125
RTAA-IOM-3
Start-Up
Procedures
General
If the pre-start checkout, as discussed
above, has been completed, the unit is
ready to start. UCM controls are shown
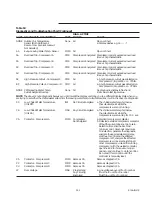
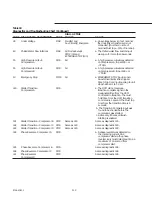
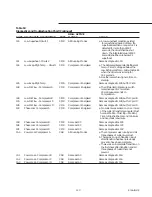
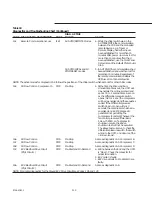
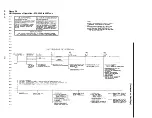
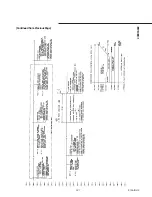
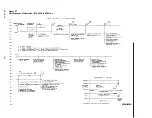
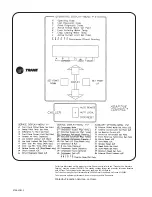
in Figure 51 and UCM Sequence of
Operation is shown in Figures 56
and 57. Complete each step, in
sequence, as follows:
[ ] Move the Chiller Switch on the UCM
to the STOP/RESET position.
[ ] As necessary, adjust the setpoint
values in the UCM menus, as
described in “Menu Function
Descriptions and Selections”.
[ ] Close the fused-disconnect switch
for the chilled water pump. Energize
the pump to start chilled water
circulation.
[ ] Check the service valves on the
discharge line, suction line, oil line
and liquid line for each circuit. These
valves must be open (backseated)
before starting the compressors.
Caution: To prevent compressor
damage, do not operate the unit
until all refrigerant and oil line
service valves are opened.
[ ] Energize the compressor sump
heaters, if not already energized.
Also close the unit-mounted
disconnect, if used.
Caution: The compressor sump
heaters must be energized for a
minimum of 24 hours prior to unit
operation, to prevent compressor
damage caused by liquid
refrigerant in the compressor at
start-up.
[ ] Verify that the evaporator heat tape
is energized.
[ ] Verify that the chilled water pump
runs for one minute after the chiller
is commanded to stop (for normal
chilled water systems). See page
[ ] Move the Chiller Switch to AUTO
LOCAL. If the chiller control 1 U 1
calls for cooling and all safety
interlocks are closed, the unit will
start. The compressor(s) will load
and unload in response to the
temperature of the leaving chilled
water temperature.
If optional low-ambient is installed,
outside air temperature must be
above the minimum starting
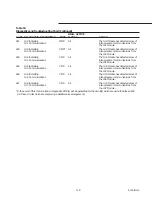
ambients, as shown in Table 1, for
continued unit operation. Use Table
1 to determine proper setpoints for
the optional low ambient lockout
setpoint, if used. Also refer to the
wiring diagrams in Figures 34
thru 36.
Once the system has been operating
for approximately 30 minutes and has
become stabilized, complete the start-
up procedures, as follows:
[ ] Check the evaporator refrigerant
pressure (23) and the condenser
refrigerant pressure (25) in Menu 2
on the UCM. The pressures are
referenced to sea level (14.6960
psia)
[ ] Check the liquid line sight glasses.
The refrigerant flow past the sight
glasses should be clear. Bubbles in
the refrigerant indicate either low
refrigerant charge or excessive
pressure drop in the liquid line. A
restriction in the line can sometimes
be identified by a noticeable
temperature differential between
the two sides of the restriction. Frost
may often form on the line at this
point. Proper refrigerant charges are
shown in Table 1.
Caution: A clear sight glass alone
does not mean that the system is
properly charged. Also check
system superheat, subcooling, and
unit operating pressures.
[ ] Measure the system superheat.
Refer to “System Superheat, below.
[ ] Measure the system subcooling.
Refer to “System Subcooling”,
below.
[ ] A shortage of refrigerant is indicated
if operating pressures are low and
subcooling is also low. If the
operating pressures, sight glass,
superheat and subcooling readings
indicate a refrigerant shortage, gas-
charge refrigerant into each circuit,
as required. With the unit running,
add refrigerant vapor by connecting
the charging line to the suction
service valve and charging through
the backseat port until operating
conditions become normal.
Caution: If both suction and
discharge pressures are low but
subcooling is normal, a problem
other than refrigerant shortage
exists. Do not add refrigerant, as
this may result in overcharging the
circuit.
Caution: Use only refrigerants
specified on the unit nameplate, to
prevent compressor damage and
insure full system capacity.
[ ] If operating conditions indicate a
refrigerant overcharge, remove
refrigerant at the liquid line service
valve. Allow refrigerant to escape
slowly, to minimize oil loss. Do not
discharge refrigerant into the
atmosphere.
WARNING: Do not allow
refrigerant to directly contact
skin or injury from frostbite may
result.
System Superheat
Normal superheat for each circuit is
approximately 8 F at full operating
load. Superheat temperature can be
expected to be moving around the 8 F
setpoint when the chiller is pulling
down, the compressor slide valve is
being modulated, or the fans are
staging on either the same or opposite
circuits. Superheat can be expected to
settle out at approximately 8 F when
the above items stabilize.
System Subcooling
Normal subcooling for each circuit
ranges from 11 F to 20 F, depending on
the unit. If subcooling for either circuit
does not approximate these figures,
check the superheat for the circuit and
adjust, if required. If superheat is
normal but subcooling is not, contact a
qualified service technician.
Summary of Contents for RTAA-130
Page 2: ... American Standard Inc 1991 ...
Page 8: ...8 RTAA IOM 3 ...
Page 24: ...24 RTAA IOM 3 ...
Page 50: ...50 RTAA IOM 3 Figure 30 Refrigerant Circuit Identification ...
Page 52: ...52 RTAA IOM 3 Figure 31 Remote Evaporator Piping Example ...
Page 59: ...59 RTAA IOM 3 Continued from Previous Page See Notes on Next Page ...
Page 63: ...63 RTAA IOM 3 Continued from Previous Page See Notes on Page 61 ...
Page 65: ...65 RTAA IOM 3 Continued from Previous Page See Notes on Page 61 ...
Page 76: ...76 RTAA IOM 3 ...
Page 92: ...92 RTAA IOM 3 Figure 51 Operator Interface Controls ...
Page 120: ...120 RTAA IOM 3 ...
Page 127: ...127 RTAA IOM 3 Continued from Previous Page 2307 1566C ...
Page 128: ...128 RTAA IOM 3 Figure 57 Unit Sequence of Operation RTAA 130 to 200 Tons 2306 9122A ...
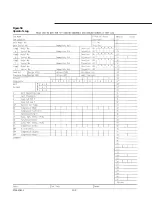
Page 132: ...132 RTAA IOM 3 Figure 58 Operator s Log ...
Page 138: ...138 RTAA IOM 3 ...

