18-CE09D1-1E-EN
55
Fault Code Recovery
Fault Code Recovery
1.
To view the last 6 faults, press the “Menu” key until the “Last 6
Faults” (
L6F
) menu appears.
2.
Enter the menu by pressing the “Option” key.
3.
The last 6 faults can be viewed.
Clearing the Last 6 Faults
1.
To clear the last 6 faults, press the “Menu” key until the “Last 6
Faults” (
L6F
) menu appears.
2.
Enter the menu by pressing the “Option” key.
3.
Hold the “Option” key for at least 5 seconds.
4.
Release and a set of 3 dashes with be seen 3 times. This confirms
the faults have been cleared.
Resetting Factory Defaults
1.
Display must be in Idle Mode.
2.
Push the “Menu” and “Option” buttons at the same time for 15
seconds then release.
3.
The 7 segment will flash “
FD
” 3 times. This confirms the unit has
been reset to the factory defaults.
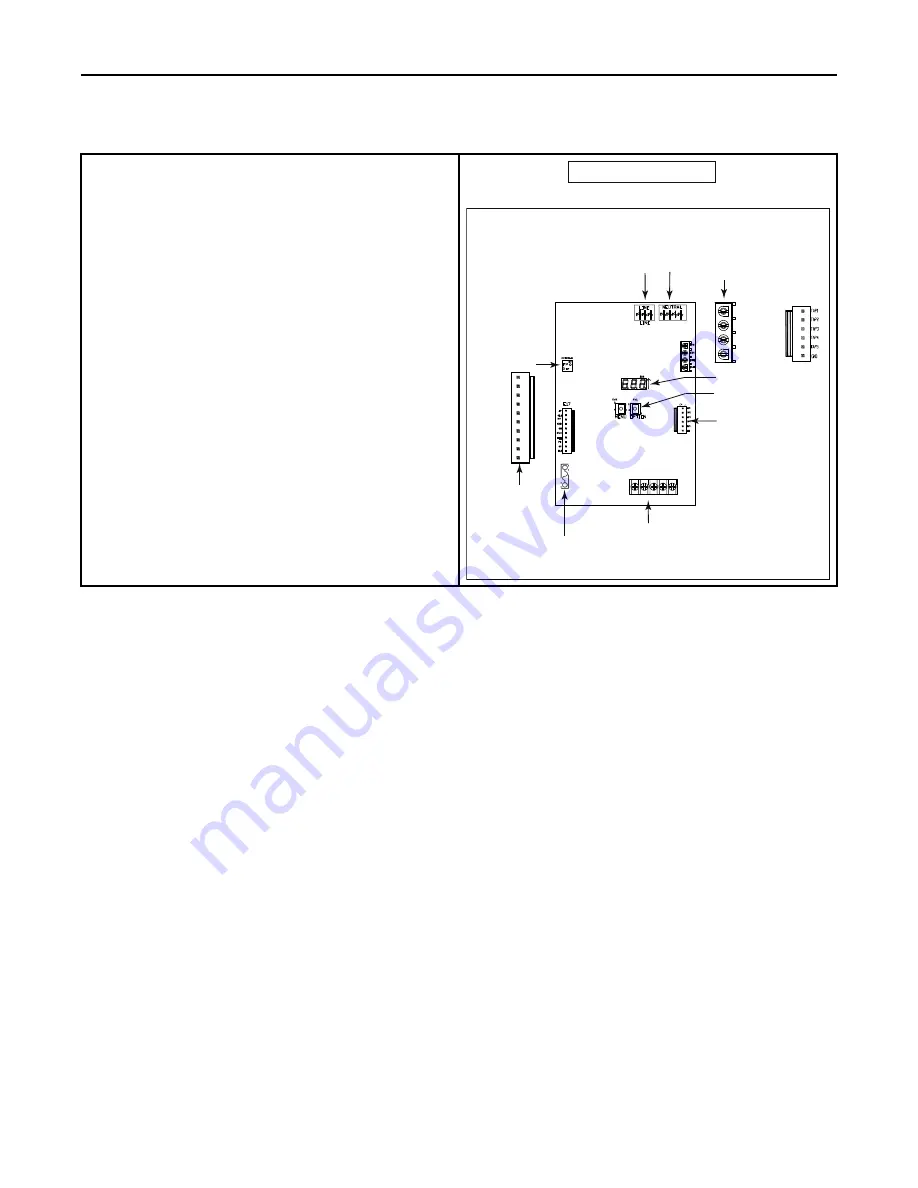
Low Voltage Terminal Strip
10 Pin
Connector
(ILI not used)
LINE
Connections
Neutral
Connections
7 Segment LED
MENU and OPTION
Select Buttons
5 Amp Fuse
Flame Current
FP
HLI
W
R
G B/C Y/Y1
Inducer/Igniter
Connector
IGN-N
IND-N
IND-H
IGN-H
MV
GND
TH
MVC
HLO
PS1
TR
ILI
6 Pin CTM Motor
Connector
Tap 1 - Low Speed
Tap 2
Tap 3
Tap 4
Tap 5 - High Speed
Common
6 Pin CTM
Connector
S8B1 IFC Component Layout
IFC
Summary of Contents for S8B1A026M2PSAB
Page 12: ...12 18 CE09D1 1E EN Outline Drawings Table 2 14 5 Width Cabinet ...
Page 13: ...18 CE09D1 1E EN 13 Table 3 17 5 Width Cabinet O Ou ut tl li in ne e D Dr ra aw wi in ng gs s ...
Page 14: ...14 18 CE09D1 1E EN Table 4 21 Width Cabinet O Ou ut tl li in ne e D Dr ra aw wi in ng gs s ...
Page 15: ...18 CE09D1 1E EN 15 Table 5 24 5 Width Cabinet O Ou ut tl li in ne e D Dr ra aw wi in ng gs s ...
Page 57: ...18 CE09D1 1E EN 57 N No ot te es s ...
Page 58: ...58 18 CE09D1 1E EN N No ot te es s ...


