Control Codes
POSjet
®
1500
Programmer's Guide
Page 36
Rev M
Nov-07
Installing the new interface card
Configure the cash drawer jumpers. See "Verify the Cash Drawer Interface” on page 36.
1.
Slide the interface card into the printer. Make sure the interface card sits flush with the retaining screw
mounting bracket. The retaining screw should also line up with the hole in the new interface card.
2.
Install the retaining screw.
3.
Reconnect the power supply to the new interface card.
4.
Reinstall the power supply into the PowerPocket
®
and reattach the retainer.
5.
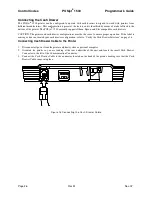
Connect the communications interface card, and the cash drawer’s cables.
6.
Turn over the printer, and reconnect the power.
Verify the Cash Drawer Interface
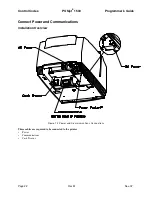
The printer is shipped from the factory with a cash drawer interface label on the bottom of the printer. You should
always verify that the cash drawer you are using matches the printer’s cash drawer interface label. If there is no
cash drawer label, you should remove the communications interface card and verify the setting.
There are many vendors of cash drawers. If you are unsure what the cash drawer interface is, contact the cash
drawer vendor for more information.
If you find that the cash drawer does not match the printer, you may change the printer's cash drawer interface
configuration as shown on page 17. If the cash drawer interface no longer matches the label on the printer, please
remove the label.
Matching the Cash Drawer Interface
Figure 21 Cash Drawer Selection
The cash drawer shunt setting is printed on the communications interface card. When you change the
communications interface card, it is very important that the cash drawer configuration of the new interface card
matches your cash drawer.
Epson
Star
Ithaca
Pin 1
Pin 1
Pin 1
Summary of Contents for POSJET 1500
Page 1: ...PROGRAMMER S GUIDE POSjet 1500 PN 20 03398 Rev M Nov 2007...
Page 14: ......

