background image

LED Master 64 manual 

17 


4.18 Upload files to USB memory stick 

You can save the channel assignment data onto your memory stick in the following way: 
1. Insert the USB memory stick into the controller. 
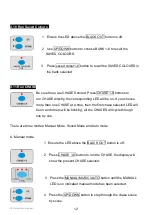
2. Hold BANK UP and MANUAL/MUSIC/AUTO buttons at the same time, the LED display 
will then show ‘UPF’ (upload files). You can then press any of the fixture buttons that you 
have assigned to your fixtures the data will then be saved. When it has completed the 
display will show ‘OK’ and the controller will exit the upload mode.


4.19 Downloading files to the controller from USB memory stick 

1. Insert the USB memory stick into the controller. 
2. Hold BANK DOWN and MANUAL/MUSIC/AUTO buttons at the same time, the LED 
display will then show ‘DLF’ (download files). If the memory stick has assignment data 
saved onto it, then the LEDs next to the fixture buttons will light up to show that data is 
available to download. Simply press any of the fixture buttons that are illuminated and that 
data will be downloaded. When the download has completed the display will show ‘OK’ and 
the controller will exit download mode. 
 

NOTE: If no data is saved onto the USB memory stick and you try to download, the display 
will show ‘LOAD’ and no transfer will take place. 
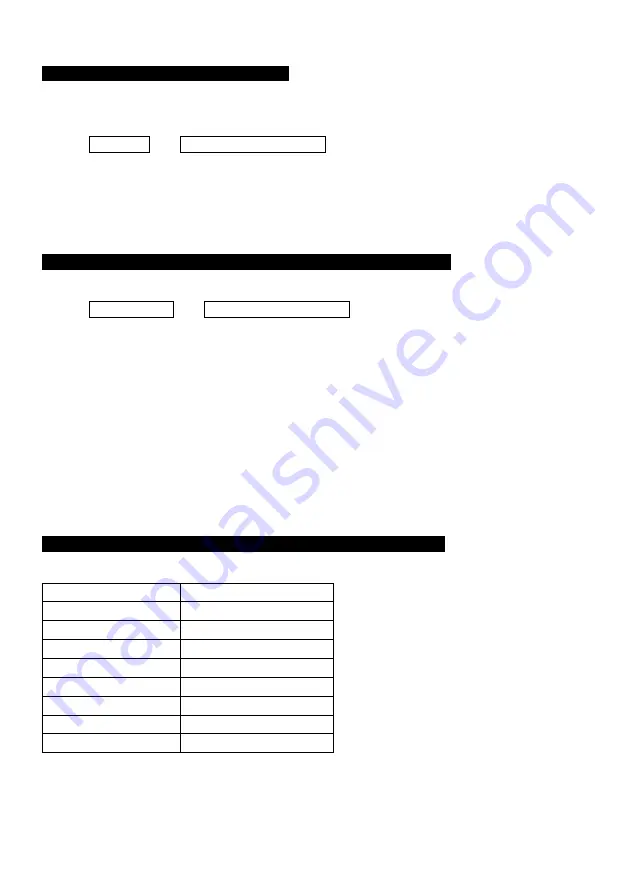
 
4.19 DMX Address                                              


Fixture Number 

DMX Start Address 

Fixture 1 

Fixture 2 

Fixture 3 

17 

Fixture 4 

25 

Fixture 5 

33 

Fixture 6 

41 

Fixture 7 

49 

Fixture 8 

57 


Summary of Contents for BOTE04

Page 1: ...LED Master 64 Order code BOTE04 Manual Please read these instructions carefully before use ...

Page 2: ...Delete Step from a Chase 10 4 7 Delete Chase 11 4 8 Factory Reset 11 4 9 Manual Mode 11 4 10 Run Saved Colours 12 4 11 Run CHASE 12 13 4 12 Run Pre Set Colours 14 4 13 Manual control 15 4 14 Strobe 15 4 15 Blackout 15 4 16 Foot Switch CA 8F 15 16 4 17 Update by USB drive 16 4 17 Upload files to USB memory stick 17 4 17 Downloading files to the controller from USB memory stick 17 In the box 1 x LED...

Page 3: ...8 LED groups 4 8 individual buttons for selecting 8 groups of lighting fixtures 5 LED display for easy navigation 6 8 colour pre set buttons 7 6 saved colours with 4 Banks 8 8 chases each with up to 32 steps 9 4 operation modes Auto Chase Sound Chase Manual Control and Fade 10 Optional Foot Controller CA 8F for ease of operation NOTE Knowledge of DMX is required to fully utilise this unit ...

Page 4: ...er serviceable parts inside NEVER try to repair the unit yourself Repairs undertaken by unqualified people could cause damage or malfunction CAUTIONS After removing the packing check that the unit is NOT damaged in any way If in doubt DO NOT use the unit and contact the dealer where the item was purchased Packaging material plastic bags polystyrene foam staples etc MUST NOT be left within children...

Page 5: ... or exit program record mode 12 INSERT TAP Insert one step set up a tap speed for chases 13 UP DOWN buttons Select bank run chase manually adjust the sound sensitivity and the speed of chase auto run 14 DEL CLEAR Delete preset color chase or step clear output 15 SAVED CHASES Use to select chase 1 8 16 FADER 1 6 Adjust the output of 1 6 channels 17 USER DEFINED FADERS For user defined operation 18 ...

Page 6: ...e LED Master 64 it will continue running the last function programme from when it was previously powered down 4 0 Enter Programming mode To enter the programming mode Hold PROGRAM REC button for 3 seconds when the LED display shows LOCK you should press the fixture selector button 6 six times to unlock That means the code is 666666 Then the PROGRAM REC button LED and the LED indicator above the sa...

Page 7: ...d blue faders will now control the fixture correctly Also you will now be able to use the pre set colours auto chase auto fade etc If the controller has been updated to V1 5 or later the user may now patch a virtual dimmer for any fixture that does not feature its own onboard dimmer channel i e 3 DMX channel RGB fixtures During the patch process please assign the MASTER DIMMER fader to display n t...

Page 8: ...es have been stored successfully 6 Repeat steps 3 5 to assign all other channels for the remaining fixtures 7 Hold PROGRAM REC button for 3 seconds to exit programming mode 4 2 Store Saved Colours 1 Enter programming mode 2 Press FIXTURE SELECTOR 1 8 button to choose units 3 Use fader FADER 1 8 to adjust the output 4 Press PROGRAM REC button once 5 Press UP DOWN button to choose bank 1 6 to store ...

Page 9: ... step if you have chosen bank before 3 Hold DEL CLEAR button press SAVED COLOURS 1 6 all LEDs will blink 3 times and then go out the corresponding LED will then go off indicating the saved colour has been deleted successfully 4 Repeat 2 3 steps to delete more colour presets 5 Hold PROGRAM REC button for 3 seconds to exit programming mode the LED above PROGRAM REC button will go off 4 4 Program Cha...

Page 10: ...r or lighting effect press DEL CLEAR button to clear any output you set inadvertently so that you can avoid storing any unwanted lighting effect 4 5 Insert Step to Chase 1 Enter programming mode 2 Press CHASE 1 8 button to choose the desired chase to insert step 3 Press INSERT TAP button the LED indicator above it will go on the present step will show on the display for example it will show ST00 w...

Page 11: ...D indicator above it will light up the present step will show on the display it will show ST00 if no step has been stored 4 Press UP DOWN button to choose the step desired to delete If you want to delete the fifth step set the present display to ST05 5 Press DEL CLEAR button all LEDs will blink 3 times and then go out indicating it has been deleted successfully The steps behind it will move forwar...

Page 12: ...OGRAM REC button for 3 seconds to exit programming mode the LED indicator above PROGRAM REC will go off 4 8 Factory Reset Be careful factory reset will delete all the settings 1 Turn off the power 2 Press the PROGRAM REC and DEL CLEAR buttons at the same time turn on the power wait until all LEDs are blinking release the buttons the LEDs will stop blinking indicating the factory reset has been suc...

Page 13: ...D will be on If you choose more than one CHASE at a time then the first chase selected LED will be on and others will be blinking all the CHASES will cycle through one by one There are three modes Manual Mode Sound Mode and Auto mode A Manual mode 1 Ensure the LED above the BLACK OUT button is off 2 Press CHASE 1 8 button to run the CHASE the display will show the present CHASE selected 3 Press th...

Page 14: ...2 Press CHASE 1 8 button the display will show the selected CHASE 3 Press the MANUAL MUSIC AUTO button to select Auto Mode the AUTO LED will now be on indicating Auto Mode has been selected 4 Use the CHASE SPEED fader to adjust the CHASE speed or use FADE SPEED to adjust the fade time Press UP DOWN button to set the run time for CHASE It s useful when running more than one CHASE at a time You can ...

Page 15: ...ess the AUTO CHASE button the LED indicator above it will be on indicating that it is in Auto Mode 3 Use the CHASE SPEED fader to adjust the CHASE speed B Sound Mode 1 Ensure the LED indicator above the BLACK OUT button is off 2 Press the SOUND CHASE button the LED indicator will be on indicating that Sound Mode has been selected 3 Press the UP DOWN button to adjust the sound sensitivity the CHASE...

Page 16: ...just the strobe speed by adjusting the Strobe Speed Fader When you release the strobe button the speed will be saved in the memory 4 15 Blackout Press the Blackout button the LED indicator above it will light up you have now entered the Blackout mode When you hold the Blackout button for about 3 seconds the LED indicator above it will blink you have now entered into the Foot Switch CA 8F Mode At t...

Page 17: ...teps will display on the screen 4 When pressing the MODE button till the indicator above it is off and then press the FUNCTION button all the fixtures channels will be on 255 for full on flood CA 8F Foot controller 4 17 Update by USB drive Power off the unit and then insert the USB drive with the specific program in it Hold PROGRAM REC button DOWN button and MANUAL MUSIC AUTO button simultaneously...

Page 18: ...the USB memory stick into the controller 2 Hold BANK DOWN and MANUAL MUSIC AUTO buttons at the same time the LED display will then show DLF download files If the memory stick has assignment data saved onto it then the LEDs next to the fixture buttons will light up to show that data is available to download Simply press any of the fixture buttons that are illuminated and that data will be downloade...

Page 19: ...ly with the following specification and bears the CE mark in accordance with the provision of the Electromagnetic Compatibility EMC Directive 89 336 EEC EN55103 1 199601 2 EN55103 2 1996 EN61000 3 2 2000 A2 2005 EN61000 3 3 1995 A1 2001 A2 2005 Harmonized Standard EN 60598 1 2004 IEC 60598 1 2003 corrigendum 2004 Part 1 General requirements and test Following the provisions of the low voltage dire...

Page 20: ...LED Master 64 manual 19 ...

Reviews: