Transition Networks
SMxxTAT4Xx Install Guide
33785 Rev. B
Page
28
of
43
Installing SFP+ Modules
You can install or remove a mini-GBIC SFP+ module from a 1G/10G SFP+ Ports SFP+ port without having to
power off the switch.
Note
: The SFP+ ports should use UL Listed Optional Transceiver product, Rated 3.3Vdc,
Laser Class 1.
See the SFP manual for specific cautions, warnings, and instructions. See the Transition Networks
our full range of Optical Devices.
During installation and maintenance, avoid direct exposure to laser beams. Specifically, do not look into laser
ports. Ensure that each SFP port at which laser beams are (or will be) present is occupied by an SFP that is locked
in position.
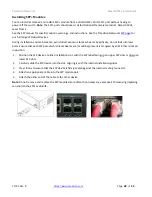
1.
Position the SFP device at either installation slot, with the SFP label facing up on upper SFP slots or down on
lower SFP slots.
2.
Carefully slide the SFP device into the slot, aligning it with the internal installation guides.
3.
Press firmly to ensure that the SFP device is firmly seated against the internal mating connector.
4.
Attach an appropriate cable into the SFP module port.
5.
Attach the other end of the cable to the other device.
Note
: Do not remove and replace the SFP modules more often than necessary; excessive SFP removing/replacing
can shorten the SFPs useful life.


