3
TRANSOLID
®
800-766-2452 www.transolid.com
electrical shock Hazard
Contacting live electrical wiring with power tools or hand
tools can cause serous injury or death. Make sure all re-
lated circuit breakers are turned OFF. Test for live circuits
or wiring inside any wall where installation of the Transol-
id
®
product requires cutting into a wall.
electrocution Hazard
Water and other liquids conduct electric current and can
create a short circuit, resulting in injury or death. Keep all
liquids away from electrical cords and power tools. DO
NOT create a short circuit between a source of electricity
and a liquid by being in contact with both simultaneously.
General Information
Required Tools
•
100% clear silicone sealant
•
Circular saw with 60 to 80 tooth carbide blade
•
Saber saw (straight up and down travel) with bi-metal
blade (14 teeth per inch)
•
Drill with 3/8” drill bit
•
Hole saw for shower faucet/shower head
•
Tape measure
•
Masking tape (2” wide works best)
•
Level
•
Compass or dividers (scribe the panel to the wall)
•
Caulking gun
•
Clean paper towels or shop towels
•
2 x 4 lumber, as required for bracing (see Bracing
Instructions)
•
Industrial grade, hot glue gun and glue sticks (optional)
•
Denatured alcohol
Kit contents
Confirm that all parts of this kit has been included before
beginning installations.
EWK363672, EWK363696
EWK423672, EWK423696
EWK424272, EWK424296
EWK483672, EWK483696
EWK484872, EWK484896
EWK603272, EWK603296
EWK603672, EWK603696
EWK604272, EWK604296
EWK604872, EWK604896
EWK606072, EWK606096
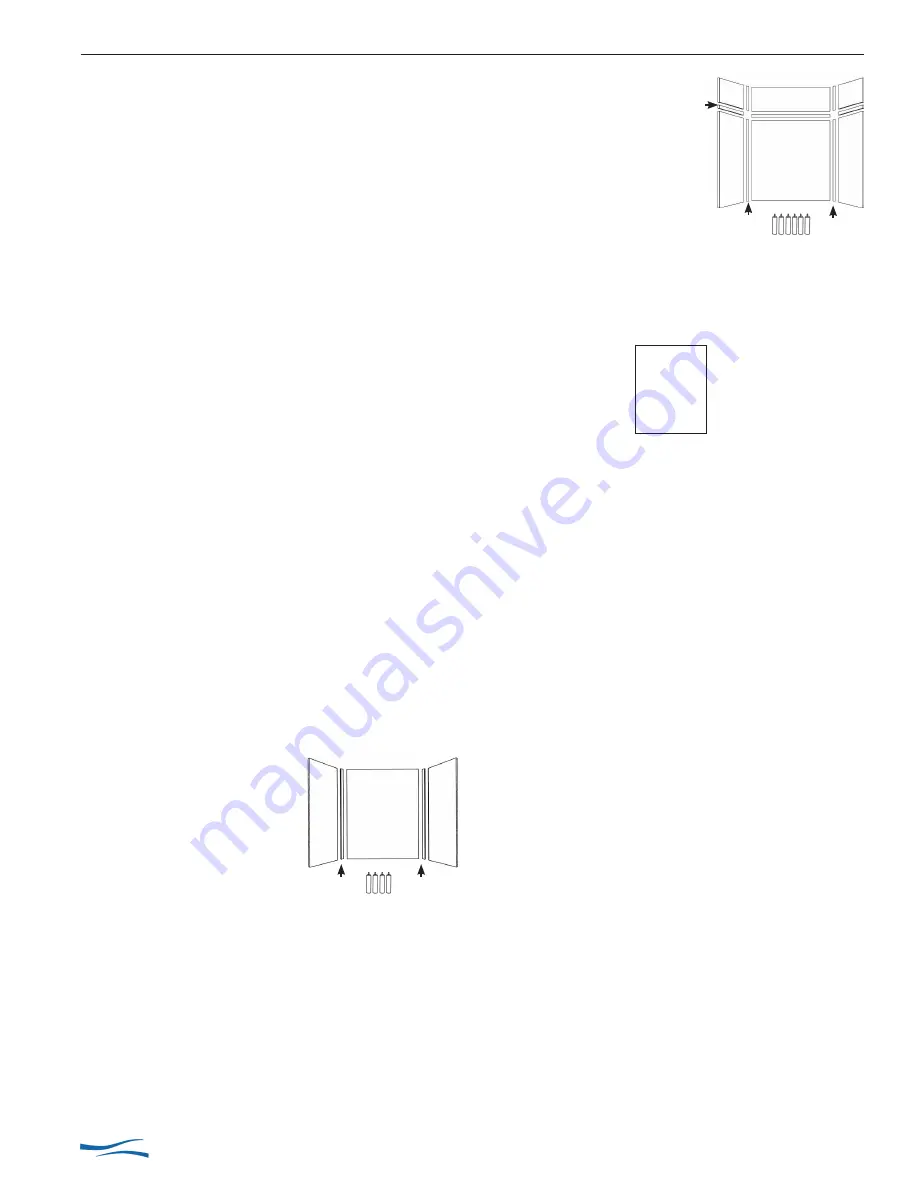
A. 3 flat wall panels
(2 end walls, back wall)
B. 2 inside corner trim pieces
C. 4 tubes silicone adhesive
safety guidelines
general information
EWKX363696, EWKX423696
EWKX424296, EWKX483696
EWKX484896, EWKX603296
EWKX603696, EWKX604296
EWKX604896, EWKX606096
A. 3 flat wall panels
(2 end walls, back wall)
B. 3 flat wall extension panels
(2 end walls, back wall)
C. 4 inside corner trim pieces
D. 2 seam joint trim pieces (cut to size on site)
E. 6 tubes silicone adhesive
EW3672, EW3696
EW4896
EW6072, EW6096
A. 1 flat wall panel
(trimmable)
For best results, use 100% clear silicone sealant for
bonding this product to a properly constructed and pre-
pared sub wall. You will need one tube of 100% clear sil-
icone sealant (tube sized to fit a standard caulking gun)
for every 1440 square inches or 10 square feet, or 4 to
10 tubes for an average shower. Follow the application
recommendation located in the Panel Installation of this
manual.
unpackaging
•
Use care when opening the box so that you do not dam-
age the panels.
•
This product is shipped to you or your retail center af-
ter careful inspection. After purchasing the kit, carefully
unbox and inspect the product for any shipping damage
that may have occurred. If damage is found, report it im-
mediately to the store of purchase. After inspection and
during installation, protect the products from construction
damage by moving them to another room or area until
ready to install.
•
Store panels in a flat area to avoid warpage until the
time of installation. Do not store the panels outside of the
original packaging in a vertical position.
•
Please use the model number located on the side of the
box or the front of this manual when contacting us with
questions concerning the installation of this unit.
•
Make sure the walls are the correct size and are in good
condition. Installation of damaged product will void the
warranty.
a
a
a
B
B
B
c
c
d
e
a
a
a
B
B
c
a


