6
www.transolid.com 800-766-2452 TRANSOLID
®
installation Procedure
Wallboard installation continued
4. Apply a coat of water or oli-based primer/sealer to all the sur-
faces of the cement board or greenboard (follow the manufac-
turer’s instructions). Allow the primer to dry thoroughly before
installing the Transolid
®
Expressions panels.
Wall Panel installation
Back Panel
If the back wall measures less than the width of the panel, cut
the panel to fit the opening.
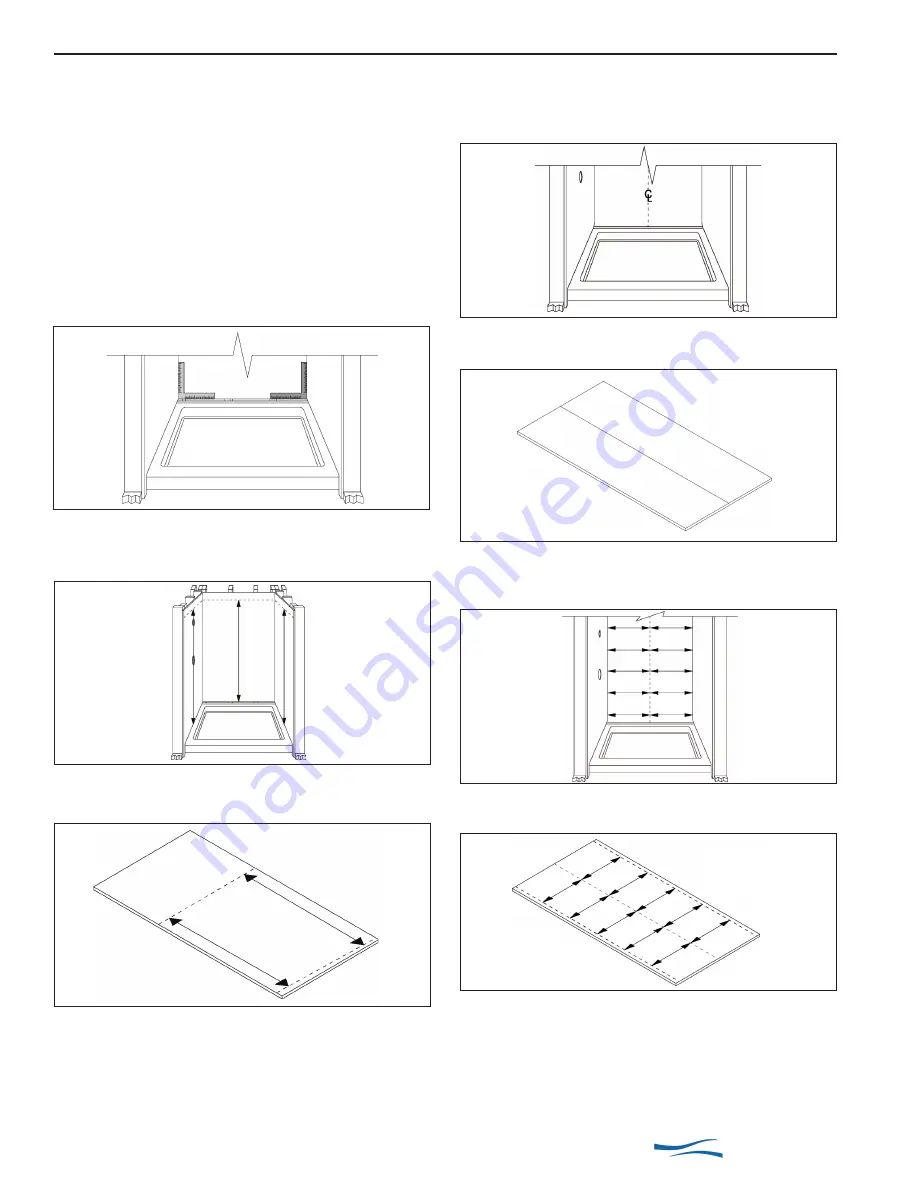
1. Using a builder’s square, make sure the shower base is per
-
pendicular to the side walls. If the walls are out of square, the
bottom of all the panels may need to be cut to follow the contour
of the shower base.
2. If the shower base is not perpendicular to the wall, use a level
and draw a line around the alcove on all three walls. Measure
the distance from the line to the top of the shower base.
3. Transfer these measurements to both side panels and the
back panel. Cut the bottom of the panels.
4. If the
back panel must be cut (side-to-side) to fit the opening,
find and mark the center of the back wall in the alcove opening.
Use a level to draw a line from the shower base to a point above
the height of the wall panel.
5. Place the panel, finished side facing up, on a flat surface.
Using a pencil, lightly mark the center of the back panel.
6. Take several measurements, bottom-to-top, from the center
line to each wall surface. These measurements will ensure the
back panel fits the exact contour of the two.
7. Transfer the measurements onto the front surface of the back
panel.
Note:
The back panel can be cut
slightly
smaller than the
opening because the side panels will cover any small gap (less
than 1/4 inch).
Cutting the side panel to precisely fir the back is not necessary
if a corner molding, supplied in wall kit, is used. This corner
molding will cover gaps up to 1/2”.


