background image

English - P5

important

ecommendation

important

Installing your wine cabinet 

When unpacking your cabinet, make sure that there are no traces of impact or
other damage and that there are no surface defects.

Carefully remove all of the protections and adhesive strips from the packaging
around your wine cabinet.

Move your cabinet to its final location.

The place you have selected for your cabinet should:

1 - Be ventilated
2 - Enable air to pass between the wall and the back of the cabinet
3 - Be well away from any heat source
4 - Not be too damp (laundry, pantry, bathroom, etc.)
5 - Have a solid and flat floor
6 - Have a standard and accessible electricity supply (standard socket to

country standards, linked to ground).

In order for you to level off your cabinet as easily as possible, it is equipped
with 4 adjustable feet.  However, we do recommend that you tighten the
back feet to the maximum and use the front feet to create a level (a spirit
level is recommended for this operation).

WAIT 48 HOURS BEFORE PLUGGING IN THE CABINET 

Should you need to move your cabinet, never tilt it more than 45° and always
sideways, on the side that the electrical cable comes out.

Installing your wine cabinet in a fitted cupboard

Ensure that the cupboard base is stable, so as not to interfere with the cabinet.
Ensure correct ventilation of the cabinet by respecting the clearance shown in
the diagram on page 6.  It is important that there is a space from the bottom to
the top behind the cabinet.  In the event that another cabinet is to be installed
on top of the one containing the Transtherm unit, make sure that this space
continues right to the top.

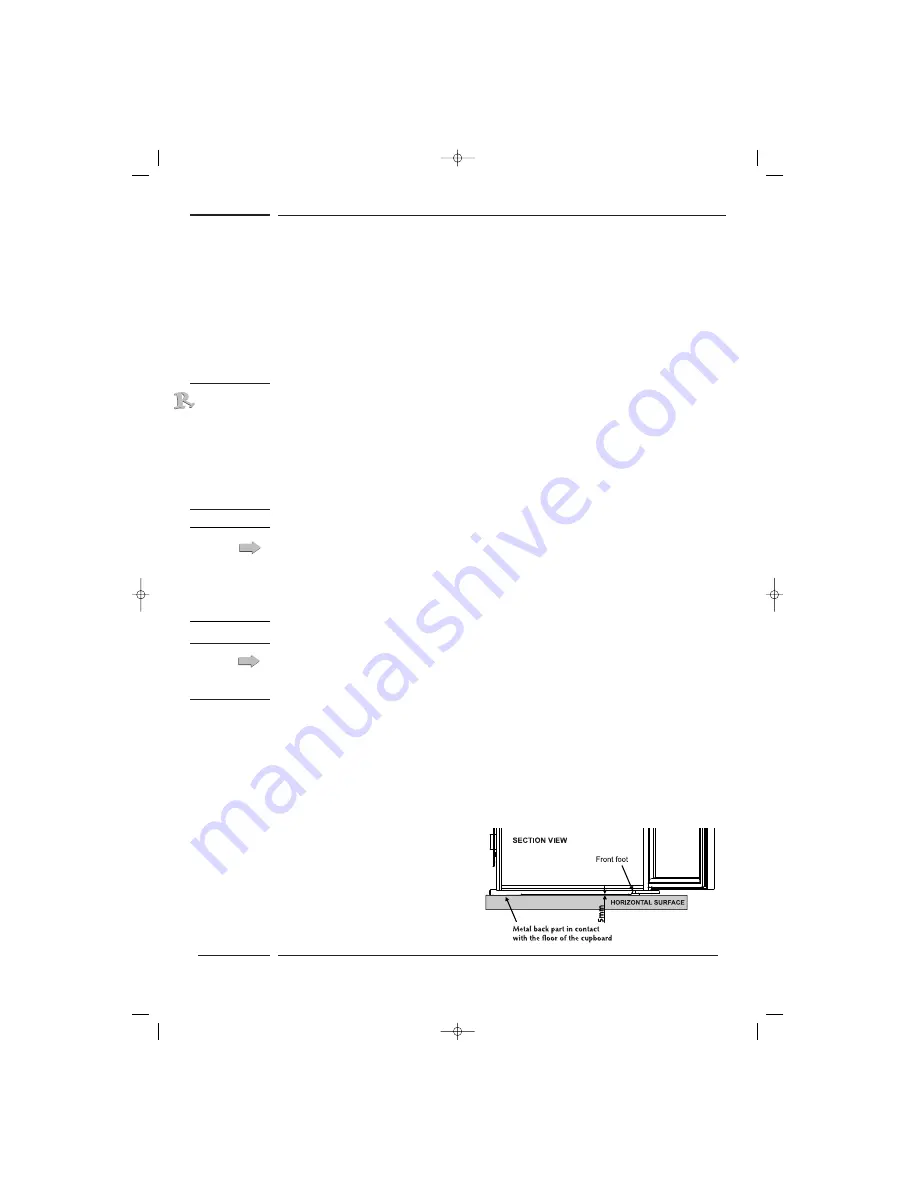
1- Adjusting the feet:

- Tighten the two back feet to the
maximum as previously indicated.
Pre-setting the front feet: 
-  Tighten or loosen the front feet to
bring the cabinet level (see diagram).

TT INTEGRABLE GAR final GB   1/10/01  13:56  Page 5

Summary of Contents for STUDIO Fitted

Page 1: ...INSTRUCTION MANUAL Wine Cabinet STUDIO Fitted TT INTEGRABLE GAR final GB 1 10 01 13 56 Page 1...

Page 2: ...net P 5 4 Installing your wine cabinet in a fitted cupboard P 5 5 Commissioning P 8 6 Settings panel P 8 7 Temperature settings P 9 8 Temperature adjustments P 9 9 Layout and loading recommendations P...

Page 3: ...Burgundy rack Door Lower hinge Bordeaux rack Wine rack Adjustable feet Condensation drain hole Hygrometer Settings and control panel 7 9 8 10 11 Description of your wine cabinet 9 2 3 4 5 6 11 10 8 7...

Page 4: ...temperature at all times no matter what the outside temperature between 0 and 35 C 3 temperature tasting cabinets CASTEL COTTAGE In addition to the central maturing area 1 temperature these cabinets a...

Page 5: ...end that you tighten the back feet to the maximum and use the front feet to create a level a spirit level is recommended for this operation WAIT 48 HOURS BEFORE PLUGGING IN THE CABINET Should you need...

Page 6: ...thus avoiding any warping of the cabinet body once loaded If this is not the case adjust the feet until contact is achieved The cabinet must be located in such a way that the front is a maximum of 8mm...

Page 7: ...the frame 1 Screw the hinge guide onto the door of the wine cabinet 2 Open the door of the wine cabinet to 90 slide the rail onto the guide and screw the rail horizontally onto the inside of the cupb...

Page 8: ...On I Once connected to the mains make sure that the Off On switch on the right of your cabinet s control panel is set at On I In the event of malfunction turn to page 13 important English P8 Settings...

Page 9: ...made The setting values are not temperatures in Celsius but are index values important English P9 Temperature adjustment If the load set up or the location of your cabinet calls for it you can adjust...

Page 10: ...aximum capacity of a rack placed at the bottom of the cabinet is 30 traditional Bordelais bottles Rack layout in sliding mode To arrange bottles on a sliding rack proceed as follows Insert the rack in...

Page 11: ...temperatures for serving and wine tasting can vary depending on the type of wine see the table below This being the case and just like the natural cellars used by wine producers it is not the exact te...

Page 12: ...rill fastened to the back of your wine cabinet 2 Completely clean the inside of your wine cabinet once a year taking care to ensure that you have unplugged and unloaded it use water and a non caustic...

Page 13: ...out If the compressor will still not turn off unplug it and contact your retailer In operation The check thermometer shows a lower temperature than required 1 Check the recommendation temperature adju...

Page 14: ...tervention on the cold circuit should be performed by a refrigeration technician who should carry out an inspection of the circuit sealing system In the same way any intervention on the electrical cir...

Page 15: ...se values may vary according to the country To see the specific characteristics of your appliance please consult the self adhesive label on the front of this manual Temperatures Height Width Depth Tol...

Page 16: ...e held responsible for any errors in this manual nor for any damage linked to or following the provision performance or use of this item This document contains original data protected by copyright All...

Page 17: ...English P17 Notes TT INTEGRABLE GAR final GB 1 10 01 13 56 Page 17...

Page 18: ...05 2001 TT INTEGRABLE GAR final GB 1 10 01 13 56 Page 18...

Reviews: