background image

6

5

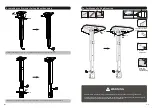
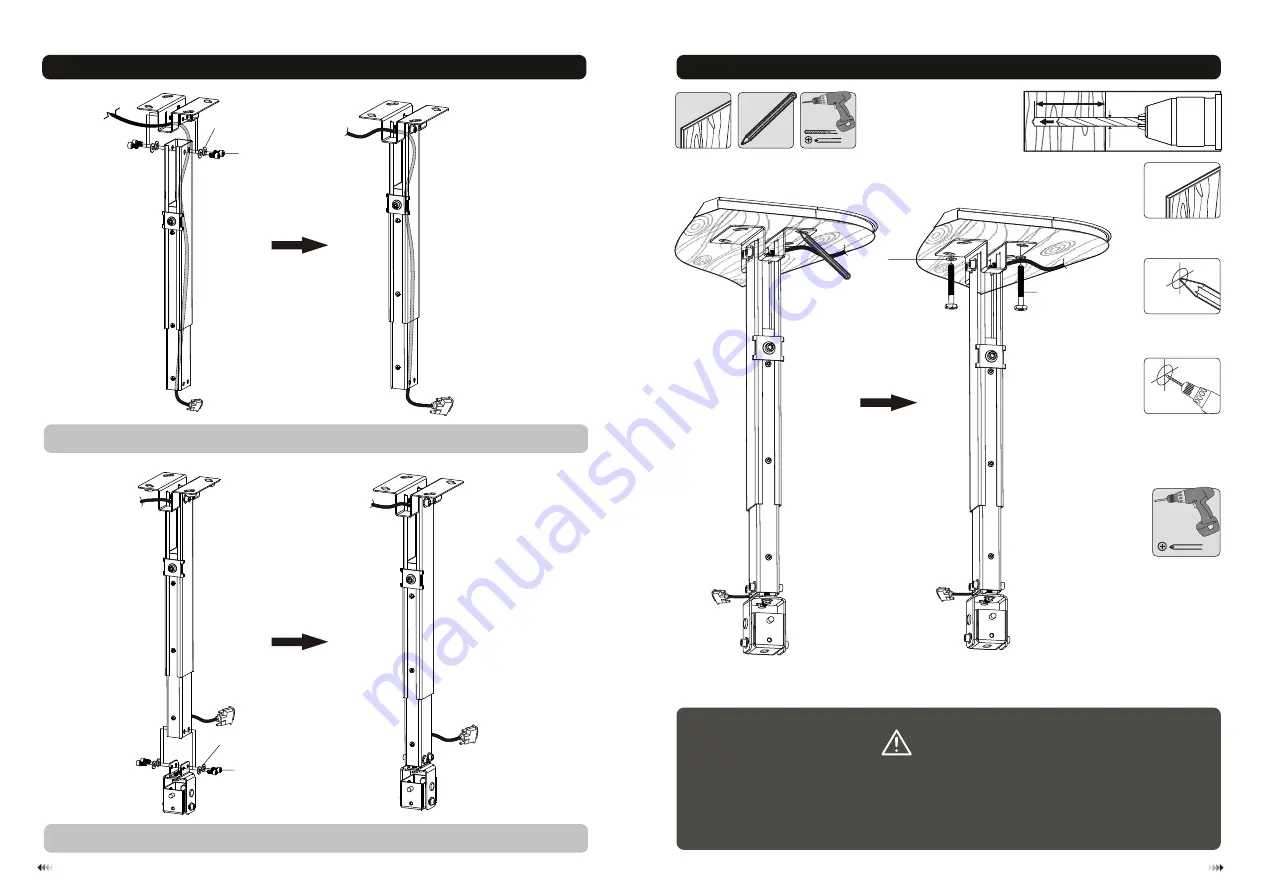
2. Installing the Projector Ceiling Mount Assembly

M-B

M-J

M-A

M-H

Attach the adjustable rod to the ceiling plate with four screws and four washers.

WARNING

• Installers are responsible to provide hardware for other types of mounting situations.

• Installers must verify that the supporting surface will safely support the combined weight of 
  the equipment and all attached hardware and components.

3a. For Wooden Ceiling Mounting 

2

1

Drill two
pilot holes

3

Screw the 
ceiling plate
onto the ceiling

ø 4.5

m

m

(

ø 3/16

"

55mm

(

2.2"

)

55mm

2.2"

(

)

55mm

(

2.2”)

Find and mark 

the exact location 

of mounting holes

W-A

W-C

Insert the pivot bracket into the end of inner rod and secure with four screws and four washers.

Summary of Contents for SPT-4365

Page 1: ...INSTALLATION MANUAL SPT 4365 ISSUED FEB 2013 Projector Ceiling Mount 20kg 44lbs RATED 20kg 44lbs RATED CAUTION DO NOT EXCEED RATED LISTED WEIGHT SERIOUS INJURY OR PROPERTY DAMAGE MAY OCCUR ...

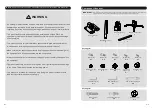
Page 2: ... instructions and warnings contained in this installation sheet If you have any questions regarding any of the instructions or warnings please contact your local distributor This mounting bracket was designed to be installed and utilised ONLY as specified in this manual Improper installation of this product may cause damage or serious injury This product should only be installed by someone with go...

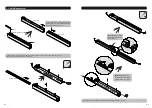
Page 3: ...amp plate screw Loosen three screws with a proper screwdriver Remove the bottom plate from the inner rod Run the cable through the correct channel bottom plate inner rod outer rod B Use an Allen Key to loosen the clamp plate screw in order to separate the inner rod from outer rod Insert the bottom plate into the inner rod and tighten the three screws ...

Page 4: ... Installers must verify that the supporting surface will safely support the combined weight of the equipment and all attached hardware and components 3a For Wooden Ceiling Mounting 2 1 Drill two pilot holes 3 Screw the ceiling plate onto the ceiling ø 4 5mm ø 3 16 55mm 2 2 55mm 2 2 55mm 2 2 Find and mark the exact location of mounting holes W A W C Insert the pivot bracket into the end of inner ro...

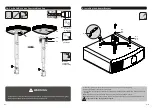
Page 5: ...es W B W C W A 4 Installing the Adapter Bracket Tighten all screws but do not over tighten Place the projector bracket as close as possible to the projector s center of gravity Position the holes of arms over mounting holes In case the mounting legs do not work for your projector model please replace them with additional legs provided Note If there are only three mounting holes using three arms of...

Page 6: ...ers Cut cable cover to fit the length of the outer rod opening nap cable cover into opening Important Make sure the projector is correctly hooked and the screws are locked safely before releasing the projector Then s ceiling 6 Adjustment You can slightly tighten the screw to secure the projector at any angles when it has become loose during use Adjust to the desired angle or tilt Maintenance Check...

Reviews: