Installation
(For Qualified Installers Only)
11
© Travis Industries
4130924
100-01330_004
Venting the Pellet Stove
•
INSTALL VENT AT CLEARANCES SPECIFIED BY THE VENT MANUFACTURER.
•
DO NOT CONNECT THE PELLET VENT TO A VENT SERVING ANY OTHER APPLIANCE OR
STOVE.
•
DO NOT INSTALL A FLUE DAMPER IN THE EXHAUST VENTING SYSTEM OF THIS UNIT.
•
USE AN APPROVED WALL THIMBLE WHEN PASSING THE VENT THROUGH WALLS AND
A CEILING SUPPORT/FIRE STOP SPACER WHEN PASSING THE VENT THROUGH
CEILINGS (MAKE SURE TO MAINTAIN CLEARANCE TO ANY COMBUSTIBLES).
•
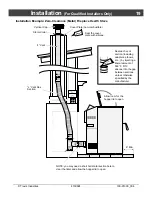
No more than one tee and 180° of elbows (one tee with two 90° elbows, one tee with one 90° and
two 45° elbows, etc.).
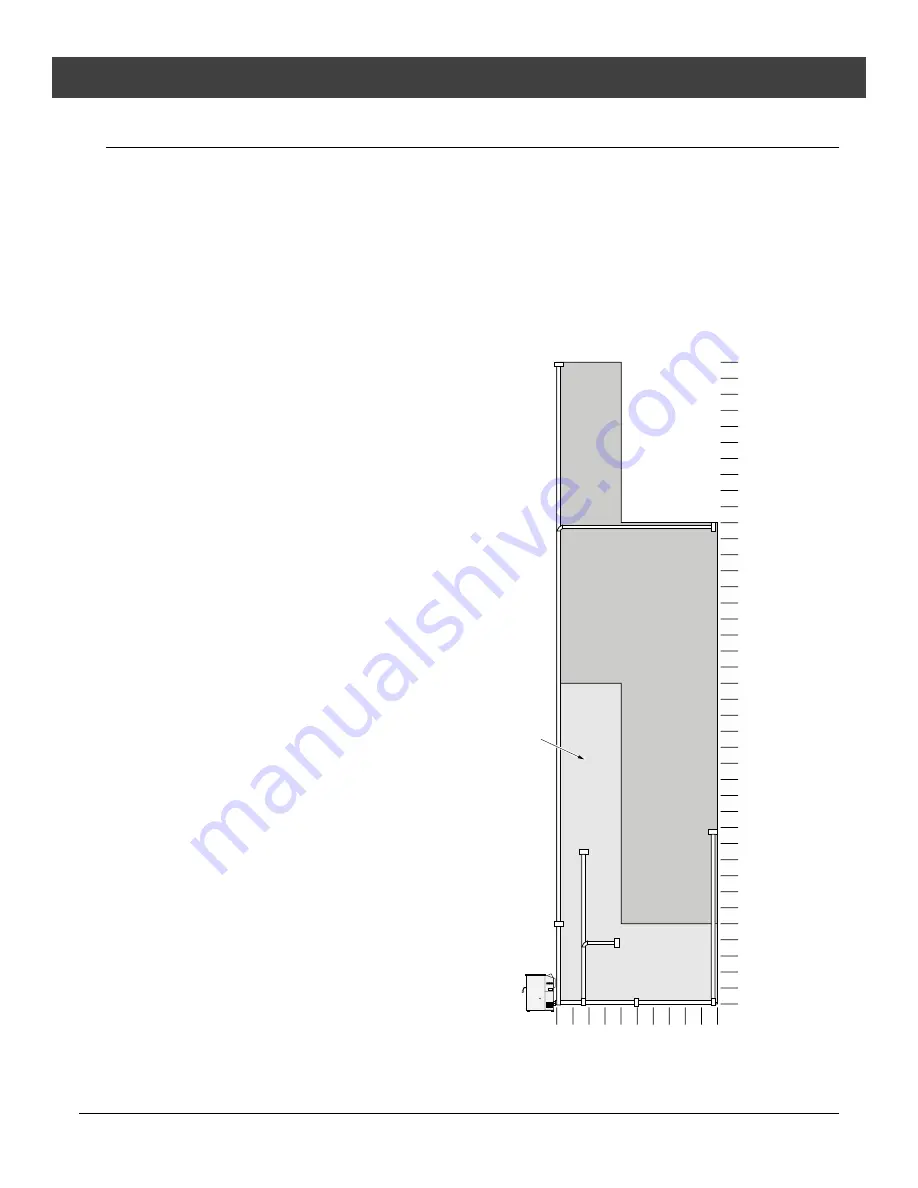
Maximum Venting Distance
•
Vent must have a support bracket
every 5' (1.524 M) of pellet vent
when on exterior of structure.
NOTE: Travis Industries
recommends a minimum vertical
vent of 5’ to ensure adequate draft
during a power outage.
0 F
e
e
t
5 F
e
e
t
10 F
e
e
t
(m
a
x
.)
0 F eet
5 F eet
10 F eet
15 F eet
20 F eet
25 F eet
30 F eet
T he vent height and run
mus t not exceed the
dis tance s hown in the
s haded region s hown to the
right.
NOT E : T o achieve optimum
performance, we
recommend keeping the
vent as s hort as pos s ible
(horizontal run es pecially).
V enting into this s haded
area may require res trictor
adjus tments . S ee the
s ection “R es trictor
Adjus tment” for details .
35 F eet
40 F eet
(max.)


