background image

22

NO. 

Parts Name 


                 7"F            7"FB

33  

SPRING  ø0.8 x ø8.5 x ø10.1 x 20L x 6T 


1

34  

C-CLIP 

ø0.6 x ø7.4 x Ø8.6 


1

35 


SCREW 

M5 

30 

     4 4

36 


NEEDLE 

BEARING 

TLA 

0810 

    1 1

37  

BEVEL GEAR    M1.25 x 55T 


1

38 


GEAR 

PLATE      1 1

39 


SCREW 

M4 

25 

     4 


40 


INTERNAL 

CIRCLIP 

S-17 

    1 


41  

BALL BEARING    6203-2RS 


1  

42 


SPINDLE 

      1 


43  

PARALLEL KEY    5 x 5 x 12 


1  

44 


EXTERNAL 

CIRCLIP 

R-40 

    1 


45  

OIL SEAL  ø20 x ø38 x 7 


2  

46 


N/A 

      N/A 

N/A

47 


N/A 

      N/A 

N/A

48 


SCREW 

M5 

35 

     3 


49 


INNER 

FLANGE 

     1 


50 


ARBOR 

NUT      1 


51 


WRENCH 

      1 


52 


FRONT 

HANDLE 

     1 


53 


SCREW 

M12 

16 

     2 


54 


HOSE 

BRACKET 

     1 


55  

HOSE RUBBER  SUPPORT 


1  

56 


SCREW 

M5 

35 

     2 


57  

WATER FEED CONNECTOR KIT   


1  

58 


WATER 

COUPLING 

     1 


59  

EARTH WIRE    20#  25cm + 4R x 10 


1  

60 


SCREW 

M4 

     1 


61 


OVERLOAD 

PROTECTION 

    1 


62 


TERMINAL 

      1 


63~66 

N/A 

      N/A 

N/A

67 


DUST 

ATTACHMENT 

     N/A 

68 


INTERNAL 

CIRCLIP 

S-40 

    N/A 

AA*----  7" Wet-Dry mode 
BB*----- 7" Dust Collect Cover Mode 

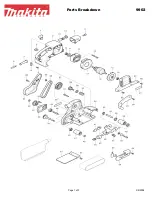
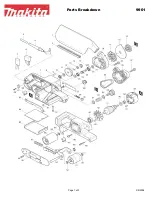
        7" Stone Grinders Parts List


Summary of Contents for EP5LFB

Page 1: ... OPERATIONS MANUAL TRAXX EP5LFB EP7FB STONE GRINDER Unit 4 1 Rocklea Drive Port Melbourne Vic 3207 Australia 1300 109 108 www traxxcp com au ...

Page 2: ... conversion to wet or dry Uses 125mm hook and loop diamond polishing pads not included Front Handle Model 5 High speed mode 5 Low speed mode 5 Wet Dry mode Power input 1200W Voltage See machine nameplate No Load min 1 3000 6500 1700 3700 1700 3700 Spindle M14 Max Disc Diameter 5 125 mm Soft Start Overload Protection With Dimensions 303mm L X 72mm W X 80mm H Net Weight 2 0 kg 4 4 Lbs 2 57 kg 5 7 Lb...

Page 3: ...ee machine nameplate No Load min 1 1700 3700 Spindle M14 Max Disc Diameter 5 125 mm Soft Start Overload Protection With Dimensions 303mm L X 72mm W X 80mm H Net Weight 2 8 kg 6 16Lbs 5 Dust Collect Cover Mode Vacuum port Spindle Lock On Off Switch Half moon door ...

Page 4: ...7 180mm Soft Start Overload Protection With Dimensions 500mm L X 210mm W X 200mm H Net Weight 5 8 kg 12 76bs 6 00 kg 13 2Lbs 7 Dust Collect Cover Mode 7 Wet Dry Mode Trigger Switch Variable Speed Wheel Quick release water hose coupling Quick change conversion to wet or dry Front Handle Spindle Lock Vacuum port Diamond plate not included Half moon door ...

Page 5: ...esistance path to carry electricity away from the user Avoid body contact with grounded surfaces such as pipes radiators ranges and refrigerators There is an increased risk of electric shock if your body is grounded Don t expose power tools to rain or wet conditions Water entering a power tool will increase the risk of electric shock Don t abuse the cord Never use the cord to carry the tools or pu...

Page 6: ...and do not allow persons unfamiliar with the power tool or these instructions to operate the power tool Tools are dangerous in the hands of untrained users M a i n t a i n t o o l s w i t h c a r e P r o p e r l y maintained tools are less likely to bind and are easier to control Check for misalignment or binding of moving parts breakage of parts and any other condition that may affect the tools o...

Page 7: ...or which it was designed If you have any questions relative to its application DO NOT use the tool until you have written the manufacturer and have been advised 9 Use the machine with both hands at all times Loss of control can cause personal injury 10 Keep power supply cord clear from the working range of the machine Always lead the cable away behind you 11 Immediately switch off the machine if u...

Page 8: ...d and satisfactorily operated the machine CARTON CONTENTS 1 Stone Grinder machine 2 Instruction manual 3 Side handle 4 125mm backing plate DO NOT OPERATE THIS TOOL UNTIL YOU READ AND UNDERSTAND THE ENTIRE INSTRUCTION MANUAL 5 7 To install a the Backing Plate and Diamond Polishing Pad Diamond Plate 1 Unplug the machine 2 Thread on the Backing Plate onto the arbor Press the Spindle Lock and rotate t...

Page 9: ...ll attach the quick release Water Coupling to your water supply hose Connect the coupling to the Water Nipple Regulate the water flow to the desired amount by adjusting the tap at the water supply The Water Feed Collar can be turned to the desired position by first loosening the 3 set screws using the supplied L hex key Hoop and loop plate for Diamond polishing Diamond plate with flanges Diamond p...

Page 10: ...p torque when the machine first starts WARNING This is a lock on switch so whenever it is on it will remain locked on until you actively turn it off Before plugging the tool in always ensure that the switch is in the Off position Whenever there is a power outage always remember to switch the tool off Otherwise when the power comes back on the machine would start unexpectedly causing a hazardous si...

Page 11: ...pe switch so for continued operation the locking pin may be pressed To shut off first re squeeze and then release the trigger switch to release the lock To switch off Release the trigger switch If the switch has been locked on first re squeeze and then release the trigger switch to release the lock After the machine has been switched off the grinding wheel will still rotate for a time Take care th...

Page 12: ...oft damp cloth NEVER use solvents to clean plastic parts They could possibly dissolve or otherwise damage the material Wear safety glasses while using compressed air THE CARBON BRUSHES The carbon brushes are a normal wearing part and must be replaced when they reach their wear limit NOTE Checking and replacing the carbon brushes should be entrusted to a qualified service center The carbon brushes ...

Page 13: ... it out of the holder Unscrew the two screws which hold the brush leads and remove the Carbon Brushes NOTE When putting the Carbon Brushes back into the Carbon Brush Holders it is essential that both flanges go back inside the holder NOTE To reinstall the same brushes first make sure the brushes go back in the way they came out Otherwise a break in period w i l l o c c u r t h a t w i l l r e d u ...

Page 14: ...14 5 Stone Grinders Wiring ...

Page 15: ...15 CARBON BRUSH MOTOR CARBON BRUSH BLACK SPEED CONTROL UNIT SWITCH WHITE BLACK RED BLACK 1 1 2 2 AC GEAR CASE EARTH 7 Stone Grinders Wiring ...

Page 16: ...ONAL B4 B5 B3 B1 B2 A1 A2 A3 OPTIONAL A B G K C D J F L H E I 36B 31A 31B HIGH SPEED LOW SPEED 23A 23B HIGH SPEED LOW SPEED 60 57 01B 26 45 45 48 49 50 51 66 65 67 69 68 70 A B C D E F A G H I J L A G H I J K L 5 W 5 High speed mode A B C D E F 5 L 5 Low speed mode 5 LF 5 Dust Collect Cover Mode 5 LFB 5 Dust Collect Cover Mode Half moon 5 Stone Grinders Exploded View ...

Page 17: ...1 1 1 1 13 SWITCH LEVER 1 1 1 1 14 MOTOR HOUSING 1 1 1 1 15 STATOR 1 1 1 1 15 STATOR 1 1 1 1 16 STATOR SCREW M4 x 60 2 2 2 2 17 SCREW M4 x 10 1 1 1 1 18 FLAT WASHER ø4 x ø10 x 1 1 1 1 1 19 PLASTIC WASHER ø4 x ø11 x 1 1 1 1 1 20 PICKUP MAGNET ø8 x ø15 x 5 1 1 1 1 21 SPACER ø8 x ø12 x 10 5 1 1 1 1 22 BEARING 608 2RU 1 1 1 1 23A ARMATURE HIGH SPEED M1 2 x 8T H 1 NA NA NA 23B ARMATURE LOW SPEED M1 15 ...

Page 18: ... 1 38 SCREW M4 x 16 4 4 4 4 39 SIDE HANDLE 1 1 NA NA 40 THUMB WHEEL 1 1 1 1 41 GASKET 1 1 1 1 42 SPRING WASHER M4 4 4 4 4 43 EXTERNAL CIRCLIP S 12 1 1 1 1 44 FAN SHROUD 1 1 1 1 45 OIL SEAL ø20 x ø30 x 5 NA NA 2 2 46 N A NA NA NA NA 47 N A NA NA NA NA 48 HOSE BRACKET NA NA 1 1 49 SCREW M5 x 6 NA NA 1 1 50 WATER FEED CONNECTOR KIT NA NA 1 1 51 WATER COUPLING NA NA 1 1 52 N A NA NA NA NA 53 GEARBOX C...

Page 19: ...2 x 10T x 20L NA NA NA 4 68 SANDING PLATE COVER NA NA NA 1 69 HALF MOON DOOR NA NA NA 1 70 INTERNAL CIRCLIP S 45 NA NA NA 1 Optional for model 5 W 5 L A1 SCREW M5 x 12 2 2 NA NA A2 GUARD 1 1 NA NA A3 GUARD BRACKET 1 1 NA NA A4 4 SANDING PAD 4 1 1 NA NA Optional for model 5 LF 5 LFB B1 INNER FLANGE NA NA 1 1 B2 ARBOR NUT NA NA 1 1 B3 WRENCH NA NA 1 1 B4 ALUMINUM CUP WHEEL NA NA 1 1 B5 FACE SPANNER ...

Page 20: ...8 22 11 10 16 17 14 15 17 16 15 14 12 23 24 25 26 27 28 29 31 37 36 38 34 33 32 35 44 43 42 41 40 53 53 52 13 13 02 01 03 04 05 06 54 07 08 09 55 56 06 39 60 59 56 61 62 57 58 OPTIONAL A1 A2 A4 A3 45 45 70 48 49 50 68 73 72 74 51 71 67 FOR EP7FB ...

Page 21: ...R 2 2 14 SCREW M4 x 10 4 4 15 BRUSH SPRING 2 2 16 CARBON BRUSH 7 x 17 2 2 17 CARBON BRUSH HOLDER 7 x 17 2 2 18 SCREW M4 x 10 1 1 19 FLAT WASHER ø4 x ø10 x 1 1 1 20 PLASTIC WASHER ø4 x ø11 x 1 1 1 21 PICKUP MAGNET ø8 x ø15 x 5 1 1 22 SPACER ø8 x ø12 x 10 5 1 1 23 MOTOR HOUSING 1 1 24 STATOR 1 1 25 SCREW M5 x 60 2 2 26 FAN SHROUD 1 1 27 BALL BEARING 6200 zz 1 1 28 ARMATURE M1 25 x 6T 1 1 29 BALL BEA...

Page 22: ...R 40 1 1 45 OIL SEAL ø20 x ø38 x 7 2 2 46 N A N A N A 47 N A N A N A 48 SCREW M5 x 35 3 3 49 INNER FLANGE 1 1 50 ARBOR NUT 1 1 51 WRENCH 1 1 52 FRONT HANDLE 1 1 53 SCREW M12 x 16 2 2 54 HOSE BRACKET 1 1 55 HOSE RUBBER SUPPORT 1 1 56 SCREW M5 x 35 2 2 57 WATER FEED CONNECTOR KIT 1 1 58 WATER COUPLING 1 1 59 EARTH WIRE 20 25cm 4R x 10 1 1 60 SCREW M4 x 8 1 1 61 OVERLOAD PROTECTION 1 1 62 TERMINAL 1 ...

Page 23: ...ø7 2 x 10T x 20L N A 4 72 SANDING PLATE COVER N A 1 73 HALF MOON DOOR N A 1 74 INTERNAL CIRCLIP S 65 N A 1 BELOW ARE OPTIONAL A1 DIAMOND PLATE B 1 1 A2 DIAMOND PLATE B 1 1 A3 LOCK NUT WRENCH 1 1 A4 ALUMINUM PAD 1 1 AA 7 Wet Dry mode BB 7 Dust Collect Cover Mode 7 Stone Grinders Parts List ...

Page 24: ... Unit 4 1 Rocklea Drive Port Melbourne Vic 3207 1300 109 108 www traxxcp com au ...

Reviews: