background image

1/16 SUMMIT • 15

ADJUSTING THE ELECTRONIC SPEED CONTROL

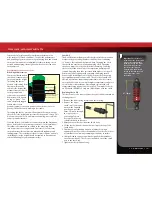
Patent Pending Training 
Mode (Profile #3) reduces 
forward and reverse throttle 
by 50%. Training Mode 
is provided to reduce the 
power output allowing 
beginning drivers to better 
control the model. As driving 
skills improve, simply change 
to Sport or Race Mode for 
full-power operation.

Tip For Fast Mode Changes

The ESC is set to Profile 1 
(Sport Mode) as the default.  
To quickly change to Profile 3 
(Training Mode), with the 
transmitter on and the ESC 
turned off, press and hold 
the SET button until the light 
blinks red three times and then 
release. For full power, turn off 
the ESC then quickly change 
back to Profile 1 (Sport
 Mode)  by pressing and 
holding the SET button until 
the light blinks red one time 
and then releasing.

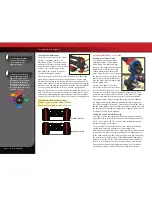
7. To turn the XL-2.5 off, press and hold the EZ-Set button for 1½ seconds or 

until the red LED turns off. 

8. The XL-2.5 is equipped with thermal shutdown protection to guard against 

overheating caused by excessive current flow. If the operating temperature 
exceeds safe limits, the XL-2.5 will automatically shut down. The LED on the 
face of the XL-2.5 will rapidly blink red, even if the throttle trigger is moved 
back and forth. Once the temperature returns to a safe level, the XL-2.5 will 
once again function normally. 

XL-2.5 Profile Selection

The speed control is factory set to Sport Mode (100% forward, brakes, and 
reverse). To disable reverse (Race Mode) or to allow 50% power (patent 
pending Training Mode), follow these steps. The speed control should 
be connected to the receiver and the transmitter adjusted as described 
previously. The profiles are selected by entering the programming mode.

Profile Description

Profile #1 (Sport Mode): 100% Forward, 100% Brakes, 100% Reverse
Profile #2 (Race Mode): 100% Forward, 100% Brakes, No Reverse
Profile #3 (Training Mode): 50% Forward, 100% Brakes, 50% Reverse

Selecting Sport Mode 

(Profile #1: 100% Forward, 100% Brakes, 100% Reverse)

1. Connect a fully charged battery 

pack to the XL-2.5 and turn on your 
transmitter.

2. With the XL-2.5 off, press and hold  

the EZ-Set button until the LED turns 
solid green, then solid red and then 
begins blinking red (indicating the 
Profile numbers).

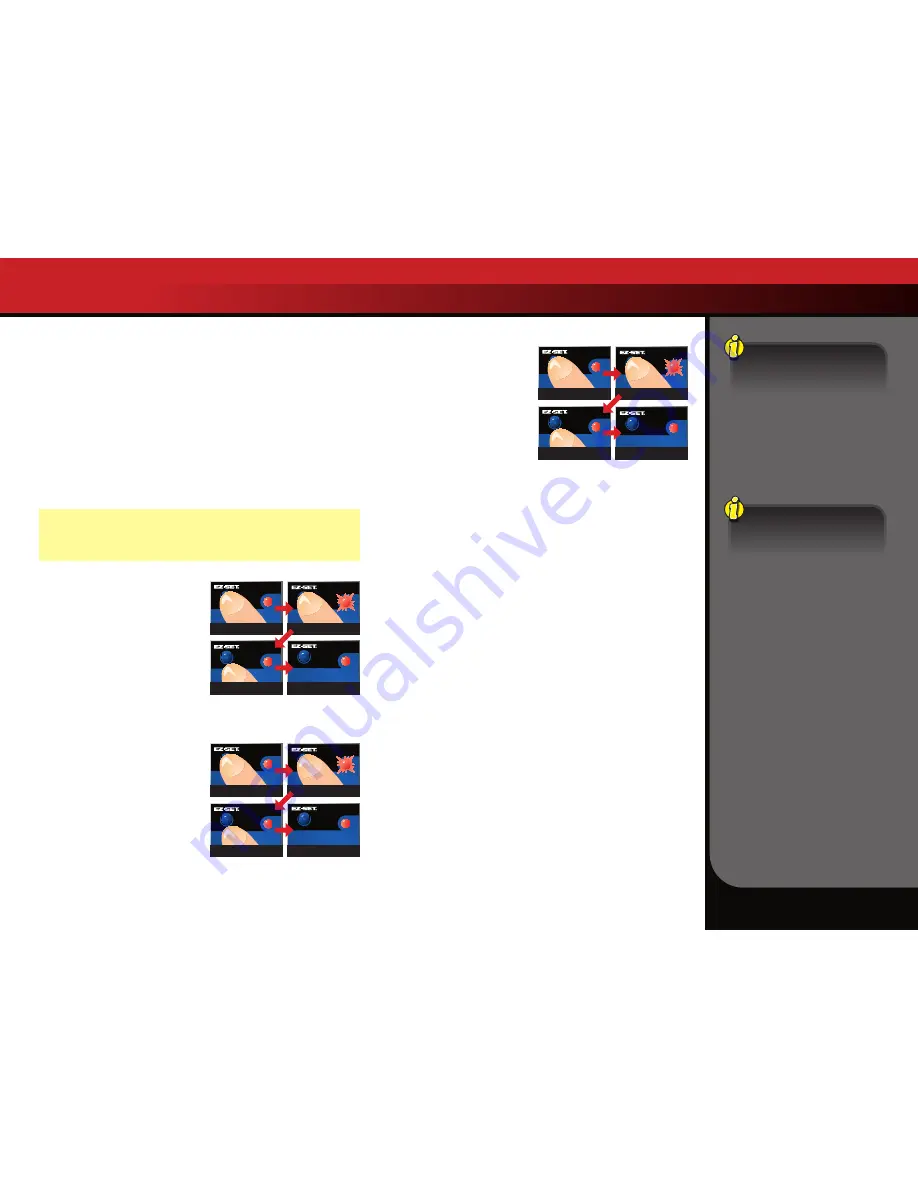
3. When the LED blinks RED ONCE, 

release the EZ-Set button.

4.  The LED will blink and then turn solid green (Low-Voltage Detection ACTIVE) or 

red (Low-Voltage Detection DISABLED). The model is ready to drive.

Selecting Race Mode

 (Profile #2: 100% Forward, 100% Brakes, No Reverse)

1. Connect a fully charged battery 

pack to the XL-2.5 and turn on your 
transmitter.

2. With the XL-2.5 off, press and hold  

the EZ-Set button until the LED turns 
solid green, then solid red  
and then begins blinking red 
(indicating the Profile numbers).

3. When the LED blinks RED TWICE, 

release the EZ-Set button.

4.  The LED will blink and then turn solid green (Low-Voltage Detection ACTIVE) or 

red (Low-Voltage Detection DISABLED). The model is ready to drive.

Selecting Training Mode*

 (Profile #3: 50% Forward, 100% Brakes, 50% Reverse)

1. Connect a fully charged battery 

pack to the XL-2.5 and turn on your 
transmitter.

2. With the XL-2.5 off, press and hold 

the EZ-Set button until the LED turns 
solid green, then solid red  
and then begins blinking red 
(indicating the Profile numbers).

3. When the LED blinks RED THREE  

TIMES, release the EZ-Set button.

4.  The LED will blink and then turn solid green (Low-Voltage Detection ACTIVE) or 

red (Low-Voltage Detection DISABLED). The model is ready to drive.

Note:

 If you missed the mode you wanted, keep the EZ-Set button pressed 

down and the blink cycle will repeat until the button is released and a Mode  
is selected.

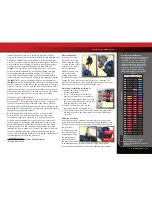
LED Codes and Protection Modes

• Solid Green: 

XL-2.5 power-on light. Low-Voltage Detection is ACTIVATED 

(LiPo setting).

• Solid Red:

 XL-2.5 power-on light. Low-Voltage Detection is DISABLED 

(NiCad/NiMH setting). Never use LiPo batteries while Low-Voltage 
Detection is disabled.

• Fast Blinking Red:

 The XL-2.5 is equipped with thermal shutdown 

protection to guard against overheating caused by excessive current flow. If 
the operating temperature exceeds safe limits, the XL-2.5 will automatically 
shut down. Let the XL-2.5 cool. Make sure your model is properly geared for 
the conditions.

• Slow Blinking Red (with Low-Voltage Detection on): 

The XL-2.5 has 

entered Low-Voltage Protection. When the battery voltage begins to reach 
the minimum recommended discharge voltage threshold for LiPo battery 
packs, the XL-2.5 will limit the power output to 50% throttle. When the 
battery voltage attempts to fall below the minimum threshold, the XL-2.5 
will shut down all motor output. The LED on the speed control will slowly 
blink red, indicating a low-voltage shutdown. The XL-2.5 will stay in this 
mode until a fully charged battery is connected.

• Fast Blinking Green: 

The XL-2.5’s LED will blink fast green if Throttle Neutral 

Protection is activated, or if the speed control is not receiving a signal. 
Make certain the speed control is properly plugged into the receiver and 
the transmitter is switched on. If this does not restore normal operation, 
then the XL-2.5 is indicating the transmitter’s Throttle Trim is incorrectly set. 
Reset the throttle trim to the “0” position.

• Flashing Red and Green: 

The XL-2.5 has entered Over Voltage Protection. If a 

battery with too high voltage (3S LiPo) is used, the XL-2.5 will go into a failsafe 
mode. The XL-2.5 is only compatible with 2S LiPo.

*Patent-pending

Green to Red to Off

Release

One blink Red

Solid

Green to Red to Off

Release

Two blinks Red

Solid

Green to Red to Off

Release

Three blinks Red

Solid

Summary of Contents for 1/16 Summit 7205

Page 1: ...owners manual MODEL 7205 ...

Page 2: ...h your model but also with the company that stands behind it We know you re excited about getting your new model on the road or trail but it s very important that you take some time to read through the Owner s Manual This manual contains all the necessary setup and operating procedures that allow you to unlock the performance and potential that Traxxas engineers designed into your model Even if yo...

Page 3: ... followed and the precautions are adhered to IMPORTANT POINTS TO REMEMBER Your model is not intended for use on public roads or congested areas where its operation can conflict with or disrupt pedestrian or vehicular traffic Never under any circumstances operate the model in crowds of people Your model is very fast and could cause injury if allowed to collide with anyone Because your model is cont...

Page 4: ...or the battery backs properly In addition to your battery and charger instructions here are some more tips to keep in mind Use the supplied charger to charge the included battery See Charging the Battery Pack on page 10 Never leave batteries to charge unattended Remove the battery from the model while charging Always unplug the battery from the electronic speed control when the model is not in use...

Page 5: ...wn with your finger as you go This will prevent air bubbles Placing both ends of the decal down and then trying to smooth it out will result in air pockets Look at the photos on the box for typical decal placement TIRE GLUING The factory tires on your model are already glued to the rims The tires must be glued to the rims to prevent the rims from spinning inside the tires The instructions here are...

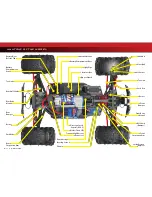
Page 6: ... Rear Body Mount Hex Hub Rear Suspension Arm Axle Carrier Pivot Ball Toe Link Light Pipe Receiver Box Steering Servo Front Body Mount Battery Compartment Door Battery Compartment Vent Electronic Speed Control XL 2 5 Motor Titan 12T Battery Door Release Tab Slipper Clutch Rocker Rocker Push Rod Push Rod Spring Preload Adjuster Traxxas High Current Connector ...

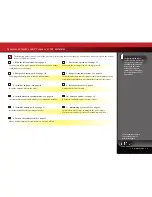
Page 7: ...the radio system See page 13 Fully charge the battery pack included with your model Follow this procedure to make sure your radio system works properly at a distance and that there is no interference from outside sources 3 Install the antenna See page 10 9 Detail your model See page 5 Install the antenna mast in the model Apply other decals if desired 4 Install batteries in the transmitter See pag...

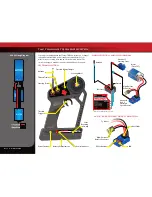
Page 8: ...XL 2 5 Wiring Diagram MOTOR MOTOR TQ TRANSMITTER Antenna Steering Trim Throttle Trim Throttle Trigger Throttle Neutral Adjust Steering Wheel Power Switch Battery Compartment Servo Reversing Switch Power Indicator RADIO SYSTEM WIRING DIAGRAM Antenna Receiver Crystal Motor Titan 12T High Current Connector Channel 2 XL 2 5 Electronic Speed Control Channel 1 Steering Servo Extra CH1 CH3 and BATT CH4 a...

Page 9: ...ergy density and current handling in a compact size These are high performance batteries that require special care and handling For advanced users only mAh Abbreviation for milliamp hour A measure of the capacity of the battery pack The higher the number the longer the battery will last between recharges Neutral position The standing position that the servos seek when the transmitter controls are ...

Page 10: ...hly charged batteries The power indicator light does not indicate the charge level of the battery pack installed in the model SETTING UP THE ANTENNA 1 Locate the black antenna wire that exits the receiver box 2 Pull the wire straight with your fingers and then insert the end of the wire into one end of the antenna tube the antenna tube can be found in the documents bag Push the wire all the way th...

Page 11: ...ur model is equipped with the Traxxas High Current Connector Standard connectors restrict current flow and are not capable of delivering the power needed to maximize the output of your model The Traxxas connector s gold plated terminals with a large contact surfaces ensure positive current flow with the least amount of resistance Secure long lasting and easy to grip the Traxxas connector is engine...

Page 12: ...r adjusts the neutral center point of the steering servo when the servo is at rest Adjust this control to make the model drive straight with no steering input at the wheel Servo Reversing Switches The servo reversing switches are located on the front of the transmitter next to the on off switch Moving a switch reverses the direction of the corresponding servo Each switch corresponds to a channel a...

Page 13: ...more on ESC setup and operation To turn the ESC off press the set button until the green LED turns off Always disconnect your battery when the model is not in use Note If the LED shines green Low Voltage Detection is activated This will cause erratic performance from the included NiMH battery pack The default factory setting is for Low Voltage Detection to be disabled LED shines red Make sure to t...

Page 14: ...teps before you begin If you get lost during programming or receive unexpected results simply unplug the battery wait a few seconds plug the battery pack in and start over 1 Disconnect one of the motor wires between the XL 2 5 and the motor This is a precaution to prevent runaway when the speed control is turned on before it is programmed 2 Connect a fully charged battery pack to the XL 2 5 3 Turn...

Page 15: ...ing red indicating the Profile numbers 3 When the LED blinks RED TWICE release the EZ Set button 4 The LED will blink and then turn solid green Low Voltage Detection ACTIVE or red Low Voltage Detection DISABLED The model is ready to drive Selecting Training Mode Profile 3 50 Forward 100 Brakes 50 Reverse 1 Connect a fully charged battery pack to the XL 2 5 and turn on your transmitter 2 With the X...

Page 16: ...e types of batteries that are available and the methods with which they can be charged it s impossible to give exact run times for the model Another major factor which affects run time is how the model is driven Run times may decrease when the model is driven repetitively from a stop to top speed and with repetitive hard acceleration Tips for Increasing Run Time Use batteries with the highest mAh ...

Page 17: ...bmerge the motor under water Do not gear the motor by temperature when running in wet conditions The motor will be cooled by water contact and will not give an accurate indication of appropriate gearing After Running Your Vehicle in Wet Conditions 1 Drain the tires by spinning the tires at full throttle to sling the water out An easy way to do this is to remove the body and set the model upside do...

Page 18: ...an now access the receiver Unplug the servo cables from the receiver and remove the receiver Receiver Installation 1 Route the antenna wire out of the receiver box cover A Place the cover on the chassis 2 Route the servo and speed control leads into the receiver box cover Use the molded in wire guides to align the servo and speed control leads and antenna wire B 3 Apply a small bead of silicone gr...

Page 19: ...nsion damping effect Changing the oil to a higher viscosity oil will increase damping Lowering the viscosity of the oil will cause the suspension damping to be reduced Damping should be increased with higher viscosity oil if the model is bottoming easily over jumps Damping should be decreased with thinner viscosity oil if the model is hopping over small bumps and feels unstable The viscosity of sh...

Page 20: ...urpose of the slipper clutch is to prevent over stressing of the drivetrain and transmission gears It may also be used to regulate the amount of power sent to the rear wheels to prevent tire spin When it slips the slipper clutch makes a high pitch whining noise To adjust the slipper clutch first remove the receiver box cover Next remove the single large hex screw from the motor plate using the sup...

Page 21: ...r Installation To access the motor remove the gear cover by removing the single screw on the top of the gear cover The motor uses an aluminum mount for quick easy motor access and gearing adjustment To remove the motor first open the right battery door and slide out the ESC Next remove the single large hex screw using the supplied 2 5mm wrench Then rotate the motor and mount to the side of the mod...

Page 22: ...erent specifications Experimentation with different types of tires is recommended to see which ones work the best on the terrain where the model is run Soft compound tires with many short spikes generally work better on hard dry surfaces In loose dirt a tire with large spikes should perform better Foam tires can be fitted for use on pavement or indoor carpet tracks See your parts list for accessor...

Page 23: ...Keep the chassis clean of accumulated dirt and grime Periodically inspect the chassis for damage Shocks Keep the oil level in the shocks full Use only 100 pure silicone shock oil to prolong the life of the seals If you are experiencing leakage around the top of the shock inspect the bladder in the top cap for signs of damage or distortion from overtightening If the bottom of the shock is leaking t...

Page 24: ...1100 Klein Road Plano Texas 75074 1 888 TRAXXAS 120425 KC1344 R01 MODEL 7205 owners manual ...

Reviews: