background image

SLAYER PRO 4X4 • 21

• Slightly lean fuel mixtures deliver 

stronger, more efficient  
combustion and more power, but with 
less lubrication.

• Slightly rich fuel mixtures deliver 

cooler running and more  
lubrication but with slightly     less power. 

Tuning the engine means finding the 
perfect balance between the two; 
excellent power to meet your needs 
while maintaining good lubrication 
for long engine life. 

The optimal fuel 

mixture setting is rich

 to provide a 

safety margin against having a lean 
condition if some variable changes (such 
as the temperature from one day to the 
next).
General fuel mixture settings are 
measured by the number of turns 
the needles are turned out from fully 
closed. The fuel mixture settings have been pre-set from the factory 
to typical break-in settings. Do not readjust your carburetor from the 
factory settings until after the engine is started and running, and you 
have been able to observe the engine running to assess what minor 
adjustments may be required to compensate for fuel, temperature, 
and altitude. Adjustments are usually made in 1/8 or 1/16-turn 
increments. If the engine sticks at top dead center (TDC), see page 35 
for instructions on freeing the engine.

The Idle Speed Adjustment

The idle speed adjustment screw controls the closed position of the 
throttle slide. When the throttle servo is in its neutral position, the 
throttle slide should be stopped against the idle speed adjustment 
screw. Always use the idle 
speed adjustment screw 
to control engine idle. See 
page 27 for instructions on 
adjusting the idle speed.

THE TRAXXAS EZ-START  

ELECTRIC STARTING SYSTEM

The Traxxas EZ-Start brings the convenience of push-button electric 
engine starting to your model. The EZ-Start consists of a hand-held control 
unit and an on-board motorized starter. 
• Power for the EZ-Start system comes from a 7.2-volt rechargeable 

battery pack installed in the hand-held control unit. 

• The engine glow plug is heated automatically by the EZ-Start system, 

eliminating the need to keep up with a separate glow plug igniter. 

• The voltage to the glow plug is kept constant, regardless of the load 

placed on the starter by the starter motor. 

• The “Glow Plug” LED (light emitting diode) on the control unit 

indicates the condition of the glow plug. 

• The “Motor” LED indicates the status of the EZ-Start electric starter motor. 
• The cush drive mechanism in the drive unit prevents damage to the 

gears caused by engine kickback.

• Smart Start

 protection circuitry prevents damage to the motor by cutting 

power if the load on the motor or other electronics exceeds safe limits.

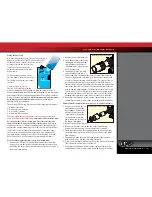
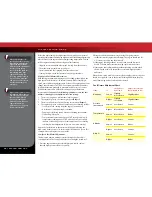
Charging the EZ-Start Battery

The included charger can be used to charge the included EZ-Start 
battery pack. 

Do not charge batteries inside of an automobile. Read the 

Safety Precautions section of this guide.

1. Plug the charger into a 12-volt automotive auxiliary power socket. 


The charger is compatible with 12-volt automotive auxiliary power 
sockets only. The LED on the charger will glow red to indicate it is 
ready to charge a battery.

2. Connect the battery to begin charging.

 Plug the battery into the 

charger. The  charger’s LED will flash green, indicating that charging 
has begun. The flashing green LED on the charger indicates the 
charge progress. 

3. Disconnect the battery when charging is complete. 

When the 

battery is fully charged, the LED will light solid green. The battery 
will be warm in your hand. Disconnect the battery.

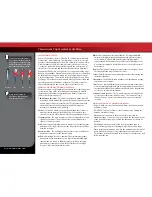
Lean

Rich

See 

Tuning Your TRX 3.3 

Racing Engine 

on page 25 

for complete information on 
adjusting the air/fuel mixture 
and idle speed.

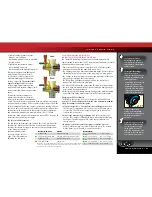
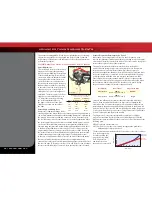
Factory Needle Settings

If your factory preset 
carburetor adjustments have 
been tampered with, use the 
following settings: 

• Set the high-speed needle to 

4 turns out from closed. 

• Set the low-speed needle so 

the screw head (

red in Fig. A

is flush (even) with the end 
of the slide (

yellow in Fig. A

). 

Always use the factory 
settings for initial starting. 
Only use these settings when 
the factory settings have  
been lost.

Higher nitro requires a richer 
fuel mixture. When running 
33% fuel, richen your high 
speed needle 3/4 turn if 
previously running 20% nitro 
and then re-tune the engine 
for maximum performance.

Low Speed 

Needle Adjustment

Fig. A

THE TRX 3.3 RACING ENGINE

2

CHARGE PROGRESS

x1

1 green flash

0 - 25% charged

x2

2 green flashes

25% - 50% charged

x3

3 green flashes

50% - 75% charged

x4

4 green flashes

75% or more charged

Solid green LED

100% charged

CHARGER LED INDICATION

MEANING

Solid Red LED

Ready for Charging

Slowly Flashing Green LED

Charging (see Charge Progress chart)

Solid Green LED

Battery Fully Charged

Flashing Red LED

Charger error

Note: 

If there is a problem with the battery, such as a short circuit, the charger’s LED will flash 

red. Disconnect the battery and unplug the charger from its power source to clear the error. 
Determine the cause of the error before continuing. 

Summary of Contents for 59076-1

Page 1: ...owner s manual MODEL 59076 1 ...

Page 2: ...ements for the engine The advanced design of the TRX 3 3 Racing Engine has a special break in procedure that has been developed and proven to produce the best performing engine possible Using traditional or old fashioned procedures could reduce engine performance and longevity Slayer Pro 4x4 is made to be a complete package that starts with the highest level of engineering and is equipped stock wi...

Page 3: ...ered trademarks of Traxxas Other brand names and marks are the property of their respective holders and are used only for purposes of identification No part of this manual may be reproduced or distributed in print or electronic media without the express written permission of Traxxas Specifications are subject to change without notice Toll free support is available to U S residents only REGISTERING...

Page 4: ...aware of its presence Keep small children at a safe distance away from the operating area Because Slayer is controlled by radio it is subject to radio interference from many sources beyond your control Since radio interference can cause momentary loss of control always allow a safety margin in all directions around your model to prevent collisions Do not kink the antenna wire Kinks in the antenna ...

Page 5: ... on page 10 Supplied Tools and Equipment Required Tools and Equipment sold separately Glow plug wrench Extra glow plug 1 5mm L wrench 2 0mm T wrench 2 5mm T wrench Shock wrench Suspension multi tool 4 way wrench Suspension tuning shims and hollow balls 2 5mm L wrench Extra oiled air filter set pre filter and primary filter Air filter oil Traxxas part 5263 8 AA alkaline batteries Traxxas Top Fuel s...

Page 6: ...ne Fuel Line EZ Start Motor Bulkhead under chassis Body Mount Post Chassis Driveshaft Half Shaft On Off Switch Throttle Linkage to Throttle Brake Servo below filter Antenna Mount Access Plug for two speed adjustment Pipe Hanger Receiver Box Engine Shut off Clamp Roll Hoop Rocker Push Rod Pivot Ball Hex Hub Axle Carrier Spring Pre load Adjuster Disc Brake Brake Tension Adjuster Fuel Cap Handle Diff...

Page 7: ...ect starting procedure for your TRX 3 3 5 Decal and Install the body See page 12 14 Break in your engine See page 23 You will need to use the body during break in so it s best to apply any additional decals before you use the body Follow the break in instructions exactly to ensure the best performing longest lasting engine 6 Install batteries in the transmitter See page 10 15 Tune your engine See ...

Page 8: ...pack The higher the number the longer the battery will last between recharges Neutral position The standing position that the servos seek when the transmitter controls are at the neutral setting NiCad Abbreviation for nickel cadmium The original rechargeable hobby pack NiCad batteries have very high current handling high capacity and can last up to 1000 charging cycles Good charging procedures are...

Page 9: ...nnels Your model is equipped with two servos and a receiver Slayer Pro 4x4 Wiring Diagram Antenna On Off Switch Receiver 4 Cell Battery Holder Channel 1 Steering Servo Channel 2 Throttle Servo Transmitter and receiver Steering Trim Multi Function Knob Throttle Trigger Throttle Neutral Adjust Steering Wheel Power Switch Battery Compartment Set Button Menu Button Red Green Status LED see page 40 for...

Page 10: ...agrams in the battery holder 3 Insert the battery holder into the battery compartment 4 Reinstall the battery compartment cover and secure with the screws To prevent losing control of your model it is important to stop at the first sign of weak receiver batteries to avoid losing control Visible warning signals include sluggish steering response and shortened radio range Installing Transmitter Batt...

Page 11: ...ustment by pressing the button and sliding it to the desired position There are two settings available 50 50 Allows equal travel for both acceleration and reverse 70 30 Allows more throttle travel 70 and less reverse travel 30 50 50 is the required setting with TRX 3 3 Racing Engine installed Steering Trim The electronic steering trim located on the face of the transmitter adjusts the neutral cent...

Page 12: ... If you want to see your model achieve its maximum speed it is best to position yourself in the middle of the model s running area not the far end so you drive the model towards and past your position In addition to maximizing the radio s range this technique will keep your model closer to you making it easier to see and control No matter how fast or far you drive your model always leave adequate ...

Page 13: ...way to adjust exponential Any setting that makes you more comfortable with your car s handling is the right setting Installing the Receiver Antenna The receiver antenna and antenna tube must be properly installed before operating your model The antenna tube has been precisely cut to match the length of the antenna wire Follow these steps to install the antenna and antenna tube 1 Slide the antenna ...

Page 14: ... of premature engine wear and failure is lack of care and maintenance BREAK IN The TRX 3 3 Racing Engine is manufactured to exacting tolerances and requires a specially designed break in procedure to accomplish the final precision fitting of the internal engine components It is very important that you follow the new break in procedure as closely as possible to achieve the best performance and long...

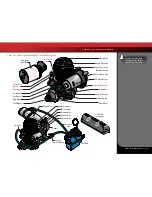
Page 15: ... Carburetor Air Intake Fuel Intake High Speed Needle Idle Speed Screw Clutch Bell Crankcase Two Stage Air Filter Glow Plug EZ Start Plug Positive Wire Negative Wire Fuel Line Fuel Tank Tuned Pipe Header Pressure Line Ground Wire Glow Plug Wire EZ Start Controller Engine Shut off Clamp Slayer Pro 4x4 s fuel tank is equipped with a built in sintered bronze fuel filter THE TRX 3 3 RACING ENGINE ...

Page 16: ...ne s body that contains all of the running mechanical components Crankshaft The main shaft of the engine that holds the reciprocating assembly Cooling fins The cooling fins are milled into the cylinder head and crankcase and cause heat to be drawn away from the engine Heat is removed when it dissipates into the air passing across the cooling fins It is important to keep the fins clean of dirt and ...

Page 17: ...es the first level of air filtration for the engine The majority of dirt and debris will be stopped by this filter Clean re oil and replace this filter after every hour of run time Always use both the pre filter and primary filter Primary filter The inner air filter element in a two stage air filter This provides a second level of air filtration after the pre filter removes the majority of dirt an...

Page 18: ... other factors determine how much nitro can be efficiently used in the engine The TRX 3 3 Racing Engine responds exceptionally well to a maximum of 33 nitro returning cooler temps more power and a smoother throttle response For those who want to run higher nitro 33 Top Fuel is the optimum nitro percentage for the TRX 3 3 Racing Engine Increasing the nitro beyond 33 can introduce the need for engin...

Page 19: ...it Do not pull straight up 2 Remove the pre filter element 3 Clean the pre filter element by thoroughly washing the foam element in hot soapy water dishwashing detergent works well Repeat twice 4 Thoroughly dry the pre filter element with a clean towel 5 Oil the foam element with air filter oil Use Traxxas filter oil part 5263 or a high quality special purpose foam filter oil such as that used for...

Page 20: ... fuel used by the engine at idle and low RPM part throttle engine speed The high speed needle is used to meter the fuel when the throttle is open from part throttle to wide open throttle WOT Two needles on the TRX 3 3 Racing Engine provide precise control of the air fuel ratio across the engine s entire RPM range The maximum possible fuel flow is always controlled by the high speed needle It works...

Page 21: ...ectric starter motor The cush drive mechanism in the drive unit prevents damage to the gears caused by engine kickback Smart Start protection circuitry prevents damage to the motor by cutting power if the load on the motor or other electronics exceeds safe limits Charging the EZ Start Battery The included charger can be used to charge the included EZ Start battery pack Do not charge batteries insi...

Page 22: ...rged may not deliver enough power to crank the engine over at the appropriate RPM to keep the piston from sticking at top dead center TDC A new engine will typically have a tight fit between the piston and the top of the sleeve This is a tapered fit and a tight piston sleeve fit on initial startup is desirable for those who want the best performing engine Make sure you are using a good quality bat...

Page 23: ...er after break in Follow the instructions exactly for each of the first 5 tanks of fuel Starting Your TRX 3 3 Racing Engine for the First Time Before you start your TRX 3 3 Racing Engine for the first time make sure you have read all instructions and precautions in this manual Pay close attention to the tank by tank break in instructions in the next section and make sure you have read and understo...

Page 24: ...e 3 When the fuel tank is nearly empty shut off the engine and refuel From here on you do not need to let the engine cool between tanks Tank 4 1 Driving procedure Gently pull the throttle trigger to full throttle over a 3 second count Then gently apply the brake to stop Count the three seconds out while accelerating one thousand one one thousand two one thousand three and then stop Repeat this sta...

Page 25: ...nds then it is likely that it is over 220 F and needs to cool down If the water takes a long time or does not evaporate at all then the engine is too cool We do not recommend that you operate your engine below 35 Fahrenheit If you insist on running your vehicle below 35 F be aware that nitro engines may be very difficult to start and tune at extremely cold temperatures Also at temperatures below f...

Page 26: ... counterclockwise and retest This setting will extend engine component life Low Speed Fuel Mixture Adjustment The low speed mixture is always set after the high speed needle is correctly adjusted The low speed mixture is set using the pinch test 1 Once the engine is warm do several high speed runs to confirm that the high speed needle is set correctly 2 Bring the vehicle in and pinch closed the fu...

Page 27: ...hat has the most influence on engine temperature is air temperature Expect the engine temperature to vary almost in direct proportion to air temperature Assuming you tuned the engine for the same maximum performance each day the engine will run about twenty degrees hotter when it s ninety degrees outside than it would in seventy degree weather For this reason we cannot give you a definitive temper...

Page 28: ...thing with your Slayer Pro 4x4 The engine is cooled by airflow created by speed Towing creates a high load on the engine and at the same time limits cooling of the engine due to low vehicle speed If your Slayer Pro 4x4 gets stuck stop driving immediately Move the vehicle and then continue driving Never turn off the radio system while the engine is running The truck could run out of control Driving...

Page 29: ...4x4 is lightened significantly for racing applications softer springs will be necessary to allow the suspension to sag properly Heavier configurations will require stiffer springs The suspension sag and spring pre load should be readjusted anytime the springs are removed and or replaced Optional springs available from Traxxas are listed below Refer to your parts list for a complete part number lis...

Page 30: ... Empty the used shock oil from the shock body 4 Fill the shock with new silicone shock oil up to the top of the shock body 5 Slowly move the piston up and down always keeping it submerged in oil to release the air bubbles Let the shock sit for a few minutes to allow any remaining air bubbles to surface 6 Slowly thread the upper cap with the installed shock bladder onto the shock body with the susp...

Page 31: ... 1 Limiting the engine s torque output to the wheels to prevent wheelspin on low traction surfaces and help to prevent damage to the gears in the transmission during on throttle landings 2 Protecting the drivetrain from sudden impact or shock loads such as landing from a jump with the engine at full throttle From the factory the slipper clutch is set for minimal slippage just enough to protect the...

Page 32: ...t lap after each adjustment On a small race track with many tight turns try setting the shift point later so that the truck only shifts into second gear on the main straightaway This will prevent an unexpected shift in the middle of a turn On larger tracks it may be necessary to allow earlier shifts for increased speed Adjusting the Spur Gear Clutch Bell Gear Mesh The ideal spur gear clutch bell g...

Page 33: ...houlder bolts that are used to secure the brake pads to the transmission housing may need to be adjusted periodically as the brake material wears down They should be tightened so a 0 50mm 020 gap exists between the disk and the brake pad on the transmission side Adjust in one of the following ways 1 Use a 0 50mm feeler gauge between the brake pad insert and brake disk 2 Push the outer brake pad fi...

Page 34: ...uld be replaced when the piston and sleeve are replaced Also replace the piston wrist pin and G clip whenever the connecting rod is replaced As with other internal engine components connecting rod life depends engine s usage and the quality and frequency of the engine maintenance Inspect the connecting rod after 3 gallons of fuel have been used Slipper clutch pads friction material Under normal us...

Page 35: ... reinstall the glow plug and gasket 6 Reconnect the blue glow plug wire to the glow plug 7 Reconnect the EZ Start controller 8 Do not prime the engine Pull the throttle to 1 2 throttle and push the EZ Start button The engine should start immediately Piston stuck at top dead center TDC Top dead center is the position where the piston is at the very top of the tapered sleeve Occasionally an engine c...

Page 36: ...g aspects of Slayer Pro 4x4 s suspension is the inboard shock damper arrangement that uses pivoting rockers to translate vertical wheel travel into linear shock motion The rockers can be changed to increase the progressive rate of the suspension The progressive rate determines how much the force at the wheel produced by the springs being compressed wheel force will vary with suspension travel or v...

Page 37: ...sidebar chart for possible gearing combinations Adjusting the Two Speed Ratios Slayer Pro 4x4 is equipped to allow adjustment to the two speed by installing optional close and wide ratio gearsets This requires transmission removal and disassembly see Traxxas com for detailed instructions The close ratio gearsets will reduce top speed slightly but will provide more powerful acceleration by reducing...

Page 38: ...e assembly process 1 Remove the spring and lower spring retainer from the shock 2 Remove the shock cap A and empty the shock body of shock oil 3 Remove the lower cap B and the X ring from the shock body 4 Use side cutters to grip the shock shaft just above the rod end C Remove the rod end from the shock shaft using the suspension multi tool C 5 Remove the shock shaft with piston from the shock bod...

Page 39: ...nt settings you select will represent what you wish to be the servo s maximum travel the Steering Percentage or Braking Percentage functions will not override the End Point settings Steering and Throttle Sub Trim The Sub Trim function is used to precisely set the neutral point of the steering or throttle servo in the event that simply setting the trim knob to zero does not completely center the se...

Page 40: ...blink green four times repeatedly 4 Press SET once The status LED will blink green once repeatedly 5 Press MENU once The status LED will blink green twice repeatedly 6 Press SET The memory is now selected to be deleted Press SET to delete the model Press and hold MENU to return to driving mode Failsafe Your Traxxas radio system is equipped with a built in failsafe function that returns the throttl...

Page 41: ...ed end point and press set to save To reset max throw Let go of controls and press SET The Menu Tree below shows how to navigate through the TQi transmitter s various settings and functions Press and hold MENU to enter the Menu Tree and use the following commands to navigate through the menu and select options MENU When you enter a menu you always start at the top Press MENU to move down the Menu ...

Page 42: ... LED blinks Press SET red LED blinks x3 Press MENU twice red LED blinks x3 Turn steering wheel to desired max left and right travel x8 Press SET to save each position Turn steering wheel to test settings IF END POINTS ARE OK Press hold MENU returns to driving mode IF END POINTS NEED TO BE CHANGED Press SET and repeat steps 6 8 To reset the END POINTS of STEERING servo to defaults Press hold MENU g...

Page 43: ... Set threshold warnings and log maximums minimums or averages Use the recording function to document your dashboard view with sound so that you can keep your eyes on your driving and not miss a single apex Manage up to 30 Models with Traxxas Link The TQi radio system automatically keeps track of what vehicles it has bound to and what settings were used for each up to 30 models total Traxxas Link p...

Page 44: ...140804 KC2171 R01 6200 TRAXXAS WAY McKINNEY TX 75070 1 888 TRAXXAS MODEL 59076 1 owner s manual ...

Reviews: