background image

XO-1 

 19

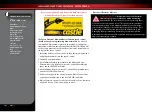
Now it’s time to have some fun! This section contains instructions on 
driving and making adjustments to your model. Before you go on, 
here are some important precautions to keep in mind.  

•  Allow the model to cool for a few minutes between runs. This is 

particularly important when using high capacity battery packs that 
allow extended periods of running. Monitoring temperatures will 
extend the lives of the batteries and motor.

•  Do not continue to operate the model with low batteries or you 

could lose control of it. Indications of low battery power include 
slow operation, sluggish servos (slow to return to center), or ESC 
shutdown due to the Cutoff Voltage. Stop immediately at the 
first sign of weak batteries. When the batteries in the transmitter 
become weak, the power light will begin to flash red. Stop 
immediately and install new batteries.

•  Do not drive the model at night, on public streets, or in large 

crowds of people.

•  If the model becomes stuck against an object, do not continue to run 

the motor. Remove the obstruction before continuing. Do not push or 
pull objects with the model.

•  Because the model is controlled by radio, it is subject to radio 

interference from many sources beyond your control. Since radio 
interference can cause momentary losses of control, allow a safety 
margin of space in all directions around the model in order to 
prevent collisions.

•  Use good, common sense whenever you are driving your model. 

Intentionally driving in an abusive and rough manner will only result 
in poor performance and broken parts. Take care of your model so 
that you can enjoy it for a long time to come.

•  High performance vehicles produce small vibrations which may loosen 

hardware over time.  Frequently check wheel nuts and other screws on 
your vehicle to ensure that all hardware remains properly tightened.  

About Run Time

A large factor affecting run time is the type and condition of your 
batteries. The milliamp hour (mAh) rating of the batteries determines 
how large their “fuel tank” is. A 5000mAh battery pack will theoretically 
run twice as long as a 2500mAh sport pack. Because of the wide variation 
in the types of batteries that are available and the methods with which 
they can be charged, it’s impossible to give exact run times for the model.
Another major factor which affects run time is how the model is 
driven. Run times may decrease when the model is driven repetitively 
from a stop to top-speed and with repetitive hard acceleration.

Tips for Increasing Run Time

• Use batteries with the highest mAh rating you can purchase.
• Read and follow all maintenance and care instructions provided by 

the manufacturer of your batteries and charger.

• Keep the electronic speed control cool. Make certain airflow to the 

speed control is unimpeded.

• Use the correct Cutoff Voltage setting for your battery (Refer to 

the included Castle Driver’s Ed Guide for instructions). Cutoff Voltage 
can be off for maximum NiMH battery runtime. Never use LiPo 
batteries while Cutoff Voltage is turned off. 

• Lower your gear ratio. Installing a smaller pinion or larger spur gear 

will lower your gear ratio, causing less power draw from the motor 
and battery, and reducing overall operating temperatures.

• Maintain your model. Do not allow dirt or damaged parts to cause 

binding in the drivetrain. Keep the motor clean.

mAh Ratings and Power Output

The mAh rating of the battery can effect your top speed 
performance. The higher capacity battery packs experience less 
voltage drop under heavy load than low mAh rated packs. The 
higher voltage potential allows increased speed until the battery 
begins to become discharged.

Do Not Operate your model in Wet Conditions

Your new Traxxas model features a waterproof steering servo 
and receiver box, but the electronic speed control, motor, 
and the model itself are not waterproof or water-resistant. 
Do not operate the model in wet conditions, including wet 
pavement. Do not run the model through puddles. Operating 
this model on wet surfaces will reduce control and may 
damage the electronics, resulting in loss of control. 

The instructions that follow are for operating the model up 
to its electronically-limited top speed of 50mph. Additional 
registration, setup steps and precautions are required before 
operating your model at its maximum, unrestricted speed. 
Read, understand, and follow all the steps beginning on page 
28 before unlocking your model’s full-power setting and 
operating it at speeds over 50mph. 

DRIVING YOUR MODEL

9

Summary of Contents for 64077

Page 1: ...OWNER S MANUAL MODEL 64077 ...

Page 2: ...del 3 SAFETY PRECAUTIONS 6 BEFORE YOU PROCEED 7 TOOLS SUPPLIES AND REQUIRED EQUIPMENT 8 ANATOMY OF THE XO 1 9 QUICK START GETTING UP TO SPEED 10 TRAXXAS TQi RADIO SYSTEM 18 ADJUSTING THE ELECTRONIC SPEED CONTROL 19 DRIVING YOUR MODEL 20 BASIC TUNING ADJUSTMENTS 23 MAINTAINING YOUR MODEL 25 ADVANCED TUNING ADJUSTMENTS 28 DRIVING 100MPH 31 TQi ADVANCED TUNING GUIDE TABLE OF CONTENTS Entire contents ...

Page 3: ...ATH WARNING RISK OF FIRE INJURY OR DEATH Liability Statement This product is surrendered by Traxxas to the purchaser with the understanding that the purchaser accepts the responsibility that driving this model and using the enclosed accessories in a careless improper or unsafe manner can result in serious injury or death Also the purchaser assumes all liability resulting from any misuse unsafe han...

Page 4: ...ety barricades and pedestrian access controls This is to prevent the possibility of injury or death resulting from collision with the model by another human being or animal Do not drive the XO 1 by yourself Bring a friend along to act as a spotter to alert you if a person or animal is approaching your driving course Do not operate your model at night or anytime your line of sight to the model may ...

Page 5: ...ed from service permanently Make sure charger settings match the battery type and specifications Refer to the battery label for the proper cell count and charging amperage setting Battery Chemistry Maximum Charge Rate Cell Configuration Voltage Make sure the battery connections are connected in the correct polarity Black is negative and red is positive A wrong connection will damage the battery an...

Page 6: ...ts Cross References Throughout this manual you ll notice warnings and helpful hints identified by the icons below Be sure to read them An important warning about personal safety or avoiding damage to your model and related components Special advice from Traxxas to make things easier and more fun Refers you to a page with a related topic Support If you have any questions about your model or its ope...

Page 7: ...r model SUPPLIED TOOLS AND EQUIPMENT 4 AA alkaline batteries Optional Pinion Gear 100mph Splitter TQi transmitter with Traxxas Link Wireless Module Internet enabled iPhone iPod touch iPad or iPad mini sold separately Traxxas Link application sold separately LiPo Balance Charger EZ Peak Plus recommended Part 2933 REQUIRED EQUIPMENT sold separately REQUIRED FOR 1 00mph OPERATION see page 28 Two batt...

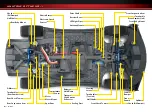
Page 8: ...iver Box Antenna Mount Front Suspension Arm Steering Servo Shock Oil Damper Front Canard Foam Bumper Shock Oil Damper Turnbuckle Toe Link Turnbuckle Front Camber Link Turnbuckle Rear Camber Link Diffuser Rear Shock Tower Traxxas High Current Connector Rear Body Mount Front Body Mount Front Shock Tower Drive Shaft Rear Suspension Arm Half Shaft Half Shaft Splitter ...

Page 9: ...eries in the transmitter See page 13 8 Detail your model See sidebar page 10 The transmitter requires 4 new AA alkaline batteries Apply other decals if desired 4 Install the battery packs in the model See page 14 9 Drive your model See page 19 Your model requires two fully charged battery packs Driving tips and adjustments for your model 5 Turn on the radio system See page 15 10 Maintaining your m...

Page 10: ...ing Traxxas recommends the EZ Peak Plus balance charger for Traxxas Power Cell LiPo batteries BEC Battery Eliminator Circuit The BEC can either be in the receiver or in the ESC This circuit allows the receiver and servos to be powered by the main battery pack in an electric model This eliminates the need to carry a separate pack of 4 AA batteries to power the radio equipment Brushless Motor A D C ...

Page 11: ...system Sold separately on the App Store Apple com Trim The fine tuning adjustment of the neutral position of the servos made by adjusting the throttle and steering trim knobs on the face of the transmitter Note The Multi Function knob must be programmed to serve as a throttle trim adjustment Thermal Shutdown Protection Temperature sensing electronics used in the electronic speed control detect ove...

Page 12: ...sed Antenna Voltage Sensor Receiver Motor Castle 1650Kv Temp Sensor RPM Sensor High Current Connector Channel 2 Mamba Monster Extreme Electronic Speed Control Channel 1 Steering Servo Castle Creations Motor Specifications Type 1717 Sensorless brushless RPM volt kV 1650 Magnet type Ultra High Temperature Sintered Neodymium Connection type 6 5mm bullet Wire size 10 Gauge Max RPM 45 000 Diameter 50mm...

Page 13: ... You can achieve speeds of 50 mph with 2S 5000mAh or larger LiPo batteries by installing an accessory 21 tooth Mod 1 0 metric pitch pinion gear SELECTING A CHARGER FOR YOUR MODEL Make certain you choose the correct type of charger for the batteries you select You MUST use a LiPo charger for LiPo batteries or battery damage with the potential for fire will result see Warnings and Precautions for fu...

Page 14: ...old down into the lower set of holes in the center support If you are installing Traxxas Power Cell 5000mAh 3S batteries the hold downs should be oriented so the side labeled 25mm 40mm is facing up 3 Align the hold down over the retainer and press down until it snaps into place 4 Repeat for the opposite battery 5 When you are ready to drive connect the High Current Connectors to the speed control ...

Page 15: ...ing a failure to link If you miss it simply turn off the transmitter and start over Always turn on the transmitter before plugging in the battery RADIO SYSTEM BASIC ADJUSTMENTS Throttle Neutral Adjustment The throttle neutral adjustment is located on the transmitter face and controls the forward reverse travel of the throttle trigger Change the adjustment by pressing the button and sliding it to t...

Page 16: ...e model off first using the switch on the speed control then turn off the transmitter Range Testing the Radio System Before each running session with your model you should range test your radio system to ensure that it operates properly 1 Turn on the radio system and check its operation as described in the previous section 2 Have a friend hold the model Make sure hands and clothing are clear of th...

Page 17: ... amount of steering wheel travel results in a smaller amount of servo travel The farther you turn the knob the more pronounced the effect becomes Decreased steering sensitivity may be helpful when driving on low traction surfaces when driving at high speed or on tracks that favor sweeping turns where gentle steering inputs are required The ranges are exaggerated for illustrative purposes Experimen...

Page 18: ...After a few seconds you will hear multiple tones and ALL THE LEDs will shine 6 Wait a few more seconds for the speed control to arm indicated by a double tone You are now ready to drive Disconnect Batteries After Use Warning Risk of Fire Always disconnect the batteries from the speed control when you are finished using your vehicle The switch on the speed control only shuts off power to the receiv...

Page 19: ... batteries that are available and the methods with which they can be charged it s impossible to give exact run times for the model Another major factor which affects run time is how the model is driven Run times may decrease when the model is driven repetitively from a stop to top speed and with repetitive hard acceleration Tips for Increasing Run Time Use batteries with the highest mAh rating you...

Page 20: ...oth wheels are pointing straight ahead and are parallel to each other 0 toe in This will ensure the same amount of steering in both directions For increased stability add 1 2 of toe in to each front wheel Use the turnbuckles to adjust the alignment Adjusting the Camber The camber angle of both the front and rear wheels can be adjusted with the camber links upper turnbuckles Use a square or right a...

Page 21: ...n the suspension slightly Be careful to recheck your ride height as this adjustment will change the ride height of the vehicle Shock Oil The 4 oil filled shocks dampers effectively control the suspension movement by preventing the wheels and tires from continuing to bounce after rebounding from a bump Changing the oil in the shocks can vary the suspension damping effect Changing the oil to a highe...

Page 22: ...orn should face toward the center of the chassis and be perpendicular to the servo body 7 Check servo operation by turning the steering wheel back and forth to ensure that the mechanism has been centered properly and you have equal throw in both directions Use the transmitter s steering trim knob to fine tune the position of the servo horn so the model tracks straight when the steering wheel is at...

Page 23: ...o reinstall it correctly The sensor should be installed so the thermistor the small component at the top of the temperature sensor loop is on the top of the motor the side where the wires exit the motor The sensor should also be centered on the motor To find the center of the motor simply count eleven cooling fins from either end of the motor If the sensor is installed incorrectly inaccurate or fa...

Page 24: ...ton head screws from the steering servo horn 4 Pull the front suspension assembly away from the chassis Removing the rear suspension module Cush drive assembly removal 1 Remove the two 3x25 countersunk screws from the underside of the chassis 2 Remove the two 3x15 countersunk screws from the underside of the chassis 3 Remove the two 4x12 button head screws from the chassis brace 4 Pull the rear su...

Page 25: ...tiffness of the vehicle similar to installing swaybars Adding roll resistance to one end of the vehicle will tend to add traction to the opposite end For example increasing roll resistance in the rear will provide more traction for the front wheels and potentially more steering Raising the roll center on the front and rear equally will increase overall roll resistance without changing the handling...

Page 26: ... up to extremely high rpms Higher viscosity thicker oil causes the differential to act like a limited slip differential distributing more equal power to the left and right wheels Your model will generally benefit from higher viscosity oil when being driven on low traction surfaces Note Heavier oil will allow power to be transferred even with one or more tires off the ground This can make the vehic...

Page 27: ...ferential 1 Remove the four 2 5x12mm screws from the differential case and carefully pull the differential case halves apart Work over a towel to collect any fluid that drips from the differential 2 Drain the fluid from the differential You may wish to remove the spider gears from the differential to make this easier 3 Place the spider gears back into the differential case if you removed them Fill...

Page 28: ...0mph without the splitter It provides downforce and stability Failure to install the 100mph Splitter may result in a loss of control at high speed Remove the two 3x10mm countersunk screws and the center 4x15mm countersunk screws that attach the splitter extension to the splitter mount Loosening the two outer 4x15mm countersunk screws attaching the front body mount to the splitter mount will aid in...

Page 29: ... button on the Traxxas Link Wireless Module The blue LED on the module will blink B 4 Within 10 seconds touch the Search for Traxxas Link Wireless Module button on your mobile device C 5 The Bluetooth icon in the status bar will turn blue and the blue LED on the module will glow solid blue D 6 The Traxxas Link Wireless Module and the Traxxas Link App are now paired and will automatically connect w...

Page 30: ...good working order and that the connections are secure Make sure the radio system range is adequate and without interference in the area where you will be driving Inspect the tires for proper gluing and damage Inspect the mechanical and aero components for any damage Tighten any loose hardware paying special attention to the wheel nuts Wind and weather Aerodynamics play an important role in the pe...

Page 31: ...tion knob can be set to control Throttle Sensitivity Throttle Sensitivity works the same way as Steering Sensitivity as described on page 17 but applies the effect to the throttle channel Only forward throttle is affected brake reverse travel remains linear regardless of the Throttle Sensitivity setting Steering Percentage Dual Rate The Multi Function knob can be set to control the amount percenta...

Page 32: ...etting of the neutral point Always set the Steering Trim knob to zero before making final adjustment if required using Sub Trim If Throttle Trim has been previously adjusted the Throttle Trim will need to be reprogrammed to zero before making final adjustment using Sub Trim Setting Lock Once you ve adjusted all of these settings the way you like them you may want to disable the Multi Function knob...

Page 33: ...oint and press set to save To reset max throw Let go of controls and press SET The menu tree below shows how to navigate through the TQi transmitter s various settings and functions Press and hold MENU to enter the menu tree and use the following commands to navigate through the menu and select options MENU When you enter a menu you always start at the top Press MENU to move down the menu tree Whe...

Page 34: ...ssible to pick up any transmitter and any previously bound model in your collection and simply turn them on and drive With Traxxas Link Model Memory there is no need remember which transmitter goes with which model and there is never a need to have to select any model from a list of model memory entries The transmitter and receiver do it all for you automatically To activate Model Lock 1 Switch on...

Page 35: ...reen LED blinks Press SET red LED blinks x3 Press MENU twice red LED blinks x3 Turn steering wheel to desired max left and right travel x8 Press SET to save each position Turn steering wheel to test settings IF END POINTS ARE OK Press hold MENU returns to driving mode IF END POINTS NEED TO BE CHANGED Press SET and repeat steps 6 8 To reset the END POINTS of STEERING servo to defaults Press hold ME...

Page 36: ...OWNER S MANUAL 6200 Traxxas Way McKinney Texas 75070 1 888 TRAXXAS 140408 KC2080 R00 MODEL 64077 ...

Reviews: