1/16 SLASH 4WD • 21
TUNING ADJUSTMENTS
Your model is factory-tuned for optimum performance in a
wide variety of off-road conditions. To tailor the performance
and handling of your model to suit your driving style and terrain,
the model has a number of adjustable features. Gearing, shock
preload and damping, ride height, and wheel camber can all be
easily adjusted.
SUSPENSION TUNING
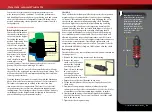
Ride Height Adjustment
Your model has threaded
shock bodies that make it
easy to adjust ride height.
Threading the shocks’
preload collars away from
the caps will raise the
vehicle’s ride height (the
distance from the chassis
to the ground), and
reduce the suspension’s
down travel, also known
as ‘sag’ or ‘droop’. This
can be helpful in rugged
terrain where extra
ground clearance is needed. However, the vehicle’s center of
gravity (CG) will be raised, making it less stable.
Threading the shocks’ preload collars toward the caps will lower
the vehicle’s ride height and increase the suspension’s droop. This
will lower the vehicle’s CG and improve handling, but it will also
reduce ground clearance.
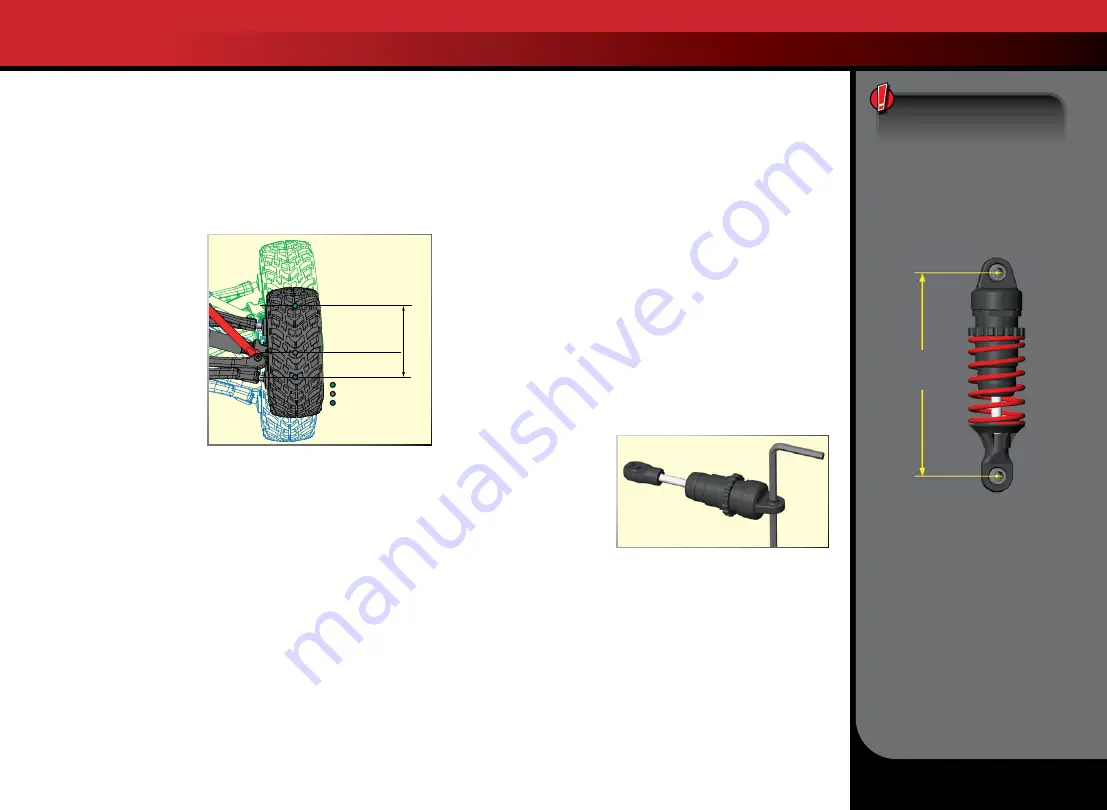
From the factory, your model is set up as shown in the illustration
above. At rest, the suspension sags to about 1/3 of its total travel.
This allows the suspension to extend so the wheel can drop
into depressions over rough terrain. This leaves 2/3 of the total
suspension travel for compression when absorbing bumps and
landing jumps. These settings are ideal for most surfaces, and only
small changes in ride height should be required to fine-tune the
vehicle’s handling for your particular surface.
Shock Oil
The 4 oil-filled shocks (dampers) effectively control the suspension
movement by preventing the wheels and tires from continuing
to “bounce” after rebounding from a bump. Changing the oil in
the shocks can vary the suspension damping effect. Changing
the oil to a higher viscosity oil will increase damping. Lowering
the viscosity of the oil will cause the suspension damping to be
reduced. Damping should be increased (with higher viscosity oil)
if the model is bottoming easily over jumps. Damping should
be decreased (with thinner viscosity oil) if the model is hopping
over small bumps and feels unstable. The viscosity of shock oil is
affected by extremes in operating temperature; an oil of certain
viscosity will become less viscous at higher temperatures and more
viscous at lower temperatures. Operating in regions with cold
temperatures may require lower viscosity oil. Your model’s shocks
are filled with SAE 30W oil. Only use 100% silicone oil in the shock.
Replacing Shock Oil
The shocks have to be removed from the vehicle and disassembled
to change the oil.
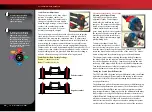
1. Remove the lower spring retainer and shock spring.
2. Remove the upper
shock cap. If you cannot
unscrew the cap with
your fingers, pass the
2mm ‘L’ wrench through
the cap’s eyelet so
you can apply more
leverage. Turn the cap
counterclockwise to loosen it.
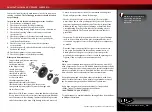
3. Empty the used shock oil from the shock body.
4. Fill the shock with new silicone shock oil up to the top of the
shock body.
5. Slowly move the piston up and down (always keeping it
submerged in oil) to release the air bubbles. Let the shock sit for
a few minutes to allow any remaining air bubbles to surface.
6. Slowly thread the upper cap with the installed shock bladder
onto the shock body. The excess oil will bleed out of the small
hole in the shock cap.
7. Tighten the shock cap until snug.
Compression 2/3
Sag (Droop) 1/3
Ride Height
Total Travel
Axle Centerline at Ride Height
Axle Centerline at Max Compression
Axle Centerline at Max Sag
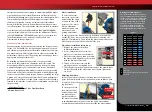
Important:
The shocks are
assembled at the factory with
a center-to-center distance
(between the rod end balls)
of 47.75mm. Any time the
shocks are removed and
disassembled, this distance
should be checked to ensure
proper operation of the
suspension.
47.75mm


