background image

DESERT RACER • 5

SAFETY PRECAUTIONS


This vehicle requires LiPo batteries. Charging and 
discharging batteries has the potential for fire, 
explosion, serious injury, and property damage if not 
performed per the instructions. In addition, Lithium 
Polymer (LiPo) batteries pose a SEVERE risk of fire if 
not properly handled per the instructions and require 
special care and handling procedures for long life 
and safe operation. LiPo batteries are intended only 
for advanced users that are educated on the risks 
associated with LiPo battery use. Traxxas does not 
recommend that anyone under the age of 14 use or 
handle LiPo battery packs without the supervision of a 
knowledgeable and responsible adult. Dispose of used 
batteries according to the instructions.
•   Your model requires the use of LiPo batteries. LiPo 

batteries have a minimum safe discharge voltage 
threshold that should not be exceeded. The electronic 
speed control is equipped with built-in Low-Voltage 
Detection that alerts the driver when LiPo batteries have 
reached their minimum voltage (discharge) threshold. 
It is the driver’s responsibility to stop immediately to 
prevent the battery pack from being discharged below 
its safe minimum threshold.

•   Low-Voltage Detection is just one part of a 

comprehensive plan for safe LiPo battery use. It is 
critical to follow all instructions for safe and proper 
charging, use, and storage of LiPo batteries. Make sure 
you understand how to use your LiPo batteries. If you 
have questions about LiPo battery usage, please consult 
with your local hobby dealer or contact the battery 
manufacturer. As a reminder, all batteries should be 
recycled at the end of their useful life.

•  DO NOT use a charger designed for NiMH or NiCad 

batteries. The use of a NiMH or NiCad charger or charge 
mode will damage the batteries. Failure to use the correct 
charger may result in battery damage, fire, personal injury, 
and/or property damage. 

•   ALWAYS inspect your LiPo batteries carefully before 

charging. Do not use or charge battery packs that have 
been damaged in any way (bent, dented, swollen, torn 
covering, or otherwise damaged).

•   BEFORE you charge, ALWAYS confirm that the charger 

settings exactly match the type (chemistry), specification, 
and configuration of the battery to be charged. DO NOT 
exceed the maximum manufacturer recommended 
charge rate. DO NOT attempt to charge non-rechargeable 
batteries (explosion hazard), batteries that have an 
internal charge circuit or a protection circuit, or batteries 
that have been altered from original manufacturer 
configuration.


•  While charging or discharging, ALWAYS place the battery 

(all types of batteries) in a fire retardant/fire proof 
container and on a non-flammable surface such as 
concrete.

•   ALWAYS charge batteries in a well-ventilated area.
•   Charge the battery in a safe area away from flammable 

materials. Monitor the charging process and never 
leave batteries unattended while charging. Do not 
allow small children to charge or handle LiPo batteries.

•   DO NOT disassemble, crush, short circuit, or expose the 

batteries to flame or other source of ignition.

•   DO NOT let any exposed battery contacts or wires touch 

each other. This will cause the battery to short circuit and 
create the risk of fire.

•   DO NOT leave the charger and battery  

unattended while charging, discharging, or  
anytime the charger is ON with a battery connected. If 
there are any signs of a malfunction, unplug the power 
source and/or stop the charging process immediately. 

•   ALWAYS unplug the charger from the wall outlet and 

disconnect the battery when not in use.

•   Never charge LiPo battery packs in series or parallel. 

Charging packs in series or parallel may result in 
improper charger cell recognition and an improper 
charging rate that may lead to overcharging, cell 
imbalance, cell damage and fire. 

•   If a battery gets hot to the touch during the charging 

process (temperature greater than 110°F / 43°C), 
immediately disconnect the battery from the charger and 
discontinue charging.

•   DO NOT store or charge LiPo batteries with or around 

other batteries or battery packs of any type, including 
other LiPos.

•   Store and transport your LiPo batteries in a cool dry 

place. DO NOT store in direct sunlight. DO NOT allow the 
storage temperature to exceed 140°F or 60°C such as in 
the trunk of a car or the cells may be damaged and risk of 
fire created. ALWAYS store battery packs safely out of the 
reach of children and pets.

•   Keep a Class D fire extinguisher nearby in case of fire.
•   DO NOT disassemble LiPo batteries or cells. DO NOT 

disassemble the charger.

•   DO NOT attempt to build your own LiPo battery pack 

from loose cells.

•   REMOVE the battery from your model or device before 

charging.

•   DO NOT expose the charger to water or moisture.

WARNING!  CAUTION!  DANGER!

FIRE HAZARD!

Summary of Contents for 85076-4

Page 1: ...MODEL 85076 4 owner s manual...

Page 2: ...t you will find it helpful and fast Be sure and read through the rest of the manual to learn about important safety maintenance and adjustment procedures Turn to page 10 to begin 3 BEFORE YOU PROCEED...

Page 3: ...is also available at Traxxas com support You may also e mail customer support with your question at support Traxxas com Join thousands of registered members in our online community at Traxxas com Tra...

Page 4: ...R TO CHARGE LIPO BATTERIES AS THIS CAN CAUSE FIRE RESULTING IN PROPERTY DAMAGE AND OR PERSONAL INJURY OR DEATH Terms of Use This product is surrendered by Traxxas to the purchaser with the understandi...

Page 5: ...d the maximum manufacturer recommended charge rate DO NOT attempt to charge non rechargeable batteries explosion hazard batteries that have an internal charge circuit or a protection circuit or batter...

Page 6: ...other unauthorized driver Always disconnect the batteries in the model when it is not in use Never store the vehicle with batteries in the model as this can cause a fire leading to property damage ser...

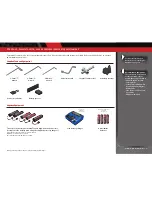
Page 7: ...your hobby dealer to operate and maintain your model Supplied Tools and Equipment Required Equipment Battery and charger style are subject to change and may vary from images 4 AA alkaline batteries Li...

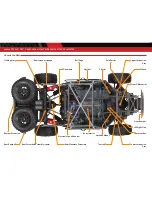
Page 8: ...Electronic Speed Control LED Light Pipe Axle Carrier Receiver Box Antenna Mount Upper Suspension Arm Toe Link Shock Roll Cage Rear Driveshaft Assembly spare Driveshaft Rear Swaybar Linkage Trailing Ar...

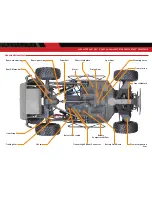
Page 9: ...View Motor Spur Gear Pinion Gear Battery Hold Down Steering Servo Chassis Skidplate Rear Upper Link Limit Strap Transmission Front Skidplate Trailing Arm Shock Driveshaft Lower Suspension Arm Rear Axl...

Page 10: ...and that there is no interference from outside sources 3 Install batteries in the transmitter See page 14 8 Detail your model See sidebar page 11 The transmitter requires 4 AA alkaline batteries sold...

Page 11: ...ator and brush arrangement with intelligent electronics that energize the electromagnetic windings in sequence to provide rotation Opposite of a brushed motor the brushless motor has its windings coil...

Page 12: ...of the neutral position of the servos made by adjusting the throttle and steering trim knobs on the face of the transmitter Note The Multi Function knob must be programmed to serve as a throttle trim...

Page 13: ...Trim Multi Function Knob Throttle Trigger Throttle Neutral Adjust Steering Wheel Channel 1 Steering Servo 2200Kv Brushless Motor Channel 2 VXL 6s Electronic Speed Control Antenna Power Switch Battery...

Page 14: ...become extremely hot and damage or injury could occur SELECTING A CHARGER FOR YOUR MODEL Make certain you choose the correct type of charger for the batteries you select Traxxas recommends you choose...

Page 15: ...d menus for the easiest and safest charging solution possible Visit Traxxas com to learn more about this feature and available Traxxas iD chargers and batteries TRAXXAS TQi RADIO VELINEON POWER SYSTEM...

Page 16: ...operation Plug the 4s accessory adapter into the 2s 3s battery connector from the speed control When using a Traxxas 5000mAh 4s battery pack part 2888X install foam battery spacers in the battery com...

Page 17: ...miss it simply turn off the transmitter and start over Always turn on the transmitter before plugging in the battery RADIO SYSTEM BASIC ADJUSTMENTS Throttle Neutral Adjustment The throttle neutral adj...

Page 18: ...ur radio system to ensure that it operates properly 1 Turn on the radio system and check its operation as described in the previous section 2 Have a friend hold the model Make sure hands and clothing...

Page 19: ...ding drifting and so on On surfaces with very little traction loose dirt smooth concrete ice snow increase TSM to maximize acceleration and control Drive with TSM on and off to test how it is making y...

Page 20: ...D turns solid green then solid red and then begins blinking red It will blink once then twice then three times then repeat One blink Sport Mode is the default setting It allows full forward and revers...

Page 21: ...3 When the LED blinks red three times release the EZ Set button 4 The LED will blink and then turn solid green The model is ready to drive Note If you missed the mode you wanted keep the EZ Set butto...

Page 22: ...XL 6s will automatically shut down fail safe mode The LED on the speed control will slowly blink red indicating a low voltage shutdown Stop driving the model The VXL 6s will stay in this mode until fu...

Page 23: ...e obstruction before continuing Do not push or pull objects with the model Because the model is controlled by radio it is subject to radio interference from many sources beyond your control Since radi...

Page 24: ...re Each hole should be near the tire center line 180 degrees apart 3 Confirm that the receiver box O ring and cover are installed correctly and secure Make sure the screws are tight and the blue O rin...

Page 25: ...earings Remove clean and re oil the bearings RECEIVER BOX MAINTAINING A WATERTIGHT SEAL Removing and Installing Radio Gear The unique design of the receiver box allows the removal and installation of...

Page 26: ...gearing from the pin location chart Replace the spur and pinion gears as needed When installing the motor install the pin into its proper location based on the gearing that is chosen The pin on the bo...

Page 27: ...ing Lowering the viscosity of the oil will cause the suspension damping to be reduced Damping should be increased with higher viscosity oil if the model is bottoming easily over jumps Damping should b...

Page 28: ...ve pins are not cracked or extremely worn Additional driveline noise can occur if the driveline components are worn out Remove the gear cover Inspect the spur gear for wear and check the tightness of...

Page 29: ...ight of shock oil available to you From the factory the Desert Racer is equipped with pistons with 1 7mm bypass holes recommended Shock disassembly The shocks must be removed from the vehicle and disa...

Page 30: ...The differential is filled with silicone differential fluid and is sealed to maintain consistent long term performance Changing the oil in the differential with either lower or higher viscosity oil wi...

Page 31: ...ty setting Steering Percentage Dual Rate The Multi Function knob can be set to control the amount percentage of servo travel applied to steering Turning the Multi Function knob fully clockwise will de...

Page 32: ...made with the Multi Function knob are overlaid on top of each other For example if you assign the Multi Function to adjust Steering Percentage and set it for 50 then reassign the knob to control Stee...

Page 33: ...o select any model from a list of model memory entries The transmitter and receiver do it all for you automatically To activate Model Lock 1 Switch on the transmitter and receiver you wish to lock 2 P...

Page 34: ...s how to navigate through the TQi transmitter s various settings and functions Press and hold MENU to enter the Menu Tree and use the following commands to navigate through the menu and select options...

Page 35: ...en LED blinks Press SET red LED blinks x3 Press MENU twice red LED blinks x3 Turn steering wheel to desired max left and right travel x8 Press SET to save each position Turn steering wheel to test set...

Page 36: ...ums minimums or averages Use the recording function to document your dashboard view with sound so that you can keep your eyes on your driving and not miss a single apex Manage up to 30 Models with Tra...

Page 37: ...6250 TRAXXAS WAY McKINNEY TEXAS 75070 1 888 TRAXXAS 180403 85076 4 OM EN R01 owner s manual...

Reviews: