background image

JATO 3.3 • 33

BASIC TUNING ADJUSTMENTS

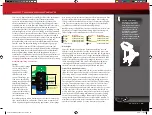
2. Protecting the drivetrain from sudden impact or shock loads (such as 

landing from a jump with the engine at full throttle).

From the factory, the slipper clutch is set for minimal slippage to 
protect the drivetrain from shock loads. On slippery, low traction 
surfaces such as a hard-packed, dry racetrack you may benefit from 
loosening the slipper adjustment nut to allow for more clutch slippage. 
This will make the truck easier and more forgiving to drive by helping 
to reduce the amount of wheel spin. Loosening the slipper adjustment 
can also improve performance on extreme high traction surfaces 
by preventing the front end from lifting off of the ground when 
accelerating. Make slipper adjustments in small  
1/8 turn increments.

The maximum tight setting for the slipper is just at the point where  
there is little or no tire slippage on a high traction surface such as 
carpet or a prepared racetrack. The slipper should not be tightened to 
the point that clutch slippage is completely eliminated. Do not over 
tighten the slipper nut or you could damage the slipper bearings, 
pressure plates, or other components.

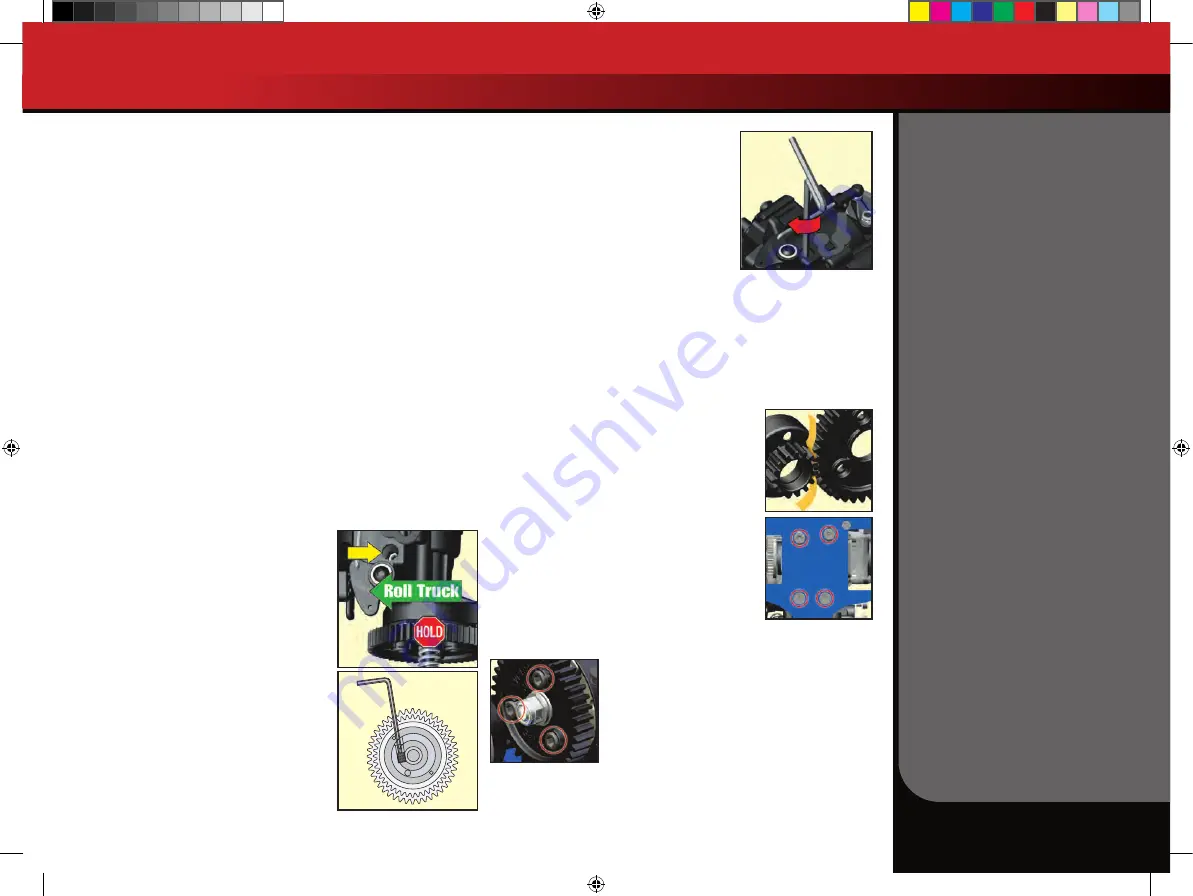
Adjusting the Two-Speed Transmission

Jato comes equipped with an adjustable two-speed transmission. When 
the shift point on the transmission is adjusted correctly, it will maximize 
acceleration and improve drivability. Use a 2mm hex wrench to adjust the 
shift point. To make the adjustment, the engine must be off (not running).

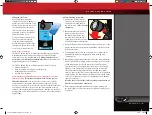
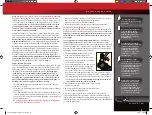
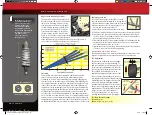
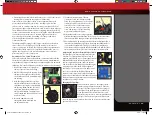
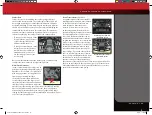
1.  Remove the rubber access plug from  

the top of the transmission housing.

2.  While looking through the opening, rotate 

the spur gear to align the cutout (notch) 
on the internal 2-speed clutch drum with 
the opening. 

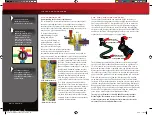
3.  Hold the spur gear and slowly roll the 

truck forward until the hex on the black 
adjustment set screw becomes visible in 
the opening. 

Note:

 The two speed will 

only rotate inside the drum when the 
truck is rolled forward. The truck can be 
rolled forward and back until the set screw 
becomes visible.

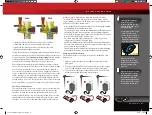
4.  Insert the 2.0mm hex wrench  

through the clutch drum and into  
the adjustment screw. 

5.  Turn the adjustment screw 1/8 turn 

clockwise to raise the shift point (shifts 
later). Turn the adjustment screw counter-
clockwise to make Jato shift sooner. Be 
careful not to loosen the adjustment 
screw too much or you may cause the 
screw and spring to fall out (requiring 
major disassembly and repair). 

6. Reinstall the rubber access plug to prevent 

dirt from entering the transmission. Do not put oil or other lubricants 
into the transmission through the two-speed adjustment access.

7.  Check performance by running a test lap after each adjustment. On a 

small race track with many tight turns, try setting the shift point later 
so the truck only shifts into second gear on the main straightaway. 
This will prevent an unexpected shift in the middle of a turn. On larger 
tracks it may be necessary to allow earlier shifts for increased speed.

Adjusting the Spur Gear/Clutch Bell Gear Mesh 

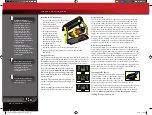
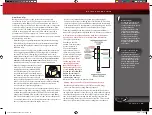
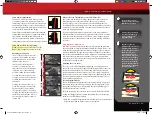
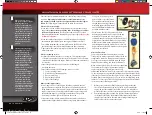
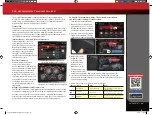
The ideal spur gear/clutch bell gear mesh for Jato 
is 0.1mm. To set the gear mesh, place a strip of 
standard letter/A4 size copy or printer paper (about 
0.1mm thick) between the mating teeth. Loosen 
the four engine mount screws from the bottom 
side of the chassis (see image) and slide the engine 
mount up to push the clutch bell gear against 
the spur gear so the paper is not too tight to pull 
out or too loose that it will fall out. Tighten the 
engine mount screws securely. When the paper is 
removed, you should feel only the slightest amount 
of play between the gears (almost none) and there 
should be no binding or friction.

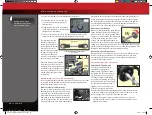
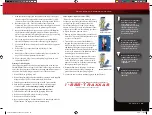
Changing the Spur Gear

Remove the three screws on the slipper clutch 
assembly using a 2.5mm hex wrench. Slide the 
spur gear off of the slipper shaft. If the spur gear 
is too tight on the shaft, gently pry on the back 
of the gear with a flat screw driver to loosen it. 
Repeat the steps in reverse order to install the new 
spur gear. If the new spur gear is a different size, 

then the engine mount screws will need to be loosened to readjust the 
gear mesh (see above).

Shift 

Later

55077-KC2104-R00-Jato-33-Owners.indd   33

6/6/14   11:53 AM

Summary of Contents for Jato 3.3 55077

Page 1: ...tible with iPod touch 5th generation and later iPad 3rd generation and later iPad mini iPhone 4S iPhone 5 iPhone 5C iPhone 5S iPhone iPad and iPod touch are trademarks of Apple Inc registered in the U S and other countries MODEL 55077 MODEL 55077 55077 KC2104 R00 Jato 33 Owners indd 44 45 6 6 14 9 43 AM ...

Page 2: ...rformance and satisfaction not just with your truck but also with the company that stands behind it Thank you again for going with Traxxas We work hard every day to assure you the highest level of customer satisfaction possible We truly want you to enjoy your new Jato 3 3 We know you re excited about getting your new Jato on the road but it s very important that you take some time to read through ...

Page 3: ... Internet Traxxas com E mail support Traxxas com Entire contents 2014 Traxxas Traxxas Ready To Race Ready To Win Jato 3 3 and ProGraphix are trademarks or registered trademarks of Traxxas Other brand names and marks are the property of their respective holders and are used only for purposes of identification No part of this manual may be reproduced or distributed in print or electronic media witho...

Page 4: ...rink to a child Keep all fuel out of the reach of children at all times Do not place fuel containers on the ground where children can reach them while you are driving Model engine fuel is flammable Never allow smoking sparks heat or flame in the presence of fuel or fuel vapors The engine brakes and exhaust system may become extremely hot during use Be careful not to touch the parts especially when...

Page 5: ...or more information on radio system batteries see Use the Right Batteries on page 10 Glow plug wrench Extra glow plug 1 5mm L wrench 2 0mm T wrench 2 5mm T wrench U joint wrench Shock wrench Turnbuckle wrench Suspension multi tool 4 way wrench Foam air filter oil and extra oiled air filter element 8 AA alkaline batteries Traxxas Top Fuel see page 18 Small flat blade screwdriver for tuning 1 8 inch...

Page 6: ...enna Mount Access Plug for two speed adjustment Pipe Hanger Receiver Box Engine Shut off Clamp Roll hoop Spring Pre load Adjuster Steering Servo under top plate Disc Brake Brake Tension Adjuster Charging Jack Fuel Pull Ring Steering Block Wheel Spindle Front Axle Caster Block Steering Bellcranks Rear Camber Link Front Camber Link Rear Shock Tower Front Shock Tower Brake Bellcrank Throttle Return S...

Page 7: ... to running the model Follow the directions in the wheelie bar bag or turn to page 34 Learn to use the correct starting procedure for your TRX 3 3 5 Install batteries in the transmitter See page 11 13 Break in your engine See page 23 Jato requires 4 AA alkaline or rechargeable batteries for the transmitter Follow the break in instructions exactly to ensure the best performing longest lasting engin...

Page 8: ...by pack NiCad batteries have very high current handling high capacity and can last up to 1000 charging cycles Good charging procedures are required to reduce the possibility of developing a memory effect and shortened run times NiMH Abbreviation for nickel metal hydride Rechargeable NiMH batteries offer high current handling and much greater resistance to the memory effect NiMH batteries generally...

Page 9: ...ack with the 4 cell battery holder The charging jack is for optional rechargeable 5 cell nickel metal hydride NiMH batteries only See page 10 for more details Channel 1 CH1 Steering Servo CH1 Throttle Servo CH2 Channel 3 CH3 From Voltage Temp Senor Port CH4 Battery BATT CH5 RPM Sensor Port RPM Voltage Temp Senor Port V T Not used Antenna On Off Switch Receiver 4 Cell Battery Holder Channel 1 Steer...

Page 10: ...lug the 5 cell RX Power Pack into the connector 4 Install the 5 cell RX Power Pack into the rear battery box carefully positioning the wires into the slots so that they will not be pinched when both battery covers are reinstalled 5 Replace the rear battery compartment cover and reinstall the four screws Replace the mid battery box cover and secure with the body clip Mid Mounting Optional 5 cell RX...

Page 11: ...n the model only turns the receiver on and off It does not turn off the engine Always use new or freshly charged batteries for the radio system Weak batteries will limit the radio signal between the receiver and the transmitter Loss of the radio signal can cause you to lose control of your model Radio System Basic Adjustments Throttle Neutral Adjustment The throttle neutral adjustment is located o...

Page 12: ...uld lock 7 Once adjustments are made turn off the receiver on your model followed by the hand held transmitter Range Testing the Radio System Before each running session with your model you should range test your radio system to ensure that it operates properly 1 Turn on the radio system and check its operation as described in the previous section 2 Have a friend hold the model with the engine off...

Page 13: ...ny setting that makes you more comfortable with your model s handling is the right setting TQi Binding Instructions For proper operation the transmitter and receiver must be electronically bound This has been done for you at the factory Should you ever need to re bind the system or bind to an additional transmitter or receiver follow these instructions Note the receiver must be connected to a 4 8 ...

Page 14: ...ailure is lack of care and maintenance BREAK IN The TRX 3 3 Racing Engine is manufactured to exacting tolerances and requires a specially designed break in procedure to accomplish the final precision fitting of the internal engine components It is very important that you follow the new break in procedure as closely as possible to achieve the best performance and longest life from your TRX 3 3 Raci...

Page 15: ... Start Motor Engine Mount Low Speed Needle Throttle Arm Clutch Bell Flywheel Carburetor Air Intake Fuel Intake High Speed Needle Idle Speed Screw EZ Start Plug Positive Wire Negative Wire Fuel Line Fuel Tank Tuned Pipe Pressure Line Ground Wire Glow Plug Wire EZ Start Controller Crankshaft Crankcase Engine Shut off Clamp Air Filter Housing 55077 KC2104 R00 Jato 33 Owners indd 15 6 6 14 11 52 AM ...

Page 16: ...all of the running mechanical components Crankshaft The main shaft of the engine that holds the reciprocating assembly Cooling fins The cooling fins are milled into the cylinder head and crankcase and cause heat to be drawn away from the engine Heat is removed when it dissipates into the air passing across the cooling fins It is important to keep the fins clean of dirt and debris for maximum cooli...

Page 17: ...tration for the engine The majority of dirt and debris will be stopped by this filter Clean re oil and replace this filter after every hour of run time Always use both the pre filter and primary filter Primary filter The inner air filter element in a two stage air filter This provides a second level of air filtration after the pre filter removes the majority of dirt and debris Clean re oil and rep...

Page 18: ...signed to run best within a range of nitro percentages How the engine is ported the size of the combustion chamber and other factors determine how much nitro can be efficiently used in the engine The TRX 3 3 Racing Engine responds exceptionally well to a maximum of 33 nitro returning cooler temps more power and a smoother throttle response For those who want to run higher nitro 33 Top Fuel is the ...

Page 19: ... or wear due to dirt ingestion is easy to detect and one of the top causes of premature engine failure Air Filter Cleaning Instructions 1 Remove the air filter from the carburetor bore by pulling the entire filter assembly firmly to the side to release it Do not pull straight up 2 Disassemble the filter Pull the rubber air filter neck out of the filter body With the base removed the foam element i...

Page 20: ...y the two mixture needles the high speed needle and the low speed needle The low speed needle is used to meter the fuel used by the engine at idle and low rpm part throttle engine speed The high speed needle is used to meter the fuel when the throttle is open from part throttle to wide open throttle WOT Two needles on the TRX 3 3 Racing Engine provide precise control of the air fuel ratio across t...

Page 21: ... hand held control unit and an on board motorized starter Power for the EZ Start system comes from a 7 2 volt rechargeable battery pack installed in the hand held control unit The engine glow plug is heated automatically by the EZ Start system eliminating the need to keep up with a separate glow plug igniter The voltage to the glow plug is kept constant regardless of the load placed on the starter...

Page 22: ...gh power to crank the engine over at the appropriate rpm to keep the piston from sticking at top dead center TDC A new engine will typically have a tight fit between the piston and the top of the sleeve This is a tapered fit and a tight piston sleeve fit on initial startup is desirable for those who want the best performing engine Make sure you are using a good quality battery pack that is fully c...

Page 23: ...rm the initial break in on a large flat paved surface Jato is very fast and by tanks 4 and 5 you will need plenty of room for the truck to run in Apply all throttle and braking actions gently Abrupt acceleration or braking could cause the engine to stall unnecessarily Special break in fuels are not recommended Use the same fuel you plan to use everyday If possible avoid breaking in the engine on e...

Page 24: ...arly empty shut off the engine and refuel From here on you do not need to let the engine cool between tanks Tank 4 1 Driving procedure Gently pull the throttle trigger to full throttle over a 3 second count Then gently apply the brake to stop Count the three seconds out while accelerating one thousand one one thousand two one thousand three and then stop Repeat this starting and stopping procedure...

Page 25: ...couple of tanks until you get the right amount of cover for the cooling head This will of course depend on your current weather conditions Adjusting the cover up and down exposing more or fewer cooling fins is a convenient way to regulate engine temps For owners that do not have access to a temperature probe a drop of water on the cooling head around the glow plug area can be used to estimate the ...

Page 26: ...his setting will extend engine component life Low Speed Fuel Mixture Adjustment The low speed mixture is always set after the high speed needle is correctly adjusted The low speed mixture is set using the pinch test 1 Once the engine is warm do several high speed runs to confirm that the high speed needle is set correctly 2 Bring the vehicle in and pinch closed the fuel line going into the carbure...

Page 27: ...ence on engine temperature is air temperature Expect the engine temperature to vary almost in direct proportion to air temperature Assuming you tuned the engine for the same maximum performance each day the engine will run about twenty degrees hotter when it s ninety degrees outside than it would in seventy degree weather For this reason we cannot give you a definitive temperature range that indic...

Page 28: ... kind The engine could be damaged due to overloads caused by drivetrain friction or over revving caused by loose or missing parts Don t tow anything with your Jato The engine is cooled by airflow created by speed Towing creates a high load on the engine and at the same time limits cooling of the engine due to low vehicle speed If your Jato gets stuck stop driving immediately Move the vehicle and t...

Page 29: ...our parts list for a complete part number listing Higher rate springs are stiffer Springs can be identified by dots of color on one end Ride Height Jato s ride height can be adjusted by turning the spring pre load adjusters on the shock bodies Turn the adjusters to the left to raise the ride height Turn them to the right to lower the ride height When adjusting spring pre load be sure to change the...

Page 30: ...k oil from the shock body 4 Fill the shock with new silicone shock oil up to the top of the shock body 5 Slowly move the piston up and down always keeping it submerged in oil to release the air bubbles Let the shock sit for a few minutes to allow any remaining air bubbles to surface 6 Slowly thread the upper cap with the installed shock bladder onto the shock body with the suspension multi tool Th...

Page 31: ...cated bellcrank steering system with geometry that is designed to completely eliminate bump steer Bump steer occurs when the steering angle of the front wheels changes as the suspension moves up and down through its range of travel Suspensions that have bump steer make it difficult to drive in a straight line over bumpy terrain Jato tracks true no matter how rough the course gets An adjustable int...

Page 32: ...these fasteners or you may damage the brake disc or pads Loosen each of the shoulder bolts by 1 turn Brake Linkage Adjustment When correctly adjusted the brake linkage spring should barely touch the rod guide when the servo is in neutral position radio system on closed throttle This will ensure no brake drag during operation of the vehicle The brake adjustment knob can be turned counter clockwise ...

Page 33: ...il the set screw becomes visible 4 Insert the 2 0mm hex wrench through the clutch drum and into the adjustment screw 5 Turn the adjustment screw 1 8 turn clockwise to raise the shift point shifts later Turn the adjustment screw counter clockwise to make Jato shift sooner Be careful not to loosen the adjustment screw too much or you may cause the screw and spring to fall out requiring major disasse...

Page 34: ...nger seal effectively loss of compression Symptoms include the engine being difficult to start when warm stalling when warm and stalling when throttle is suddenly closed to idle Replace the wrist pin and G clip whenever the piston and sleeve are replaced After run Procedure You must perform after run maintenance on your Traxxas engine whenever the model will be stored for longer than a few hours T...

Page 35: ... glow plug 7 Reconnect the EZ Start controller 8 Do not prime the engine Pull the throttle to 1 2 throttle and push the EZ Start button The engine should start immediately Piston stuck at top dead center TDC Top dead center is the position where the piston is at the very top of the tapered sleeve Occasionally an engine can get stuck at this position This is most likely to happen on new engines dur...

Page 36: ...end from the brake cam Remove the 3x10mm shoulder screw and detach the brake bell crank from the transmission housing 2 Remove the 3x12mm button head machine screw from the molded chassis brace behind the radio tray 3 Disconnect the throttle return spring from the molded chassis brace 4 Remove the two 4x18mm countersunk machine screws the two 3x15mm countersunk machine screws and the four 3x8mm co...

Page 37: ...oning the spacers in the rear stub axle housing where it joins with the lower suspension arm Keep in mind this is a fine tuning adjustment Unless you are a very experienced driver looking for that extra edge the factory wheelbase setting should prove to be fine for most applications Down Travel Limiters optional An optional kit is available separately for installing suspension down travel limiters...

Page 38: ...ast traction You may notice this when making sharp turns on slick surfaces The unloaded wheels on the inside of the turn have the least traction and tend to spin up to extremely high rpms Higher viscosity thicker oil causes the differential to act like a limited slip differential distributing more equal power to the left and right wheels Jato will generally benefit from higher viscosity oil when r...

Page 39: ...vehicles it has bound to and what settings were used for each up to 30 models total Traxxas Link provides a visual interface to name the models customize their settings attach profiles and lock them into memory Simply choose a model and any previously bound transmitter power them up and start having fun Pairing the TQi transmitter with the Traxxas Link Wireless Module and the Traxxas Link App for ...

Page 40: ... applied to steering Turning the Multi Function knob fully clockwise will deliver maximum steering throw turning the knob counter clockwise reduces steering throw note turning the dial counter clockwise to its stop will eliminate all servo travel Be aware that the steering End Point settings define the servo s maximum steering throw If you set Steering Percentage to 100 by turning the Multi Functi...

Page 41: ... from making further adjustments but the last setting of the Multi Function knob will still apply TRAXXAS LINK MODEL MEMORY Traxxas Link Model Memory is an exclusive patent pending feature of the TQi transmitter Each time the transmitter is bound to a new receiver it saves that receiver in its memory along with all the settings assigned to that receiver When the transmitter and any bound receiver ...

Page 42: ... start at the top Press MENU to move down the menu tree When you reach the bottom of the tree pressing MENU again will return you to the top SET Press SET to move across the menu tree and select options When an option is committed to the transmitter s memory the status LED will rapidly blink green BACK Press both MENU and SET to go back one level in the menu tree EXIT Press and hold MENU to exit p...

Page 43: ...ks x3 Press MENU twice red LED blinks x3 Turn steering wheel to desired max left and right travel x8 Press SET to save each position Turn steering wheel to test settings IF END POINTS ARE OK Press hold MENU returns to driving mode IF END POINTS NEED TO BE CHANGED Press SET and repeat steps 6 8 To reset the END POINTS of STEERING servo to defaults Press hold MENU green LED blinks x2 Press MENU gree...

Page 44: ...tible with iPod touch 5th generation and later iPad 3rd generation and later iPad mini iPhone 4S iPhone 5 iPhone 5C iPhone 5S iPhone iPad and iPod touch are trademarks of Apple Inc registered in the U S and other countries MODEL 55077 MODEL 55077 55077 KC2104 R00 Jato 33 Owners indd 44 45 6 6 14 9 43 AM ...

Reviews: