RADIO SYSTEM ADJUSTMENTS
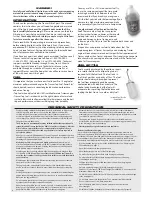
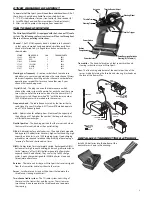
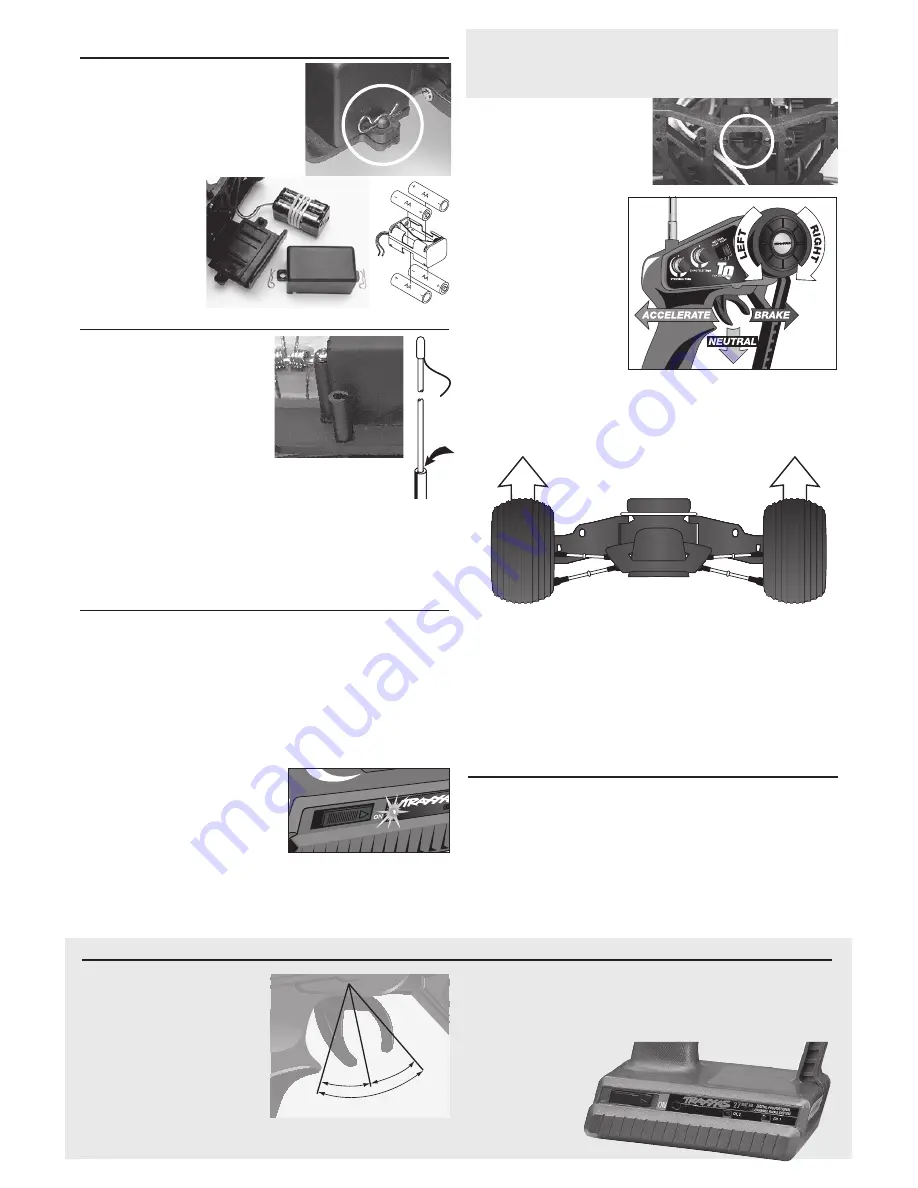
Throttle Neutral adjust
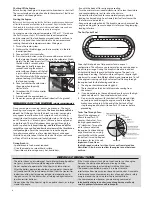
The throttle neutral adjustment
is located on the transmitter
face and controls the forward
and reverse travel of the throttle
trigger. There are two settings,
50/50 which allows equal travel
for both forward and brake, and
70/30 which allows more travel
for throttle and less for brake.
Change the adjustment by
pressing the button and sliding it to the desired position. 70/30 is
the recommended setting while running the Nitro Sport.
Servo Reversing Switches
On the front of the transmitter there are two switches. One for
throttle and one for steering. Moving the switches reverses the
direction of the corresponding servos. For example, if you turn your
steering wheel right and the model moves left, then switch the
steering servo reversing
switch to correct the
servo direction. You
may need to adjust
the corresponding
trim control after
moving the servo-
reversing switch.
TOTAL TRIGGER
MOVEMENT
50%
REVERSE
50%
FORWARD
4
INSTALLING RECEIVER BATTERIES
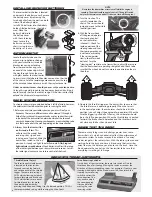
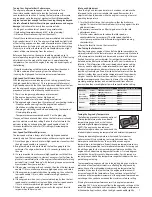
The receiver battery holder is located
underneath the battery cover. Remove
the battery cover by removing the
two body clips from the posts on both
sides of the battery holder.
Install 4 AA batteries into the battery
holder. Alkaline batteries should be
used. Place the
battery holder into
the battery cover
with the cushioning
foam. Secure the
battery cover to the
chassis using the two
body clips as shown.
ANTENNA SETUP
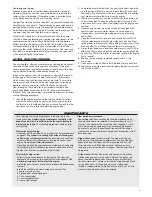
Locate the plastic tube and the
antenna tip (supplied in the bag
with your instructions). Insert the
black antenna wire, extending
from the receiver housing, into
one end of the tube and push it all
the way through. Spray the wire
with glass cleaner to make it easier
to insert. Insert the tube into the antenna mount on the side
of the chassis. Fold the remaining antenna wire over the top
of the antenna tube and secure it with the vinyl antenna tip.
Under no circumstances should you ever cut your antenna wire.
Its length is specially tuned to the frequency band, and cutting it
could severely shorten the radio’s range. On the transmitter,
fully
extend
the chrome telescopic antenna.
RADIO SYSTEM OPERATION
Your radio system was pre-adjusted before it left the factory, however,
the adjustment should be checked prior to running the truck.
1.
Before you ever turn your radio system on, you must “clear” your
frequency. There are six different channels numbered 1 through 6.
Each of the six channels is represented by a color. Look at the crystal
in the back of the transmitter to determine which of the channels
your truck is operating. Clearing your frequency means checking to be
sure that no one else in the area is operating on the same channel.
2. always turn the transmitter
on first and off last.
This
will prevent the model from
receiving stray signals and
running out of control. Slide the
transmitter switch to the “on”
position. A steady red light should
illuminate.
a flashing red
light indicates weak batteries
.
Weak batteries will limit the range
of the radio signal between your transmitter and receiver. Loss of
the radio signal can cause you to lose control of the truck.
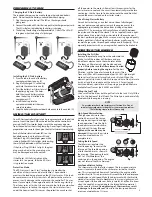
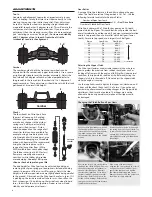
3.
Turn the truck on. The
switch is located on the
chassis. The servos should
jump and move to their idle
(neutral) positions.
4.
With the front wheels
off the ground, operate
the steering control
on the transmitter
(channel 1). Check for
rapid operation of the
steering servo and that
the steering mechanism
is not loose or binding.
If the servo operates
slowly, check for weak
batteries. Turn the
“steering trim” control on the transmitter to adjust the servo so
that the front wheels are pointing straight ahead. Check to be
sure that the wheels do not turn more in one direction than in
the other.
5.
Operate the throttle trigger on the transmitter to ensure that
the throttle servo is operating properly. When the servo is
in the neutral position, the carburetor should be in its idle
position (you will adjust the engine idle speed later). When the
throttle trigger is pulled all of the way, the carburetor should
be in the fully-open position. When the throttle lever is pushed
forward, the brake should be locked and the throttle should
not close any further than when at idle.
RANGE TEST THE RADIO
There are many things such as buildings, power lines, radio
transmitters, etc. which can adversely affect the performance of
your radio system. To make sure you do not have a “runaway”
model, range test the radio system. With the radio system on and
working, hold the truck and have a friend carry the transmitter
away from you the distance you plan to run the truck. Have the
friend operate the controls on the transmitter to be sure that
everything is working at full range.
CH.2
CH.1
NOTE:
Never turn the transmitter or receiver off while the engine is
running. The model could run out of control. (The on/off switch
only turns the receiver on and off. It does not turn off the engine.)
CH.2
CH.1
0
°
0
°
1
°
-2
°
1
°
-2
°
-1
°
-1
°


