9
decrease in performance after making changes to the slipper clutch
adjustment, then it may be too loose. The slipper must not be allowed
to slip during normal acceleration or the slipper could be damaged.
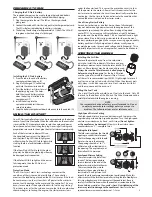
Centering your Servos
Whenever your radio system has been removed for service or
cleaning, the servos must be re-centered prior to installing the
radio system in the model. If the radio system is installed in the
truck, disconnect the servo horns from the servos.
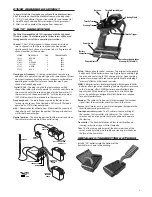
Connect the steering servo to channel 1 on your receiver and the
throttle servo to channel 2. The white wire on each servo cable is
positioned towards the crystal. Connect the red and black cable
from the battery holder to the “batt” terminal on the receiver. The
red wire is positive and the black wire is negative.
Place fresh “AA” batteries in the transmitter and turn the power
switch on. Slide the throttle and steering trim adjustments to the
center position. Now install fresh “AA” batteries into the battery
holder and turn the power switch to the “on” position. The servos
will automatically jump to their center positions. Turn off the
battery holder switch followed by the transmitter. The servos are
now ready to be installed. Be careful not to move the servo shaft
when reinstalling the servo horns.
AFTER-RUN PROCEDURE
You must perform after-run maintenance on your engine whenever
the model will be stored for longer than a few hours. Taking the
time to prepare your engine for storage will reward you with longer
engine life, easier starting, and better performance.
When a nitro engine is shut off, some excess unburned fuel remains
in the engine. The methanol in model engine fuel is hygroscopic,
which means it easily attracts and absorbs moisture. This moisture
can cause rust and corrosion on the steel engine parts (crankshaft,
bearings, wrist pin and starter shaft) if the fuel is not removed
from the engine. There are after-run oil products available from
your hobby dealer or you can use WD-40
™
, a common household
lubricant. To ensure your engine is protected from internal corrosion,
use the following procedure:
1.
Shut off the engine by pinching the fuel line closed. This allows most
of the excess fuel to be consumed by the engine. Be sure the throttle
is in the idle position. You may have to pinch the fuel line closed for
several seconds before the engine stops.
2.
Completely empty the fuel tank. Use your fuel-dispensing bottle to
suck out the old fuel. Do not mix the old fuel with your fresh fuel
supply. If you leave fuel in the tank, transporting or handling your
model may cause fuel to run into the engine.
3.
With the fuel tank empty and the throttle at the idle position, try to
start the engine. The engine will most likely start and run for a few
seconds as it uses up any fuel remaining in the engine and fuel lines.
4.
Once the engine stops, clean the outside of the engine with
compressed air or spray motor cleaner. Once the engine is
clean and dry, remove the glow plug power wire, glow plug,
and air filter.
5.
Open the throttle fully and spray a one-second burst of WD-40 into
the carburetor and into the glow plug hole (Caution! Wear safety
glasses to prevent spray from getting into your eyes). If you are using
after-run oil, follow the manufacturer’s instructions.
6.
Place a rag or paper towel over the engine to catch any WD-40 or
after-run oil that may come out the carburetor or glow plug hole.
7.
Connect the EZ-Start
®
controller to the model and spin the engine
for 10 seconds.
8.
Remove the rag or paper towel and repeat steps 5–7 two
more times.
9.
Clean and re-oil the air filter so it will be ready for use next time.
10.
Replace the glow plug, reconnect the glow plug power wire, and
reinstall the air filter.
MAINTENANCE
Nitro Stampede requires timely maintenance in order to stay in top
running condition.
Neglecting the maintenance could allow dirt,
deposits, and moisture to build up inside the engine leading to internal
engine failure.
The following procedures should be taken very seriously.
after each hour of running:
• Clean and re-oil the air filter. The instructions for this procedure are on
page 5.
We cannot stress enough the value of cleaning your air filter
at the scheduled intervals.
The cleanliness and condition of your air
filter directly influences the running life span of your engine.
Do not
skip air filter maintenance!
• Clean the outside of the engine of accumulated dirt, oil, and grime.
Accumulated grime will decrease the engine’s ability to cool itself.
• Tighten the wheel nuts (especially on the left side).
after each running session:
• Perform after-run maintenance on the engine. This clears the engine
of destructive moisture and other corrosive deposits.
This is extremely important for the life of the engine.
• Inspect the gears for wear, broken teeth, or debris lodged
between the teeth
• Inspect the vehicle for obvious damage or wear. Look for:
1.
Loose or missing screws
2.
Cracked, bent, or damaged parts
3.
Cut or loose wiring
4.
Cut or kinked fuel lines
5.
Signs of fuel leakage
Other periodic maintenance:
•
Connecting rod:
The connecting rod should be replaced when the
piston and sleeve are replaced. Also replace the piston wrist pin and
G-clip whenever the connecting rod is replaced. As with other internal
engine components, connecting rod life depends on engine’s usage
and the quality and frequency of the engine maintenance. Inspect the
connecting rod after three gallons of fuel have been used.
•
Slipper clutch pads
(friction material): The slipper clutch pegs will
wear over time and require replacement. The life of the pegs depends
on how the slipper clutch was adjusted and how the Nitro Stampede
was used. If the slipper will not tighten or you are seeing signs of wear
on the face of the gear, then the pegs should be replaced.
•
Piston/sleeve:
The life of the piston and sleeve will vary greatly
with how the engine was used and maintained. The piston and
sleeve should be replaced when they no longer seal effectively (loss
of compression). Symptoms include the engine being difficult to
start when warm, stalling when warm, and stalling when throttle is
suddenly closed to idle. Replace the wrist pin and G-clip whenever the
piston and sleeve are replaced.
ENGINE TROUBLESHOOTING
The troubleshooting guide on the following pages has been
provided to help you in diagnosing and repairing common engine
problems. Most difficulties with engines can be traced back to
problems with adjustment, fuel quality, dirt blockage, or common
parts that wear with everyday use.
Flooded Engine
The engine can become flooded if it is primed too many times
during the course of a routine start up. When the engine is
flooded, the EZ-Start
®
cannot turn the engine and it will appear to
be locked. Use the following procedure to clear a flooded engine.
1.
Remove the blue glow plug wire
2.
Remove the glow plug with a 5/16 or 8mm nut driver
3.
Plug in the EZ-Start and turn the truck upside down
4.
Push the EZ-Start button for several seconds to clear the excess
fuel from the combustion chamber
5.
Turn the truck over and re-install the glow plug with gasket
6.
Reconnect the blue glow plug wire
7.
Remove one of the motor wires from the EZ-Start motor
8.
Push the EZ-Start button for several seconds. This lights the
glow plug and burns off any remaining fuel
9.
Reconnect the EZ-Start motor
10.
Do not prime the engine. Partially open the throttle and press
the EZ-Start button. The engine should start immediately.
Glow Plugs
The glow plug in your engine is a consumable item which
must be replaced periodically to maintain peak performance
and starting ease. An extra glow pug has been included with your
model. If the “Glow Plug” LED fails to light, the glow plug may be

