28 • SLASH 4X4 ULTIMATE
TUNING THE SEALED GEAR DIFFERENTIALS
The action of the Slash 4X4 Ultimate’s front and rear gear
differentials can be tuned for different driving conditions and
performance requirements, without major disassembly or removal
of the suspension system.
From the factory, the differentials are sealed to maintain consistent
long-term performance. Changing the oil in the differential with
either lower or higher viscosity oil will vary the performance
characteristics of the differentials. Changing to a higher viscosity oil
in the differential will reduce the tendency for motor power to be
transferred to the wheel with the least traction. You may notice this
when making sharp turns on slick surfaces. The unloaded wheels
on the inside of the turn have the least traction and tend to spin
up to extremely high rpms. Higher viscosity (thicker) oil causes the
differential to act like a limited-slip differential, distributing more
equal power to the left and right wheels.
Slash 4X4 Ultimate will generally benefit from higher viscosity oil
when climbing or racing on low traction surfaces.
Note
: Heavier oil
will allow power to be transferred even with one or more tires off
the ground. This can make the vehicle more likely to overturn on
high-traction surfaces.
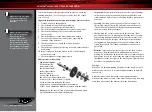
From the factory, the front differential is filled with SAE 30,000W
(30K) viscosity silicone oil. The rear differential is filled with grease,
but can also be tuned with silicone differential oil. Only use silicone
oil in the differentials. Traxxas offers silicone differential fluid in a
variety of viscosities:
Part #5135: 10K
Part #5136: 30K
Part #5137: 50K
Part #5130: 100K Part #5039: 500K
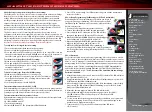
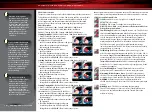
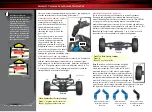
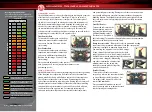
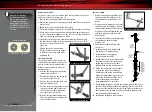
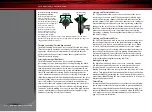
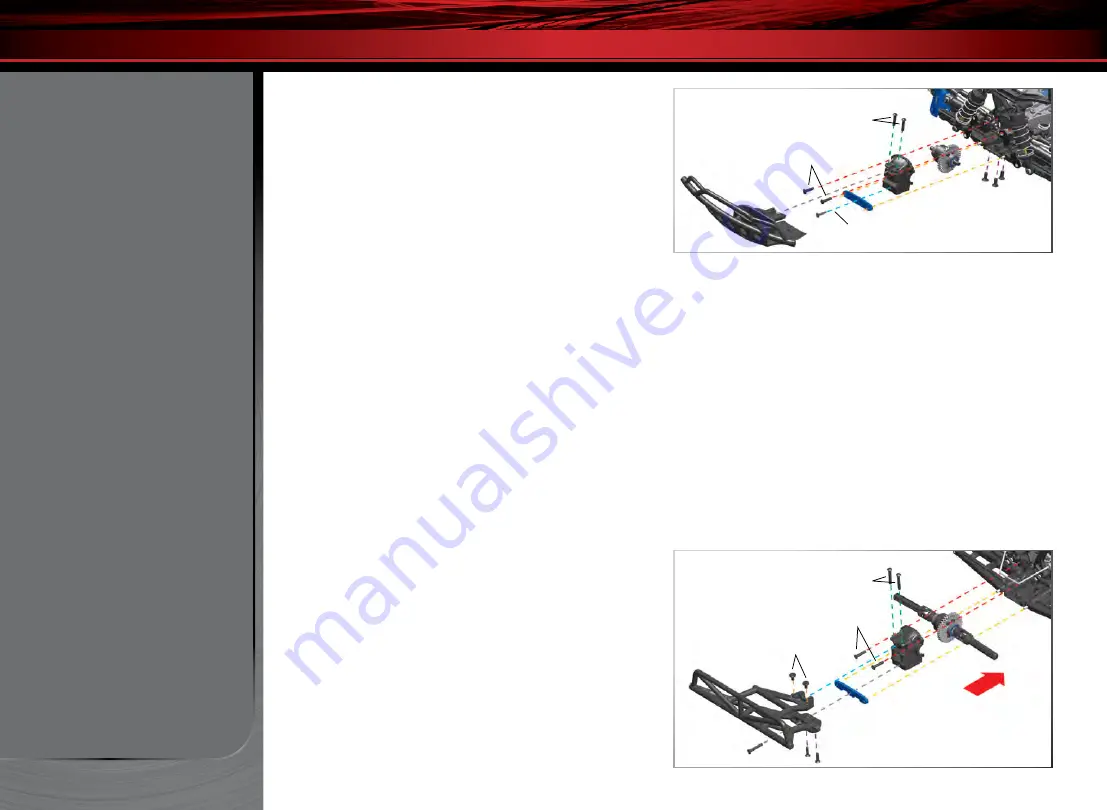
Follow the steps below to access and refill the front and rear differentials:
Front differential:
1. Remove the two 3x15mm button-head screws that secure the
top bumper mount to the differential
(
diff) case.
2. Turn the chassis over and remove the three 4x10mm
countersunk screws that hold bumper/skid plate to the bulkhead.
The two rear screws do not need to be removed.
3. Slide bumper assembly off of the chassis.
4. Remove 3x15mm button-head screw from diff tie bar.
5. Slide tie bar off truck.
6. Remove two 3x15mm button-head screws from the differential
cover. Do not remove the two screws that secure the shock tower.
7. Use a 1.5mm hex wrench to remove the two screw pins that
hold the driveshaft yokes to the differential output shafts.
Remove the differential cover and slide the differential out of the
front of the case.
8. To reinstall the differential, reverse the steps.
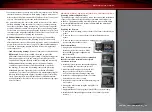
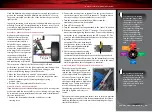
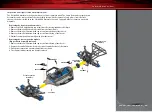
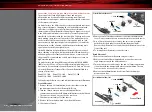
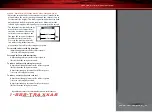
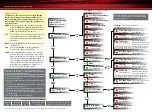
Rear differential:
1. Remove the two 3x6mm flat-head sway bar screws.
2. Remove the two 3x20mm button-head screws that secure the
top bumper mount to the differential case.
3. Turn the chassis over and remove the two 3x12mm countersunk
crews that hold the bumper/skid plate to the bulkhead. The two
front screws do not need to be removed.
4. Remove the 3x20mm button-head screw from the bumper
mount and tie bar.
ADVANCED TUNING ADJUSTMENTS
1.
3x15 BCS
2.
3x20 BCS
4.
3x15 BCS
5.
6.
3x15 BCS
7.
3x15 BCS
2.
4x10 BCS
3.
3x12 BCS
3.
4. 3x20 BCS
Front Differential Removal
Rear Differential Removal
5.
6.
Front of Truck
1.
3x6 FCS

