background image

Slash 

• 

15

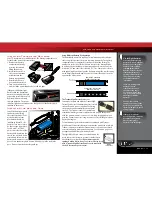
XL-5 electronic speed controls are factory set and should not require any 

adjustments.  These instructions are provided for your reference.

Transmitter Adjustments for the XL-5 ESC

Before attempting to program your XL-5 ESC, it is important to make 
sure that your transmitter is properly adjusted (set back to the factory 
defaults). Otherwise, you may not get the best performance from your 
speed control.

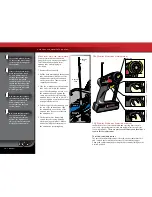
The transmitter should be adjusted as follows:

1. Set the throttle neutral switch to the 50/50 setting. 
2. Set the throttle trim to the middle “0” setting. This adjusts the  

neutral position.

3. Set the Channel 2 servo reversing switch to the left position. 
4. Do not change the position of any of the servo reversing switches 

after programming the XL-5 ESC.

XL-5 Setup Programming 

(Calibrating your ESC and transmitter)

Read through all of the programming steps before you begin. If you get 
lost during programming or receive unexpected results, simply unplug 
the battery, wait a few seconds, plug the battery back in, and start over.  

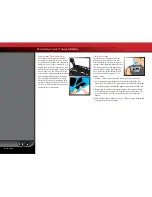
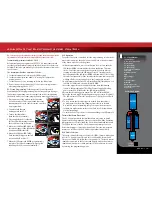
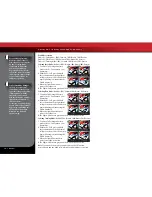
1. Disconnect one of the motor wires between the 

XL-5 and the motor. This is a precaution to prevent 
runaway when the speed control is turned on before  
it is programmed. 

2. Connect a fully charged  

battery pack to the XL-5. 

3. Turn on the transmitter  

(with the throttle at neutral).

4. Press and hold the ESC set button 

(A). The LED will first turn green and 
then red. Release the set button. 

5. When the LED blinks RED ONCE. Pull 

the throttle trigger to the full throttle 
position and hold it there (B).

6. When the LED blinks RED TWICE.  

Push the throttle trigger to the full 
reverse and hold it there (C).

7. When the LED turns solid GREEN, programming is 

complete. The LED will continuously shines green 
indicating the XL-5 is on and at neutral (D).

XL-5 Operation

To operate the speed control and test the programming, reconnect the 
motor wires and place the vehicle on a stable block or stand so that all 
of the driven wheels are off the ground. 

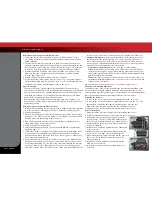
1. With the transmitter on, press the set button for ½ second, until the 

LED shines GREEN, then immediately release the button. This turns 
the XL-5 on. If you press and release too quickly, you may hear the 
steering servo jump but the LED may not stay on. Simply press the 
button again until the LED shines GREEN and then release. (Note: If the 
throttle is not at neutral or if the throttle trim has been altered, the LED 
will turn off after one second and the wheels may begin to drive.) 

2. Apply forward throttle. The LED will turn off until full throttle power is 

reached. At full throttle, the led will shine GREEN.

3. Move the trigger forward to apply the brakes. Note that braking 

control is fully proportional. The LED will turn off until full braking 
power is reached. At full brakes, the LED will shine GREEN.

4. Return the throttle trigger to neutral. The LED will shine GREEN.
5. Move the throttle trigger forward again to engage reverse (Profile #1). 

The LED will turn off. Once full reverse power is reached, the LED will 
shine GREEN. 

6. To stop, return the throttle trigger to neutral. Note that there is 

no programmed delay when changing from reverse to forward. 
Use caution to avoid slamming the speed control from reverse to 
forward. On high-traction surfaces, this could result in transmission 
or driveline damage.

7. To turn the XL-5 off, press the set button until the green LED turns off. 

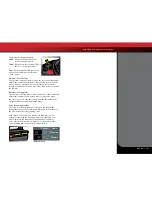
Thermal Shutdown Protection

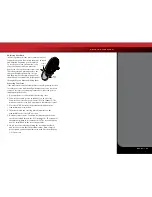
 The XL-5 is equipped with thermal shutdown protection to guard 
against overheating caused by excessive current flow. If the operating 
temperature exceeds safe limits, the XL-5 will automatically shut down. 
The LED on the face of the XL-5 will continuously shine green, even 
if the throttle trigger is moved back and forth. Once the temperature 
returns to a safe level, the XL-5 will once again function normally. 

XL-5 Profile Selection

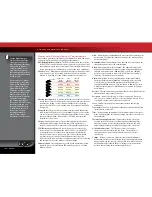
The speed control is factory set to Profile #1 (100% forward, brakes, and 
reverse). To disable reverse (Profile #2) or to allow 50% forward and 
50% reverse (Profile #3), follow the steps on page 16. The speed control 
should be connected to the receiver and battery, and the transmitter 
should be adjusted as described previously. The profiles are selected 
by entering the programming mode.

Adjusting the Electronic Speed Control

A

Green then Red

B

Once Red

C

Twice Red

D

Solid Green

XL-5 Specifications

Input voltage:


4 to 8 cells (4.8 to 9.6V)

Motor limit:


15-turns (540)

12-turns (550)

Peak current - fwd/rev:


60A/60A

Braking current:


60A

BEC voltage:


6V

Transistor type:

MOSFET

Battery connector:


Traxxas High-Current 

Connector

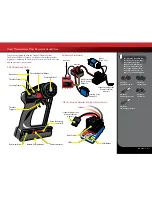
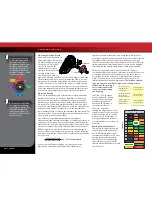
XL-5 Wiring Diagram

Summary of Contents for Slash 5805

Page 1: ...owners manual MODEL 5805...

Page 2: ...ovide just the right amount of bite and thick blinding clouds of dirt roost We know you re excited about getting your new model on the road but it s very important that you take some time to read thro...

Page 3: ...Traxxas com You may also e mail customer support with your question at support Traxxas com Join thousands of registered members in our online community at Traxxas com Traxxas offers a full service on...

Page 4: ...ter on First Switch on your transmitter first before switching on the speed control to prevent runaways and erratic performance Don t Get Burned The transistor tabs and the heat sinks can get extremel...

Page 5: ...gh Current Connector NiMH battery charger peakdetectingtyperecommended seesidebar 2 0mm L wrench 1 5mm L wrench Turnbuckle wrench U joint wrench 4 way wrench Aftermarket servo adapters Pre load spacer...

Page 6: ...own Receiver Box Antenna Mount Suspension Arm Front Front Bumper Steering Servo Shock Oil Damper Turnbuckle Toe Link Turnbuckle Front Camber Link Turnbuckle Rear Camber Link Rear Shock Tower Traxxas H...

Page 7: ...s 3 Install the antenna See page 12 9 Detail your model See page 8 Install the antenna mast in the model Apply other decals if desired 4 Install batteries in the transmitter See page 11 10 Drive your...

Page 8: ...ms The tires must be glued to the rims to prevent the rims from spinning inside the tires The instructions here are provided to show you how to glue replacement tires to the rims in the future Use CA...

Page 9: ...witch Power Indicator Antenna Not Used Receiver Motor Titan 12T Traxxas High Current Connector Male to Battery Traxxas High Current Connector Male to Battery XL 5 Electronic Speed Control Channel 2 St...

Page 10: ...control also has circuitry that prevents loss of steering and throttle control as the batteries lose their charge Frequency band The radio frequency used by the transmitter to send signals to your mod...

Page 11: ...the hold down over to the 23mm side and use it on the opposite side of the chassis The Traxxas High Current Connector Your model is equipped with the Traxxas High Current Connector Standard connector...

Page 12: ...t on the post just until the antenna tube is securely in place Do not over tighten or crush the antenna wire against the chassis 4 Fold the top of the antenna wire over the top of the antenna tube Sli...

Page 13: ...teering trim located on the face of the transmitter adjusts the neutral center point of the steering servo when the servo is at rest Adjust this control to make the model drive straight with no steeri...

Page 14: ...rear tires are off the ground If you are holding the model grip it firmly Make sure your hands are clear of the moving parts of the model 3 Plug the battery pack in the model into the speed control 4...

Page 15: ...servo jump but the LED may not stay on Simply press the button again until the LED shines GREEN and then release Note If the throttle is not at neutral or if the throttle trim has been altered the LED...

Page 16: ...ins blinking red indicating the Profile numbers 3 When the light blinks red twice release the set button 4 The light will then turn green and the model is ready to drive SelectingTrainingMode Profile...

Page 17: ...en repetitively from a stop to top speed and with repetitive hard acceleration Tips for Increasing Run Time Use batteries with the highest mAh rating you can purchase Use a high quality peak detecting...

Page 18: ...r the receiver box during wet running This can cause long term problems with the sensitive electronics in the receiver Removing the receiver box cover during storage allows the air inside to dry This...

Page 19: ...smoothly and are more consistent while thicker oils provide more damping Use only 100 pure silicone shock oil to prolong seal life The model s ride height can be adjusted by adding or removing the cl...

Page 20: ...t the model is close to factory stock weight and operates freely with no excessive friction dragging or binding and the battery is fully charged and in good condition The model is equipped with a Tita...

Page 21: ...lation in the model 1 Disconnect the servo horn from the steering servo 2 Connect the steering servo to channel 1 on the receiver Connect the electronic speed control ESC to channel 2 The white wire o...

Page 22: ...er Traxxas part 3744 the bellcrank bushings Traxxas part 2545 and the tie rod ends Traxxas part 2742 Replace these components as needed to restore factory tolerances Motor Every 10 15 runs remove clea...

Page 23: ...e speed control is plugged into the throttle channel of the receiver Check operation of the throttle channel with a servo Bad battery or motor Check the operation with known good battery and motor XL...

Page 24: ...080514 KC1130 1100 Klein Road Plano Texas 75074 1 888 TRAXXAS owners manual MODEL 5805...

Reviews: