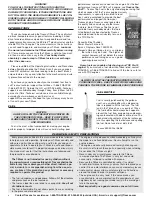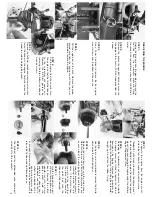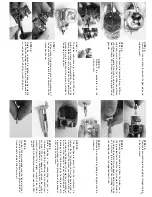
7.2v BATTERY PACK AND CHARGER
The EZ-Start™ electric starter requires a
7.2 volt rechargeable nicad battery pack.
The battery pack straps to the bottom
of the EZ-Start™ control box with
the supplied tie wraps. The battery
pack must be
fully charged
in order
to start the engine. It can be
recharged with an overnight “wall
charger”, a peak-detecting charger, or
a 15-minute quick charger. All are available from a hobby dealer.
REQUIRED EQUIPMENT
To operate the T-Maxx, you will need these additional items. All of
these items should be available from your hobby shop.
1. “AA” size batteries for your transmitter(8) and receiver(4)
2. Small Phillips head and flat screwdrivers (for adjustments)
3. After-run oil (to protect the engine from corrosion)
4. Spare glow plugs (standard plug, Traxxas part #3230; or
heavy-duty plug, Traxxas part #3231).
5. In-line fuel filter (recommended)
6. Spare fuel line (recommended)
7. Hobby-quality, thin CA glue for the tires
8. Hobby knife
THE TQ-3 RADIO SYSTEM
The T-Maxx model 4910 is equipped with the 3-channel TQ-3
radio system. The following radio system terms will be used
throughout the rest of these operating instructions.
THREE-CHANNEL RADIO SYSTEM
- The radio system in your
model consists of the RECEIVER, the TRANSMITTER, and the
SERVOS. It has three channels, one to operate the throttle, one to
shift the transmission, and one to operate the steering.
TRANSMITTER
- The TRANSMITTER is the hand-held radio unit
which sends throttle and steering instructions to the model.
RECEIVER
- The RECEIVER is the radio unit inside the model
which receives signals from the TRANSMITTER and relays them
to the SERVOS.
SERVO
- The SERVOS are the small motor units in the model
which operate the steering, shifting and throttle mechanisms.
FREQUENCY BAND
- The FREQUENCY band is the radio
frequency that the transmitter uses to send signals to the model.
All Traxxas RTR models operate on a 27 MHZ FREQUENCY BAND.
CHANNEL
- The 27 MHZ FREQUENCY BAND is divided into 6
CHANNELS, so that up to six cars can be operated simultaneously.
These CHANNELS are referred to by their number and flag color.
The chart below lists the channels and their flag colors.
CRYSTAL (X-TAL)
- The CRYSTAL is the plug-in device that
determines which channel the RADIO SYSTEM will operate on.
For each CHANNEL, there are two CRYSTALS, one for the
RECEIVER and one for the TRANSMITTER. Of those two
CRYSTALS, the one marked with the lower number (.455 MHZ
lower) must be inserted in the RECEIVER.
CLEARING YOUR FREQUENCY
- CLEARING your frequency
means checking to be sure no one else in the area is operating
on the same CHANNEL. You should always do this before operating
your model.
NICAD (Ni-Cd)
- These terms stand for rechargeable, nickel
cadmium batteries. These batteries are most economical and
can be recharged up to 500 times.
NEUTRAL POSITION
- The NEUTRAL POSITION is the standing
position that the SERVOS seek when the TRANSMITTER controls
are at neutral.
TRIM
- TRIM is the fine-tuning adjustment of the NEUTRAL
POSITION of the SERVOS. This adjustment is made by turning the
throttle and steering trim knobs on the face of the TRANSMITTER.
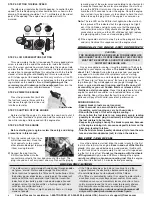
INSTALLING TRANSMITTER BATTERIES
Install 8 “AA” batteries into the bottom of the
transmitter as shown in the drawing.
3
27MHZ
FLAG COLOR
CH#
TRAXXAS PART#
26.995
BROWN
1
2031
27.045
RED
2
2032
27.095
ORANGE
3
2033
27.145
YELLOW
4
2034
27.195
GREEN
5
2035
27.255
BLUE
6
2036
Antenna
Power Indicator
Steering Trim
Reverse Shift
Forward Shift
Throttle Trim
Throttle Neutral Adjust
Throttle Trigger
Steering Wheel
Power Switch
Servo Reversing Switches
Battery
Compartment
Contact Traxxas for assistance: 1-888-TRAXXAS. 972-265-8000 (outside USA). E-mail us at support@Traxxas.com

