X-MAXX • 17
VXL-6s Specifications
Input voltage:
4S / 6S LiPo (Max 25.2 Volts)
Supported Motors:
Sensorless Brushless
Battery connector:
Traxxas High-Current
Connector
Motor connector:
TRX 6.5mm bullet
connectors
Motor/battery wiring:
10-gauge Maxx® Cable
Weight:
161.4g (5.69oz)
Case size:
56.5mm (2.2") / 61.9mm
(2.44") / 57.8mm (2.28")
ADJUSTING THE ELECTRONIC SPEED CONTROL
VXL-6s Battery Settings (Low-Voltage Detection Setting)
The Electronic Speed Control’s default settings were programmed at the
factory and should not require adjustment for normal operation. The
following information is helpful to confirm the settings or allow you to
customize the settings for your needs.
ATTENTION: USING LiPo BATTERIES
To prevent over-discharging of LiPo batteries, Low Voltage Detection
must be switched on. To check the status of your model, turn it on.
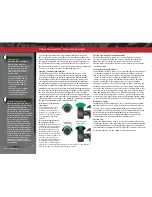
If the
speed control’s LED is green, Low Voltage Detection is already activated.
.
If the LED is red, Low Voltage Detection is not active.
Follow these steps to
turn on Low Voltage Detection:
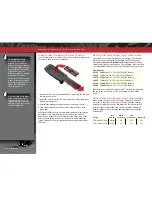
1. Turn the model on. Make sure the LED on the speed control is on
and red.
2. Press and hold the EZ-Set button for ten seconds.
The LED will turn off and then light green, and
a “rising” musical tone will be emitted from the
motor. Release the button.
3. Low-Voltage Detection is now ACTIVATED.
LiPo batteries are intended only for the most advanced users that are
educated on the risks associated with LiPo battery use.
Never use LiPo
batteries while Low-Voltage Detection is disabled.
Selecting a Throttle Mode: SPORT, RACE, or TRAINING
1. Connect a fully charged battery to the model and turn on your
transmitter.
2. With the model off, press and hold the EZ-Set button until the LED turns
solid green, then solid red and then begins blinking red. It will blink once,
then twice, then three times, then repeat.
One blink = Sport Mode
is the default setting. It allows full forward and
reverse throttle.
Two blinks = Race Mode
removes reverse throttle in case your track does
not allow it.
Three blinks = Training Mode
will slow the model down by 50% to make
it easier for new drivers to control the model.
3. Release the EZ-Set button after the number of blinks for the mode you
wish to select.
Note
: If you missed the mode you wanted, keep the EZ-Set
button pressed down and the blink cycle will repeat.
4. The LED will blink and then turn solid green (Low-Voltage Detection
ACTIVE) or red (Low-Voltage Detection DISABLED). The model is ready to
drive in the mode you have selected.
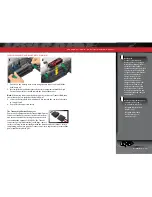
Calibrating the Speed Control
The speed control is calibrated at the factory. If the LED on the speed control
is flashing green, then follow these steps to recalibrate it (set the throttle to
the neutral position).
1. Connect a fully charged battery to the model.
2. Turn on the transmitter (with the throttle at neutral).
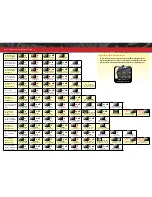
3. Press and hold the EZ-Set button (A). The LED will first turn
green and then red. Release the EZ-Set button.
4. When the LED blinks RED ONCE, pull the throttle
trigger to the full throttle position and hold it
there (B).
5. When the LED blinks RED TWICE, push the throttle
trigger to the full reverse and hold it there (C).
6. When the LED blinks green, programming is
complete. Release the throttle trigger; the LED
will then shine green.
VXL-6s Profile Selection
The speed control is factory set to Profile #1 (100% forward, brakes, and
reverse). To disable reverse (Profile #2) or to allow 50% forward and 50% reverse
(Profile #3), follow the steps below. The speed control should be connected to
the receiver and battery, and the transmitter should be adjusted as described
previously. The profiles are selected by entering the programming mode.
Profile Description
Profile #1 (Sport Mode): 100% Forward, 100% Brakes, 100% Reverse
Profile #2 (Race Mode): 100% Forward, 100% Brakes, No Reverse
Profile #3 (Training Mode): 50% Forward, 100% Brakes, 50% Reverse
Selecting Sport Mode
(Profile #1: 100% Forward, 100% Brakes, 100% Reverse)
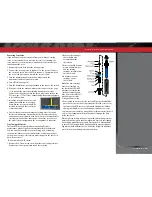
1. Connect a fully charged battery pack to
the VXL-6s and turn on your transmitter.
2. With the VXL-6s off, press and hold
the EZ-Set button until the LED turns solid green,
then solid red and then begins blinking red
(indicating the Profile numbers).
3. When the LED blinks red once, release
the EZ-Set button.
4. The LED will blink and then turn solid green (Low-
Voltage Detection ACTIVE) or red (Low-Voltage
Detection DISABLED). The model is ready to drive.
Green then Red
A
Once Red
B
Twice Red
C
B
One blink Red
A
Green to Red to Off
D
Solid
C
Release

