20
TRBOnet Swift A100 – User Manual
3.2.2
Installing and Connecting the Radio
Now install your non-MOTOTRBO radio into the A100 gateway and connect it to all
required components inside the unit.
1.
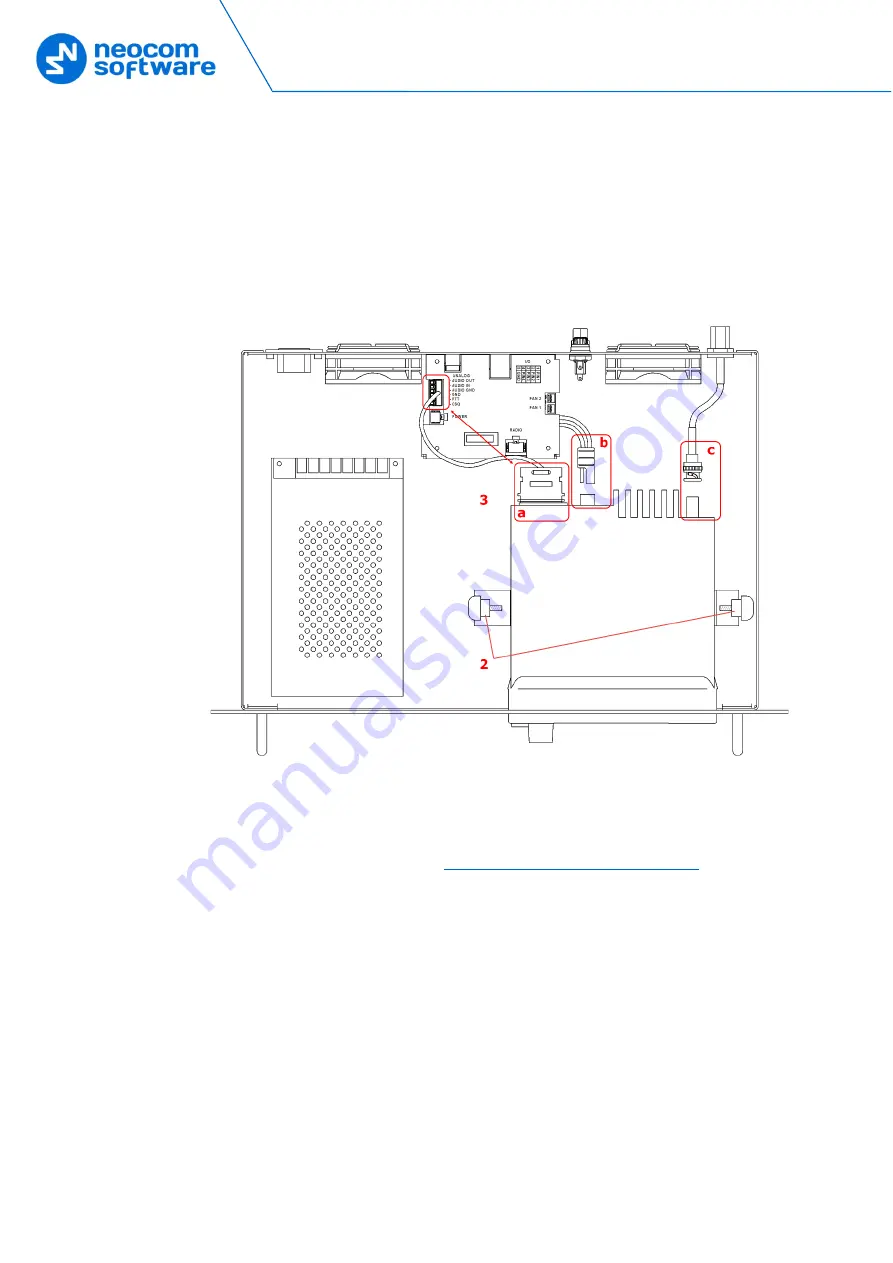
Remove the screws and lift the top cover of the unit.
2.
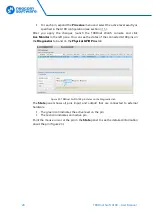
Insert the radio into the slot on the front panel of the unit, orienting the
radio’s back panel inside the unit. Use the screws of the proper size to secure
the radio in the unit.
Figure 12: Installing a non-MOTOTRBO radio into the unit
3.
Perform the following connections:
a.
Connect the radio to the IP controller with the service cable you have
assembled (see section
3.2.1, Assembling the Service Cable
).
b.
Connect the radio to the power supply. The black-and-red power cable is
already connected to the integrated power supply unit.
c.
Connect the RF antenna to the mobile radio. The antenna cable is
included in the package contents.
4.
Reinstall the top cover and secure it with the screws.
3.2.3
Configuring the Radio
After you have assembled the service cable, configure your radio to use the radio
connector pins that are coupled with the pins of the A100 gateway. Use the radio
programming software provided by the manufacturer of the radio.
Program the GPIO pins of your radio as described in the documentation supplied by
the manufacturer of the radio.


