Setup and Connection
21
3.2.4
Configuring the A100 Gateway
To configure the A100 gateway:
1.
Launch TRBOnet Swift CPS. In the main window, select
USB
as an interface for
device programming at the bottom (Figure 6, page 15). Connect the
programming cable to the USB type B port of the A100 gateway and to a USB
port of your computer.
If you prefer to program your A100 gateway using the LAN connection, select
LAN as the programming interface and connect the A100 gateway to the LAN
and to the power supply.
2.
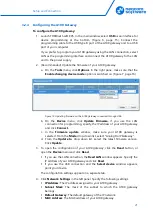
(Recommended) Update the firmware of your A100 gateway:
a.
On the
Tools
menu, click
Options
. In the right pane, make sure that the
Enable changing device mode
option is switched on (Figure 7, page 16).
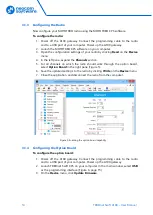
Figure 13: Updating firmware on the A100 gateway connected through USB
b.
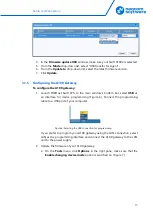
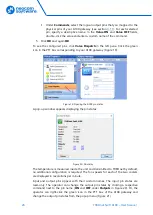
On the
Device
menu, click
Update Firmware
. If you use the LAN
connection for programming, specify the IP address of your A100 gateway
and click
Connect
.
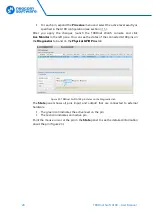
c.
In the
Firmware update
window, make sure your A100 gateway is
selected. From the
Mode
drop-down list, select "Analog RoIP Gateway".
d.
From the
Update
to
drop-down list, select the latest firmware version.
Click
Update
.
3.
To open the configuration of your A100 gateway, click the
Read
button, or
open the
Device
menu and click
Read
.
If you use the LAN connection, the
Read LAN
window appears. Specify the
IP address of your A100 gateway and click
Read
.
If you use the USB connection and the
Select device
window appears,
point your device.
The configuration settings appear on a separate tab.
4.
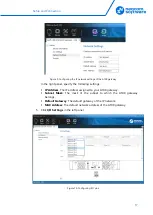
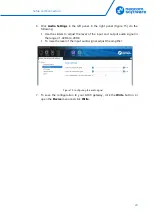
Click
Network Settings
in the left panel. Specify the following settings:
IP Address
: The IP address assigned to your A100 gateway.
Subnet Mask
: The mask of the subnet to which the A100 gateway
belongs.
Default Gateway
: The default gateway of the IP network.
MAC Address
: The MAC address of your A100 gateway.


