TRBOnet Configuration
25
To configure pins:
1.
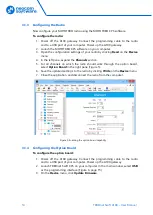
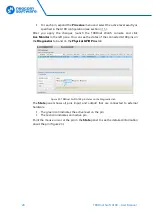
In the TRBOnet Dispatch Console, click
Administration
and
Radio Systems
in
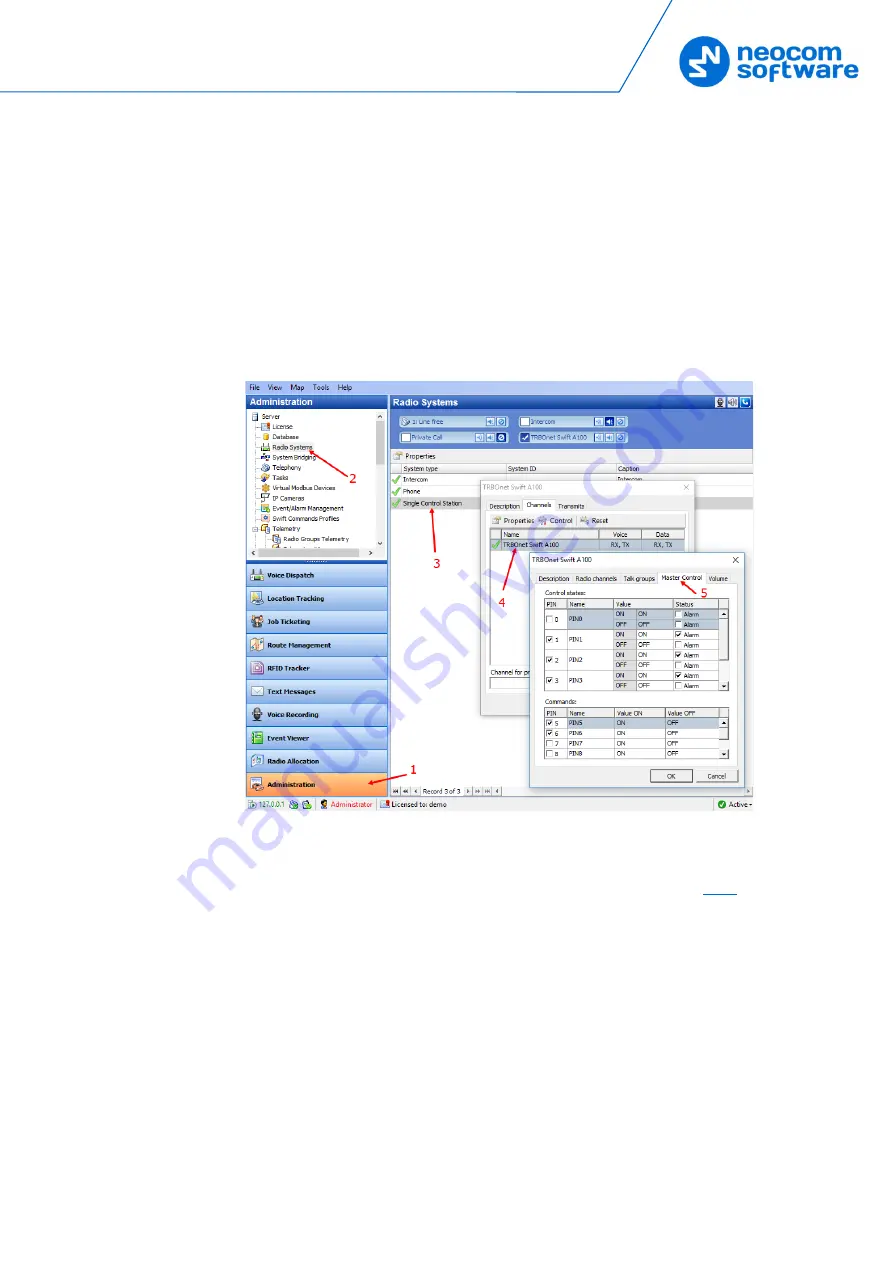
the left pane (Figure 18, step 1 and 2).
2.
In the right pane, the list of the registered radio systems appears. Double-click
the radio system associated with your A100 gateway (Figure 18, step 3).
3.
In the popup window, click the
Channels
tab. Double-click the channel
(Figure 18, step 4), or select it and click
Properties
. Another popup window
appears.
4.
In the second popup window, click the
Master Control
tab and configure
pins.
Figure 18: Configuring the A100 gateway pins in TRBOnet Dispatch Console
Under
Control states
, select the logical input pins that you have mapped
in the configuration of your A100 gateway (see section
). Do not
select pin 0. For each selected pin:
Double-click the value in the
Name
field and enter a descriptive pin
name.
In the
Value
field, you see the pin states (ON and OFF) and their
displayed values (also ON and OFF by default). If necessary, double-
click the value in the second column and enter a custom name of the
pin state.
In the
Status
field, select
Alarm
for the TRBOnet Dispatch Console
operator to see an alarm box when the given pin state is detected.


