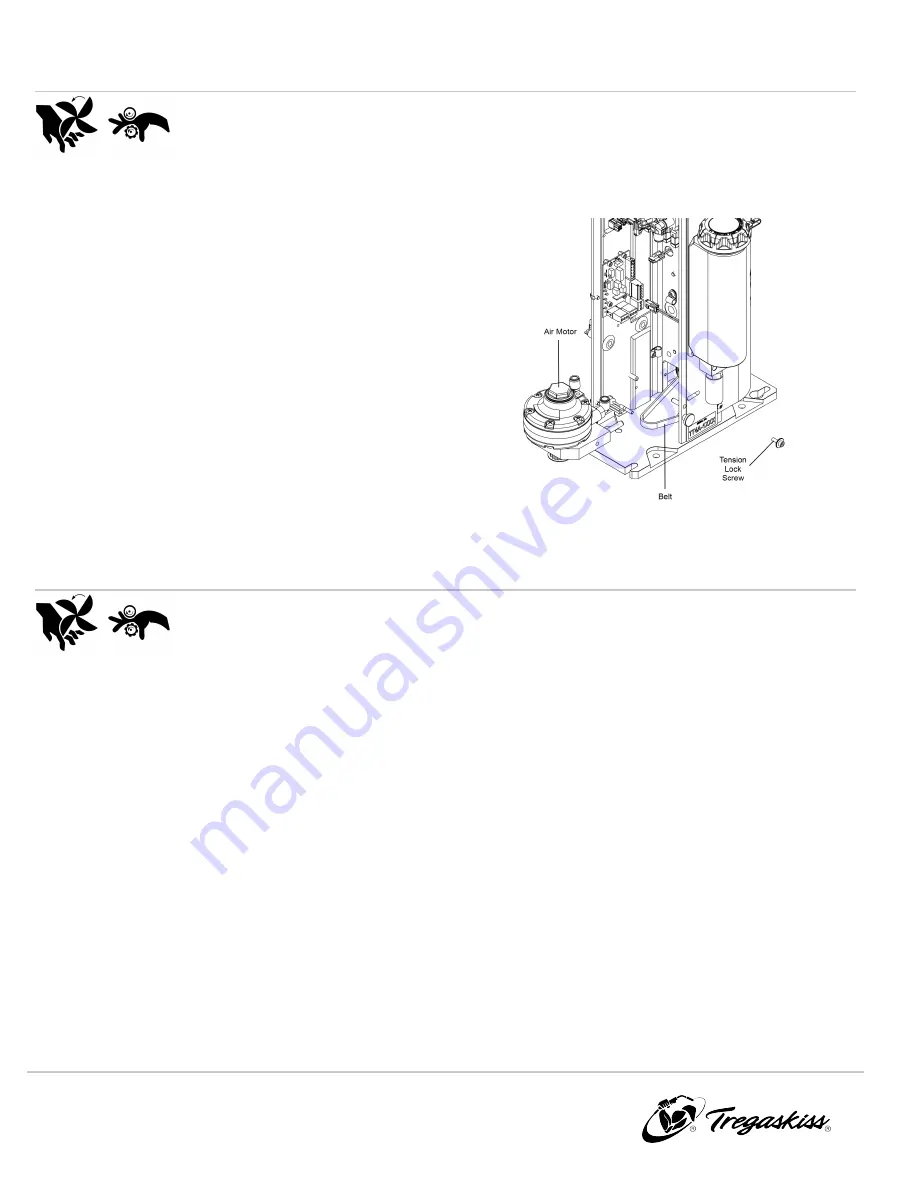
9-3 Replacing the Air Motor
WARNING:
Ensure air and power supply is off and disconnected
before proceeding. Please follow your facility's lockout / tagout
procedures.
1. Open the rear cover by loosening the two (2) thumb screws or
remove it completely by removing the three (3) BHCS using a 3
mm Allen wrench.
2. Remove the tension lock screw located on the side of the
reamer under the reservoir.
3. Push the motor in to release belt tension, and slide the belt off
the front pulley at the same time.
4. Disengage belt from the rear pulley.
5. Release the air lines from the quick disconnect air fittings at the
front of the motor.
6. Pull the motor out.
IMPORTANT:
Be careful not to lose the belt
tension spring.
7. Reverse the order of the above steps for reassembly.
Figure 9-C
9-4 Replacing the Drive Belt
WARNING:
Ensure air and power supply is off and disconnected before proceeding. Please follow your facility's lockout / tagout
procedures.
1. Open the rear cover.
2. Loosen the tension lock screw.
3. Push the motor in to release belt tension, and slide the belt off the front pulley at the same time.
4. Remove the belt from the rear pulley.
5. Reverse the order of the above steps for reassembly.
28
OM-TT4A-1.0

