9-9 Removing the Anti-Spatter Fluid Reservoir
WARNING:
Ensure air and power supply is off and disconnected
before proceeding. Please follow your facility's lockout / tagout
procedures.
A. To Remove the Reservoir
1. It is recommended that the reservoir be empty prior to
removing it from the reamer.
2. In the event that there is still fluid left in the reservoir, it can be
emptied while still secured onto the reamer.
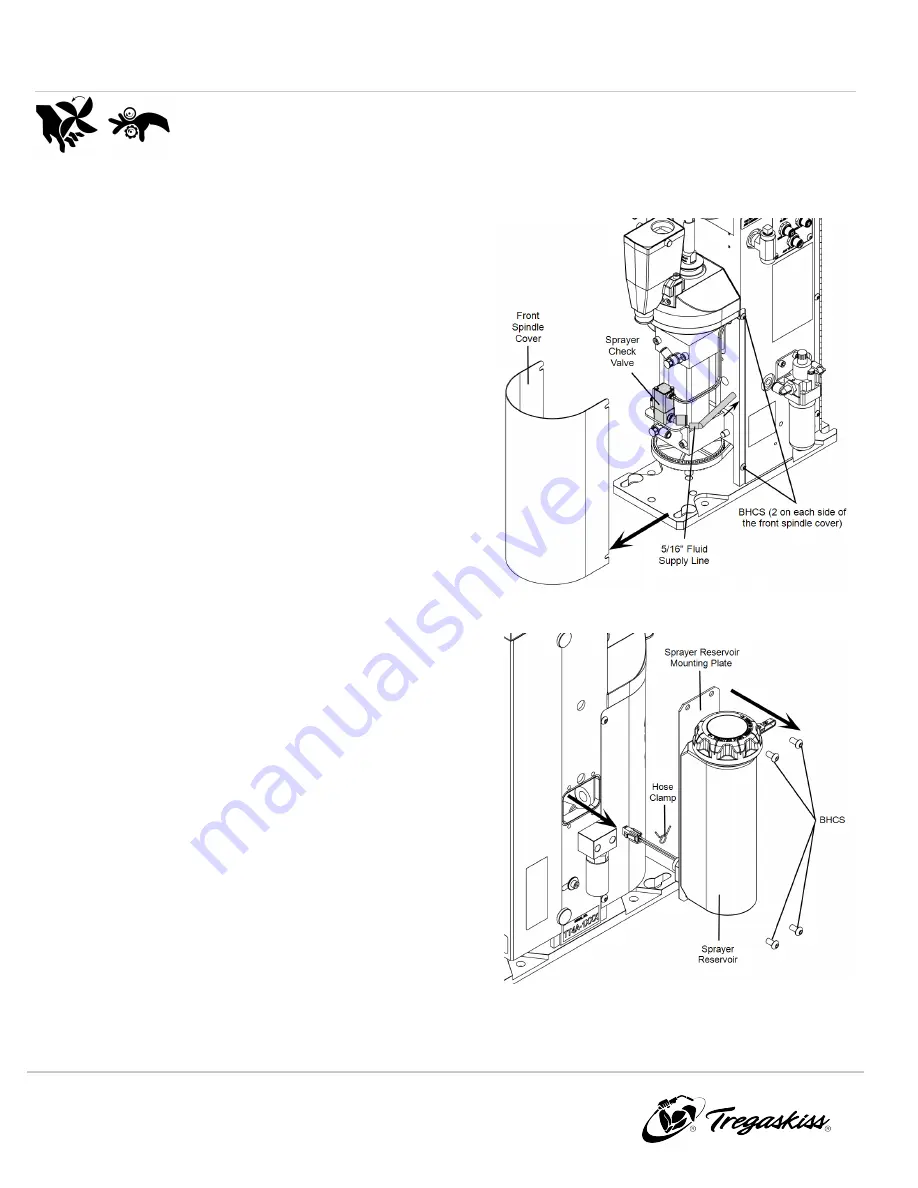
a. Remove the front spindle cover by loosening the 4 BHCS
on either side of the cover.
b. On the right hand side of the sprayer check valve there is a
black 5/16” fluid supply line.
Before disconnecting the
supply line, have a small container ready to catch the
fluid as it drains out.
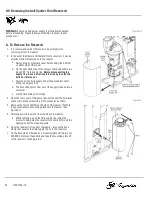
c. Disconnect the fluid supply line at the quick disconnect
fitting. (see Figure 9-H)
d. The fluid will begin to flow out of the supply line and into a
container.
e. Let the fluid drain until it stops.
3. Open the rear cover of the reamer and disconnect the fluid level
sensor (two black wires with a 2-Pin connector on them).
4. Remove the four (4) BHCS on the side of the reamer that hold
the sprayer reservoir mounting plate onto the reamer. (see
Figure 9-I)
5. Carefully pull the reservoir from the side of the reamer.
a. While removing, push the fluid supply line inside the
reamer to help guide the reservoir connection through the
opening under the mounting plate.
6. Once the reservoir is free from the reamer, remove the hose
clamp that secures the fluid supply line onto the reservoir.
7. On the back side of the reservoir mounting plate will be two (2)
M6 BHCS. Remove these bolts and take the mounting plate off
of the reservoir. (see Figure 9-J)
Figure 9-H
Figure 9-I
32
OM-TT4A-1.0

