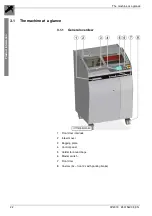
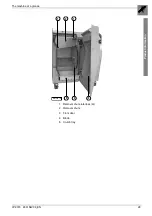
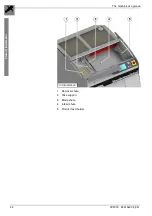
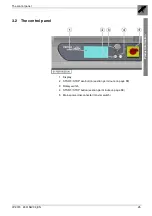

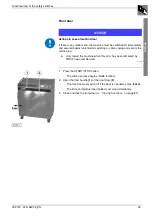

Set-up
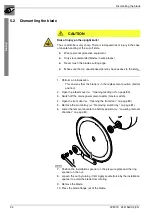
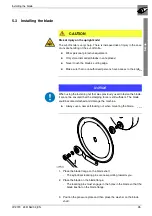
Installing the blade
36
07/2019 244156V03_EN
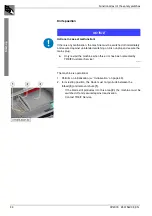
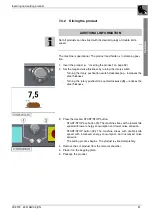
- The locating pins protruding through the blade must engage in the
holes on the pressure plate so that it rests fully against the blade.
4. Screw the nut onto the knife shaft and tighten the nut hand-tight with a
ring spanner.
- Use the installation spanner to prevent the blade from turning.
5. Lift the removal chute (
“Lifting removal chamber:” on page 86).
6. Insert the crumb tray (
“Inserting crumb tray:” on page 86).
7. Close and lock the door (
“Closing front door:” on page 87).
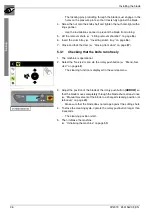
5.3.1
Checking that the knife runs freely
1. The machine is operational.
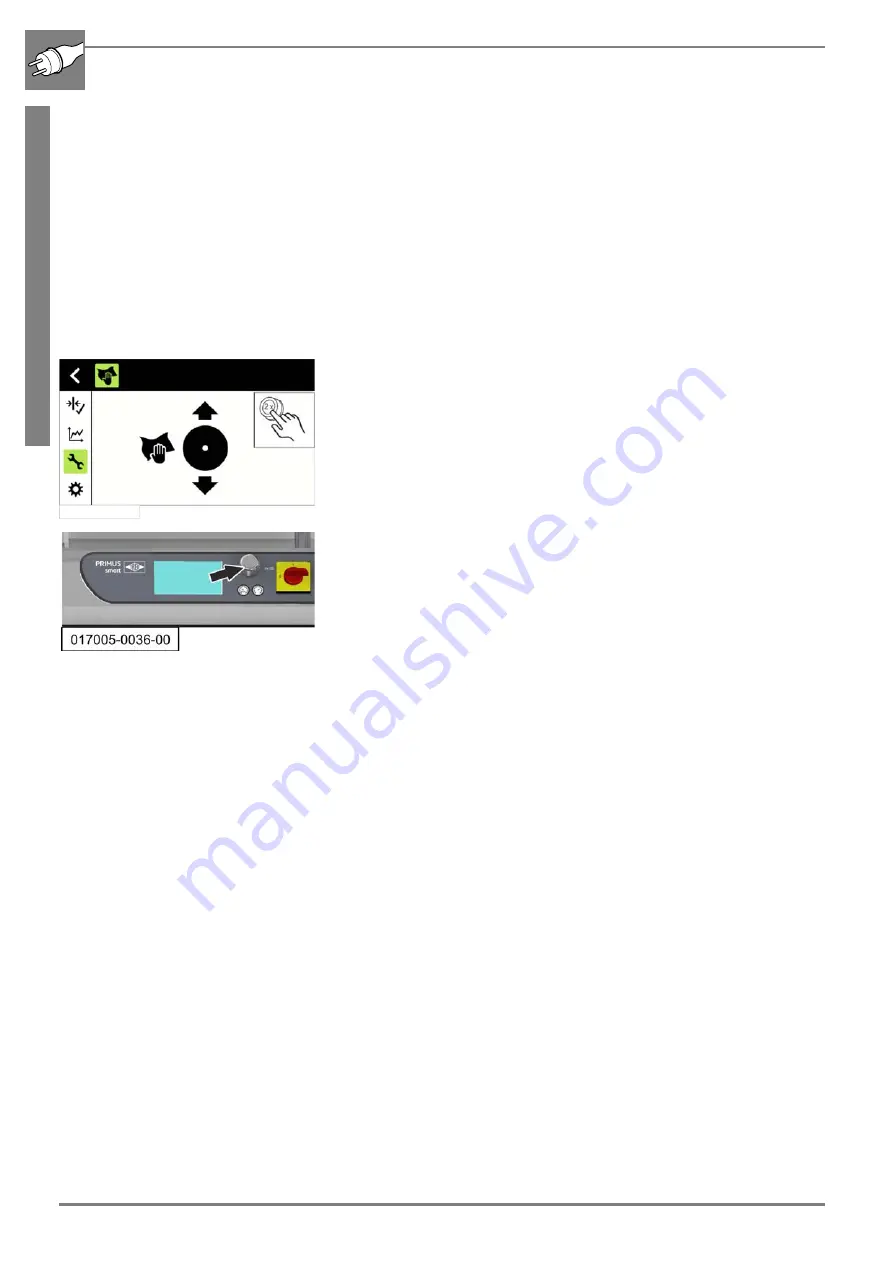
2. Select the “Service” menu via the rotary pushbutton (
“Menü „Ser-
vice“” on page 68).
- The cleaning function is displayed in the service menu.
3. Adjust the position of the blade at the rotary pushbutton
(ARROW)
so
that the blade moves completely through the blade chute at least once
(
“Manual movement of the blade to a changed cleaning position (al-
ternative)” on page 69).
- Make sure that the blade does not scrape against the cutting chute.
4. To close the cleaning cycle, operate the rotary pushbutton longer than
3 seconds.
- The cleaning position is left.
5. Then initialise the machine.
(
“Initialising the machine” on page 59)
Summary of Contents for PRIMUS 400
Page 2: ......
Page 3: ......
Page 4: ......
Page 7: ......
Page 11: ...Table of contents Table of contents 07 2019 244156V03_EN...
Page 31: ...Safety Safety layout 20 07 2019 244156V03_EN...
Page 43: ...Transport and installation Installation and connection 32 07 2019 244156V03_EN...
Page 57: ...Start up Switch off 46 07 2019 244156V03_EN...
Page 69: ...Operation If a malfunction occurs 58 07 2019 244156V03_EN...
Page 85: ...Visualisation Additional information on the display 74 07 2019 244156V03_EN...
Page 104: ...Maintenance Sharpening the blade 07 2019 244156V03_EN 93...
Page 105: ...Maintenance Sharpening the blade 94 07 2019 244156V03_EN...
Page 109: ...Help and Service If any fault occurs 98 07 2019 244156V03_EN...
Page 116: ...Index 07 2019 244156V03_EN 105 W Workplace lighting 10...
Page 117: ...Index 106 07 2019 244156V03_EN...


