background image

ENGLISH

ENGLISH

12

13

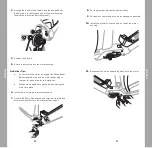
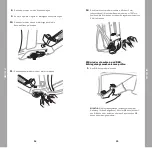
12.

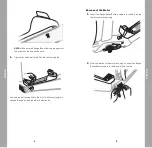
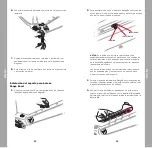
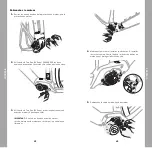
  Reinstall the motor guard. Use the 3mm hex wrench 

(aluminum frame) or the T25 Torx wrench to torque the 
bolts to 5Nm.

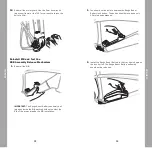
Reinstall RIB and Test the  

RBB Assembly Release Mechanism

 1.

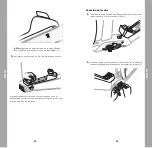
  Reinstall the RIB.

IMPORTANT:

 The Range Boost Battery assembly bolt 

(plunger) inside the RIB cavity should not contact the 
RIB or in any way impede the RIB installation.

 1.

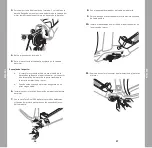
  You should not be able to depress the Range Boost 

Battery lock button. The button should move down only 
1-5mm when depressed.

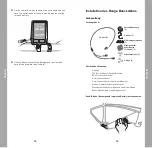
 2.

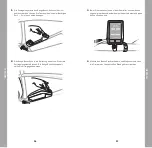
  Install the Range Boost Battery in the tray. Again depress 

the lock button. The Range Boost Battery assembly 
should not be released.

Summary of Contents for Diamant Range Boost Battery

Page 1: ...C Trek Diamant Range Boost Battery Manual ENGLISH DEUTSCH ESPAÑOL FRANCAIS 586593 1 ...

Page 2: ...ungsmechanismus prüfen Español Índice 28 Preparación 29 Desconexión del motor 31 Conexión del cable con forma de Y 32 Instalación del soporte para batería Range Boost 35 Conexión del motor 38 Reinstalación de la batería RIB y comprobación del mecanismo de liberación del conjunto de la batería Range Boost Francais Table des matières 41 Préparation 42 Débranchez le moteur 44 Raccordez le câble Y 45 ...

Page 3: ...me Small Phillips screwdriver Torque wrench with appropriate sockets Bosch connector and diagnostic tool Remove the Rechargeable Integrated Battery RIB Disconnect the Motor 1 Remove the four motor guard bolts and remove the motor guard 2 Use the IP40 Torx Plus wrench to LOOSEN the two aft motor bolts Do not remove the bolts 3 Use the IP40 Torx Plus wrench to remove the front four motor bolts 2 per...

Page 4: ...the Y Cable A B C 1 Temporarily remove the S hook and support the motor with one hand 2 Use a small Phillips head screwdriver to remove the screw in the plastic cover see Figure A 3 Remove the cover from the top of the motor housing see Figure B Figure A Figure B 4 Re install the S hook to support the motor 5 With the battery cable disconnected from the motor pull the connector out from behind the...

Page 5: ...hree bolts spacers and o rings to create the Range Boost Battery Mount assembly BOLT O RING SPACER NOTES There are three spacers included in the Range Boost bag of contents for carbon frames Carbon frames will need spacers between the Range Boost Battery Mount and the frame to prevent surface damage to the bike frame The o rings act as a retention system to keep the spacers and bolts in place on t...

Page 6: ...m Do not overtighten Use only the bolts supplied in the kit If a different length is needed then only use Grade 8 or better bolts Reconnect the Motor 1 Insert the Range Boost Battery cable into the hole on the top of the motor housing 2 From the inside of the motor housing connect the Range Boost Battery cable to the A end of the Y cable ...

Page 7: ... on top and the motor power plug in the rear for ease of motor re installation b Make sure no cables are pinched when moving the motor into place 6 Install the four forward motor mount bolts 7 Use the IP40 Torx Plus wrench and torque all forward and aft motor mount bolts to the manufacturer s spec 8 Put the grommet around the battery cable 9 Put as much cable inside the motor housing as possible 1...

Page 8: ...he RIB IMPORTANT The Range Boost Battery assembly bolt plunger inside the RIB cavity should not contact the RIB or in any way impede the RIB installation 1 You should not be able to depress the Range Boost Battery lock button The button should move down only 1 5mm when depressed 2 Install the Range Boost Battery in the tray Again depress the lock button The Range Boost Battery assembly should not ...

Page 9: ...rbereitung Packungsinhalt Kontaktabdeckung 1 Distanzscheiben 3 O Ringe 3 Y Kabel 1 S Haken 1 M5 Montageschrauben 3 Motorgehäuse Kabelstopfen für Y Kabel 1 Erforderliches Werkzeug S Haken T25 Torx Schlüssel Carbon Rahmen IP40 Torx Plus Schlüssel 4 mm Inbusschlüssel 3 mm Inbusschlüssel Aluminium Rahmen Kleinen Kreuzschlitz Schraubendreher Drehmomentschlüssel mit passenden Bit Aufsätzen Bosch Steckve...

Page 10: ...plett herausdrehen 3 Mit dem IP40 Torx Plus Schlüssel die vorderen vier Motorschrauben 2 pro Seite herausdrehen WICHTIG Sobald die vorderen Motorschrauben entfernt wurden muss der Motor abstützt werden um ein nach unten schwingen zu verhindern 4 Den Motor abstützen und den S Haken einsetzen Den Haken wie abbildet verwenden von innen am Motorgehäuse um den Lack des Bikes zu schützen 5 Das Akkukabel...

Page 11: ...4 Den S Haken zum Abstützen des Motors wieder einsetzen 5 Bei abgeklemmtem Akkukabel den Steckverbinder hinter dem Motor herausziehen 6 Den Stecker B des Y Kabels mit dem Steckverbinder des Akkukabels verbinden 7 Das restliche Kabel von Stecker B hinter der hinteren Akkuhalterung unten am Unterrohr verstauen 8 Das Kabel von Stecker A hinter dem Motor nach oben führen Halterung für Range Boost Akku...

Page 12: ...ben an der Halterung zu fixieren 3 Die Halterung des Range Boost Akkus an den Löchern im Unterrohr ausrichten und einsetzen 4 Diese Kolbenschraube Kreis herausdrehen um den Entriegelungsmechanismus bei eingesetztem RIB Akku zu reduzieren Diese Kolbenschraube hineindrehen wenn der Entriegelungsmechanismus das Einsetzen des RIB Akkus behindert HINWEIS Achte darauf dass die Kolbenschraube des Range B...

Page 13: ...inter der innenliegenden Akkuhalterung 4 Den S Haken entfernen 5 Den Motor nach oben in das Motorgehäuse bewegen Profi Tipp a Wenn der Motor nach oben bewegt wird am Kabel für den Range Boost Akku sowie hinten am Motoranschlussstecker wackeln um den Wiedereinbau des Motors zu vereinfachen b Beim Positionieren des Motors darauf achten dass keine Kabel eingeklemmt werden 6 Die vier vorderen Motorsch...

Page 14: ...Den Motorschutz wieder montieren Mit dem 3 mm Inbusschlüssel Aluminium Rahmen oder dem T25 Torx Schlüssel die Schrauben mit einem Anzugsdrehmoment von 5 Nm festziehen RIB wieder einsetzen und RBB Entriegelungsmechanismus prüfen 1 Den RIB Akku wieder einsetzen WICHTIG Die Montageschraube Kolbenschraube der Halterung für den Range Boost Akku im RIB Akkufach darf den RIB Akku nicht berühren oder das ...

Page 15: ...oost Akku in die Halterung einsetzen Erneut die Entriegelungstaste drücken Die Range Boost Akkueinheit sollte nicht freigegeben werden 3 Beim Einschalten sollten auf dem Controller nun zwei Akkus angezeigt werden und außerdem sollte der Ladezustand jedes Akkus zu sehen sein 4 Mithilfe des Bosch Steckverbinders und Diagnosetools kann die Firmware auf den aktuellen Stand gebracht werden ...

Page 16: ...n de 3 mm cuadros de aluminio Destornillador Phillips pequeño Llave dinamométrica con adaptadores compatibles Conector y herramienta de diagnóstico Bosch Extrae la batería RIB Rechargeable Integrated Battery Desconexión del motor 1 Quita los cuatro tornillos del protector del motor y retira el protector 2 AFLOJA los dos tornillos traseros del motor con la llave Torx Plus IP40 No retires los tornil...

Page 17: ...n del cable con forma de Y A B C 1 Quita momentáneamente el gancho con forma de S y sujeta el motor con una mano 2 Utiliza un destornillador Phillips pequeño para quitar el tornillo de la tapa de plástico ver Figura A 3 Quita la tapa de la parte superior de la carcasa del motor ver Figura B Figura A Figura B 4 Vuelve a colocar el gancho con forma de S para sujetar el motor 5 Con el cable de la bat...

Page 18: ...os del soporte TORNILLO JUNTA TÓRICA ESPACIADOR NOTAS En la bolsa que incluye la tornillería hay tres espaciadores para los cuadros de carbono Los cuadros de carbono requieren el uso de espaciadores entre el soporte de la batería Range Boost y el cuadro para evitar daños en la superficie del cuadro Las juntas tóricas actúan como sistema de retención para que los espaciadores y los tornillos no se ...

Page 19: ...icamente los tornillos suministrados en el kit Si fuera necesario usar tornillos de diferente longitud utiliza solo tornillos de grado 8 o mejores Conexión del motor 1 Introduce el cable de la batería Range Boost por el orificio de la parte superior de la carcasa del motor 2 Desde el interior de la carcasa del motor conecta el cable de la batería Range Boost al extremo A del cable con forma de Y ...

Page 20: ...imentación del motor de la parte trasera para facilitar la instalación del motor b Cuando estés colocando el motor asegúrate de no pillar ningún cable 6 Instala los cuatro tornillos de sujeción de la parte delantera del motor 7 Con la llave Torx Plus IP40 aprieta los tornillos delanteros y traseros del motor de acuerdo con las especificaciones del fabricante 8 Pon el pasacables alrededor del cable...

Page 21: ...stalar la batería RIB IMPORTANTE El tornillo de ensamblaje émbolo de la batería Range Boost alojado dentro de la cavidad de la batería RIB no debe estar en contacto con la batería RIB o impedir de forma alguna la instalación de la misma 1 No deberías poder presionar el botón de bloqueo de la batería Range Boost Al apretarlo solo debe bajar 1 5 mm 2 Coloca la batería Range Boost en la base de acopl...

Page 22: ...réparation Contenu de l emballage Protection des contacts 1 Entretoises de montage 3 Joint torique 3 Câble Y 1 Crochet en S 1 Boulons de montage M5 3 Prise du câble Y sur le support du moteur 1 Outils requis Crochet en S Clé Torx T25 cadre en carbone Clé Torx Plus IP40 Clé Allen de 4 mm Clé Allen de 3 mm cadre en aluminium Petit tournevis cruciforme Clé dynamométrique avec douilles adaptées Connec...

Page 23: ...les boulons 3 Utilisez la clé Torx Plus IP40 pour retirer les quatre boulons avant du moteur 2 de chaque côté IMPORTANT Une fois les boulons avant du moteur retirés maintenez le moteur pour éviter qu il ne se balance librement 4 Maintenez le moteur et installez le crochet en S Installez le crochet comme illustré depuis l intérieur du boîtier du moteur pour protéger la finition du vélo 5 Débranchez...

Page 24: ... en S pour maintenir le moteur 5 Tandis que le câble de la batterie est débranché du moteur extrayez le connecteur par l arrière du moteur 6 Raccordez l extrémité B du câble Y au connecteur de la batterie 7 Rangez l excédent de câble Y extrémité B derrière le support arrière de la batterie dans la base du tube diagonal 8 Acheminez le reste du câble Y extrémité A par le dessus et l arrière du moteu...

Page 25: ...ger la surface du cadre Les joints toriques font office de système de retenue maintenant les entretoises et les boulons en place sur le support 3 Placez l ensemble batterie Range Boost sur le tube diagonal en alignant les trous 4 Dévissez ce boulon de piston entouré pour réduire la course du verrou lorsque la RIB est installée Vissez ce boulon de piston si le verrou empêche l installation de la RI...

Page 26: ...terne 4 Retirez le crochet en S 5 Faites pivoter le moteur vers le haut jusque dans le boîtier du moteur Conseils de pro du montage a En faisant pivoter le moteur vers le haut faites bouger le câble de la batterie Range Boost vers le haut et la prise d alimentation du moteur à l arrière pour réinstaller le moteur plus facilement b Assurez vous qu aucun câble ne soit pincé lors de l installation du...

Page 27: ...sur le moteur 12 Réinstallez la protection du moteur Utilisez la clé Allen de 3 mm cadre en aluminium ou la clé Torx T25 pour serrer les boulons à 5 Nm Réinstallez la batterie intégrée amovible et testez le mécanisme de blocage de la batterie Range Boost 1 Réinstallez la batterie intégrée amovible RIB IMPORTANT Le boulon de montage de la batterie Range Boost piston situé dans la cavité de la RIB n...

Page 28: ...st utilisé 2 Installez la batterie Range Boost dans le support Rappuyez sur le bouton de blocage L ensemble batterie Range Boost ne doit pas se débloquer 3 Au démarrage le dispositif de commande doit afficher deux batteries ainsi que le niveau de charge de chaque batterie 4 Utilisez le connecteur et l outil de diagnostic Bosch pour vérifier que le micrologiciel est à jour ...

Page 29: ...nge Boost Akku Prüfe auf trekbikes com manuals ob eine neuere Version des Handbuchs vorhanden ist Este es el manual de tu batería Range Boost para Trek Diamant Consulta las actualizaciones en trekbikes com manuals Voici le manuel de votre batterie Range Boost Trek Diamant Pour obtenir la version la plus récente du manuel consultez le site trekbikes com manuals ...

Reviews: