-15-
2
1
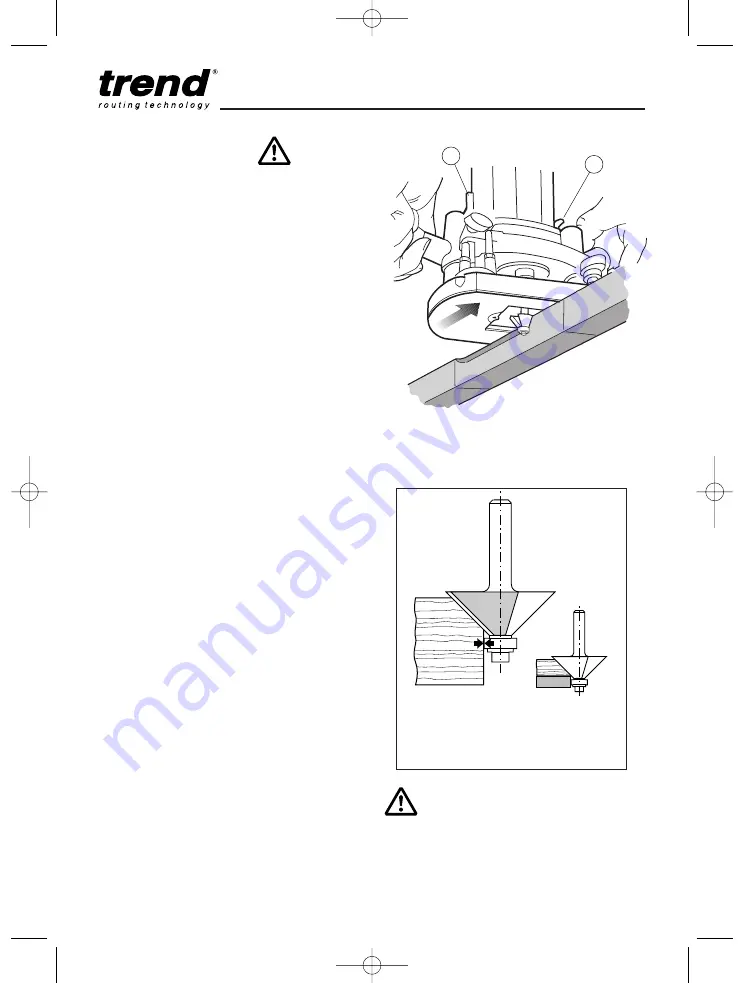
The guide bearing
ensures the cutter
follows the workpiece.
Where the material thickness leaves
insufficient room for the bearing to make
contact, a second piece of material can be
temporarily fixed beneath it for the ball
bearing to follow.
Keep downward pressure with
the inside hand to prevent the
router from tipping.
T4
Bearing Guided Cutters
Edge profiling and shaping cutters are available
with a bearing fitted to the end. This enables
shaped or straight workpieces to be routed
without the need for a guiding device such as a
side-fence or batten.
The edge must be free from imperfections as
these will be reflected in the finish of the mould.
Often alternative diameters of bearings are
offered which will change the shape of the
resulting mould.
With certain shapes such as the chamfer cutter
below, increasing the depth of cut will produce a
larger chamfered edge.
■
Fit the bearing guided cutter into the router
collet.
■
Place router onto the workpiece.
■
Set height of cutter using the depth stop (1).
■
Switch on the machine.
■
After releasing the plunge locking lever (2),
lower the machine slowly as far as the depth
stop.
■
With bearing of cutter running along board
edge, mould the edge of the workpiece by
moving the router in the direction shown.
■
A continuous motion should be used to
prevent burning of the workpiece. When
possible, take a number of passes at
increased cutter depths. A light final pass will
produce a good finish.
■
When complete, retract the carriage by
releasing the locking grip knob.
■
Switch off the router.
MANU/T4 v2.0 30/8/07 1:08 pm Page 15


