VJS/AG/36
-6-
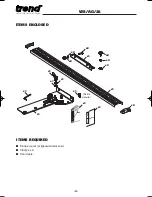
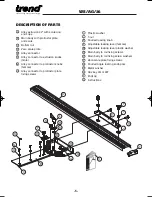
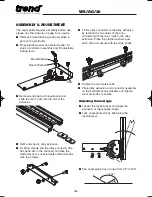
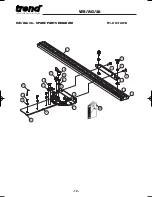
The angle guide requires assembly before use,
please use the drawing on page 5 as a guide.
I
Remove knurled locking knob and place in
park on the protractor.
I
Place plastic washer and metal washer on
stud on protractor assembly and fit adjustable
locking lever.
ASSEMBLY & ADJUSTMENT
Park
Metal Washer
Plastic Washer
I
Remove end caps on the extrusion and
slide the two T-nuts into the slot of the
extrusion.
I
Refit end caps to alloy extrusion.
I
Fit fixing screws into the alloy connector (the
hex head sits in the channel) and then the
metal washers. Loosely tighten female knobs
onto the screws.
I
Fit the alloy connector to the alloy extrusion
by locating the two holes of the alloy
connector with the two T-nuts in the alloy
extrusion. Place the plastic washers over
each hole and secure with the male knobs.
Adjusting Guide Angle
I
Loosen the locking lever and angle the
extrusion at the required angle.
I
Lock angle protractor by tightening the
locking lever.
I
The angle guide has a range from 25º to 155º.
90
80
70
80
70
50
60
40
30
0
5
5
60
50
40
30
155°
25°
I
Tighten the two male knobs.
I
Place alloy extrusion and connector assembly
on the protractor body washers and tighten
the male knobs to secure.
MANU/VJS/AG/36 v1.0 3/2/10 12:57 Page 6


