background image

do not. IEEE 802.11 Shared Key authentication accomplishes this without the 
need to transmit the secret key in clear. Requiring the use of the WEP privacy 
mechanism. 

Auto:

 Auto is the default authentication algorithm. It will change its 

authentication type automatically to fulfill client’s requirement. 

Wireless Isolation: 

Select to enable or disable the Wireless Isolation feature. 

When Wireless Isolation is enabled, wireless clients will not be able to access to 
the other wireless clients. 

Ethernet Isolation: 

Select to enable or disable the Ethernet Isolation feature. 

When Ethernet Isolation is enabled, wireless clients will not be able to access to 
the Ethernet clients. 

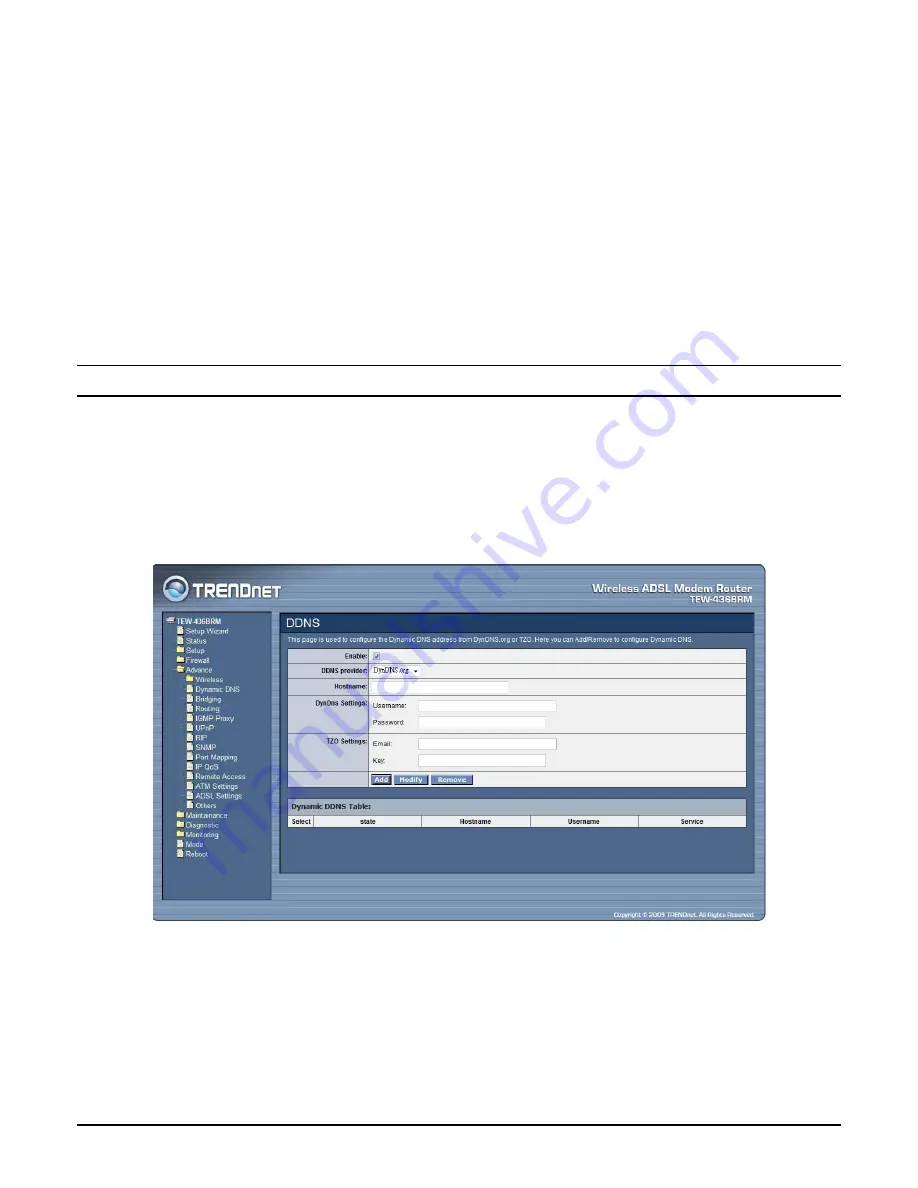
Dynamic DNS 
Each time your device connects to the Internet, your ISP assigns a different IP 
address to your device. In order for you or other users to access your device from 
the WAN-side, you need to manually track the IP that is currently used. The 
Dynamic DNS feature allows you to register your device with a DNS server and 
access your device each time using the same host name. The Dynamic DNS page 
allows you to enable/disable the Dynamic DNS feature. 


Enable:

 Checked to enable this registration account for the DNS server. 

DDNS Provider: 

There are two DDNS providers to be selected in order to register 

your device with: DynDNS and TZO. A charge may occur depends on the service 
you select. 

Hostname: 

Domain name to be registered with the DDNS server. 

53 

Summary of Contents for TEW-436BRM

Page 1: ...i ...

Page 2: ...gital device pursuant to Part 15 of the FCC Rules These limits are designed to provide reasonable protection against harmful interference in a residential installation This equipment generates uses and can radiate radio frequency energy and if not installed and used in accordance with the instructions may cause harmful interference to radio communications However there is no guarantee that interfe...

Page 3: ... CE statement Europe EU Declaration of Conformity This device complies with the essential requirements of the R TTE Directive 1999 5 EC The following test methods have been applied in order to prove presumption of conformity with the essential requirements of the R TTE Directive 1999 5 EC EN60950 1 2006 Safety of Information Technology Equipment EN 50385 2002 Product standard to demonstrate the co...

Page 4: ...direttiva 1999 5 CE Latviski Latvian Ar šo TRENDnet deklarē ka TEW 436BRM atbilst Direktīvas 1999 5 EK būtiskajām prasībām un citiem ar to saistītajiem noteikumiem Lietuvių Lithuanian Šiuo TRENDnet deklaruoja kad šis TEW 436BRM atitinka esminius reikalavimus ir kitas 1999 5 EB Direktyvos nuostatas Nederlands Dutch Hierbij verklaart TRENDnet dat het toestel TEW 436BRM in overeenstemming is met de e...

Page 5: ... PC NETWORK TCP IP SETTING 9 Windows 95 98 ME 9 Windows 2000 10 Windows XP Vista 11 CONFIGURATION 12 Login to the WLAN ADSL Router through Wireless LAN 12 Login to the WLAN ADSL Router 12 Using the Web Browser 12 Configuration Menu 14 SETUP WIZARD 15 Step 1 Determine Connection Method 15 Step 2 ADSL Setting 16 Step 3 Select Channel Mode 16 Step 4 Completed the Setup Wizard 28 MANUAL SETINGS 29 Sta...

Page 6: ... 61 IP QoS 62 Remote Access 63 ATM Settings 64 ADSL Settings 65 Maintainance 67 Backup Restore 67 Password 67 Upgrade Firmware 69 Access Controls 70 TR 069 Config 71 Logout 72 Diagnostic 73 Ping 73 ATM Loopback 74 ADSL 75 Diagnostic Test 75 Monitoring 76 DHCP Clients 76 Routing Table 76 ARP Table 77 Bridge FDB Table 77 Interface Statistics 78 ADSL Statistics 78 Mode 79 Reboot 80 TECHNICAL SPECIFIC...

Page 7: ...er refers to your 54Mbps Wireless G 2 2 ADSL Modem Router Overview of this User s Guide Introduction Describes the 54Mbps Wireless G 2 2 ADSL Modem Router and its features Unpacking and Setup Helps you get started with the basic installation of the 54Mbps Wireless G 2 2 ADSL Modem Router Identifying External Components Describes the front panel rear panel and LED indicators of the 54Mbps Wireless ...

Page 8: ...r wired WLAN LAN and WAN Internet Resource sharing Share resources such as printers scanners and other peripherals File sharing Exchange data messages and distribute files thus making good use of hard disk space Online gaming Through the local area network online gaming and e commerce services can be easily setup Firewall A built in firewall function for security and anti hacking systems Supported...

Page 9: ... Antenna orientation can also have a large impact on your wireless signal Use the wireless adapter s site survey tool to determine the best antenna orientation for your wireless devices 5 Interference from devices that produce RF radio frequency noise can also impact your signal Position your wireless devices away from anything that generates RF noise such as microwaves radios and baby monitors 6 ...

Page 10: ...Setup The setup of the WLAN ADSL Router can be performed properly using the following methods The power outlet should be within 1 82 meters 6 feet of the Broadband Router Visually inspect the DC power jack and make sure that it is fully secured to the power adapter Make sure that there is proper heat dissipation and adequate ventilation around the WLAN ADSL Router Do not place heavy objects on the...

Page 11: ...g device malfunction Off Power off DSL Green Blinking Pending ADSL line synchronization Solid on ADSL line synchronized Internet Green Blinking Internet activity Solid on Internet connectivity no activity Red Solid on Internet connection setup failed Off No Internet connection LAN 1 4 Green Blinking Ethernet activity Solid on Ethernet connection no activity Off No Ethernet connection WLAN Green Bl...

Page 12: ...Off Wireless disabled WPS Green Blinking WPS in progress Solid on WPS success Red Solid on WPS fail Off WPS disabled 6 ...

Page 13: ...ts for connecting to either 10Mbps or 100Mbps Ethernet connections DSL ADSL Port Connect to an active telephone line RJ 11 DC IN Receptor for the supplied power adapter ON OFF On Off Switch Press this button to turn the unit on or off WPS Button Press to enable Wi Fi Protected Setup RESET Holding the Reset button for 5 seconds restores the WLAN ADSL Router to its original factory default settings ...

Page 14: ...adapter to the Wireless ADSL Router Use only the power adapter provided Using a different one may cause hardware damage Check the installation The LEDs on the WLAN ADSL Router are clearly visible and the status of the network link can be seen instantly 1 With the power source on once the device is connected to the phone line and PCs the Power LAN WLAN and DSL INETRNET LEDs of the WLAN ADSL Router ...

Page 15: ...ista and are as follows Windows 95 98 ME 1 Click on the Network neighborhood icon found on the desktop 2 Click the right mouse button and a context menu will be show 3 Select Properties to enter the TCP IP setting screen 4 Select Obtain an IP address automatically on the IP address field 5 Select Disable DNS in the DNS field 9 ...

Page 16: ...open the Network dialup connection applet Double click on the Local area network connection icon Select Properties to enter the TCP IP setting window 1 In the Local area network status window click on Properties 2 In the Local area network connection window first select TCP IP setting and then select Properties 3 Set both IP address and DNS to Automatic configuration 10 ...

Page 17: ... cursor and click the right button on the My Network Place icon Select properties to enter the TCP IP setting window 1 Set IP address to Obtain an IP address automatically 2 Set DNS to Obtain DNS server address automatically 11 ...

Page 18: ...P Address 192 168 10 1 9 VPI VCI for ATM 5 35 9 ADSL Line mode Auto detect Login to the WLAN ADSL Router Before you configure this device note that when the WLAN ADSL Router make sure the host PC must be set on the IP subnet that can be accessed by the xDSL Cable modem For example when the default network address of the xDSL Cable modem Ethernet interface is 192 168 10 x then the host PC should be...

Page 19: ...s enter the user name and password to login to the main configuration window the default username and password is admin After entering the user name and password the main page comes up the screen will display the WLAN ADSL Router status 13 ...

Page 20: ...ck on the setup item that you want to configure There are ten options Setup Wizard Status Setup Firewall form router mode only Advance form router mode only Maintenance Diagnostic Monitoring Mode and Reboot as shown in the Configuration Menu screen Configure menu on Router mode Configure menu on Modem mode 14 ...

Page 21: ...ne Connection Method Choose Auto detect for auto detect the Internet connection method or Manual Selection for manually configure the ADSL setting Auto detect Selected the Auto detect then click Next button the wizard will automatically detect the first usable PVC and automatically detect PPPoE PPPoA and Bridge Protocol with DHCP Server available Manual Selection Selected the Manual Selection then...

Page 22: ... VCI value provided by ISP Encapsulation Select the encapsulation type for LLC or VC Mux ADSL modulation Select the ADSL modulation type defined by your ISP Step 3 Select Channel Mode Select the type of network protocol for 1483 Bridged 1483 MER PPPoE PPPoA or 1483 Routed 16 ...

Page 23: ...ext button the WLAN ADSL Router will save configuration and reboot the WLAN ADSL Router When rebooted the WLAN ADSL Router enabled the Test Internet Connection then click finish button for test Internet connection click close button close the setup wizard 17 ...

Page 24: ...1483 MER Selected the 1483 MER mode then click next button continuing the WAN IP setting Select whether user wants to specify an IP address manually or want DHCP to obtain an IP address automatically 18 ...

Page 25: ... will going on Click next button to save configuration and reboot the WLAN ADSL Router When rebooted the WLAN ADSL Router enabled the Test Internet Connection then click finish button for test Internet connection click close button close the setup wizard 19 ...

Page 26: ... Address Gateway IP Address Subnet Mask and Wan MAC if need to specify the other Wan MAC address in the text boxes click next button to continue the DNS server setting Setting the DNS server assigned by DHCP or manually click next button to save configuration and reboot the WLAN ADSL Router 20 ...

Page 27: ...ISP Password Enter the password provided by ISP Type Select the connection type for Continuous Connecting Connect on Demand or Manual connecting Idle Time Enter the idle time for Connect on Daemon when no Internet access during the idle time the ADSL connection will auto disconnect Default Route Setting the default router function disable or enable Type Select the IP address assign by DHCP or manu...

Page 28: ...Click next button to save configuration and reboot the WLAN ADSL Router 22 ...

Page 29: ...d the 1483 Routed mode then click next button continuing the WAN IP setting NAPT Checked to enable the NAPT on the WLAN ADSL Router Local IP Address Enter local IP address provided by ISP Gateway IP Address Enter gateway IP address provided by ISP Unnumbered Checked to enable the IP unnumbered on the WLAN ADSL Router Default Route Setting the default router function disable or enable 23 ...

Page 30: ...Setting the DNS server assigned by DHCP or manually click next button to save configuration and reboot the WLAN ADSL Router 24 ...

Page 31: ...7 Routed Selected the 1577 Routed mode then click next button continuing the WAN IP setting Select whether user wants to specify an IP address manually or want DHCP to obtain an IP address automatically 25 ...

Page 32: ...p will going on Click next button to save configuration and reboot the WLAN ADSL Router When rebooted the WLAN ADSL Router enabled the Test Internet Connection then click finish button for test Internet connection click close button close the setup wizard 26 ...

Page 33: ...n MAC address in the text boxes click next button to continue the DNS server setting Setting the DNS server assigned by DHCP or manually click next button to save configuration and reboot the WLAN ADSL Router When rebooted the WLAN ADSL Router enabled the Test Internet Connection then click finish button for test Internet connection click close button close the setup wizard 27 ...

Page 34: ...tep 4 Completed the Setup Wizard When rebooted the WLAN ADSL Router enabled the Test Internet Connection then click finish button for test Internet connection click close button close the setup wizard 28 ...

Page 35: ...s Click the Refresh button to update the status Setup The section enables users to configure the Internet ADSL LAN Wireless DHCP and Time Zone setting Internet Setup The WLAN ADSL Router comes with 8 ATM Permanent Virtual Channels PVCs at the most There are mainly three operations for each of the PVC channels add delete and modify And there are several channel modes to be selected for each PVC cha...

Page 36: ...Bridged 1483 MER PPPoE PPPoA 1483 Routed or 1577 Routed provide by ISP Enable NAPT Checked to enable the NAPT function on the WLAN ADSL Router Admin Status Enable or disable the ATM VC setting when adding to the ATM VC Table PPP Settings When the channel mode selected by PPPoE or PPPoA User Name Enter the user name provide by ISP Password Enter the user name provide by ISP Type Select the connecti...

Page 37: ...n DNS Automatically Select this item if you want to use the DNS servers obtained by the WAN interface via the auto configuration mechanism Set DNS Manually Select this item to configure up to three DNS IP addresses DNS 1 3 Ethernet the IP address of the DNS server Add Button Click add button to add the new VC setting to the ATM VC Table Modify Button Selected on of VC setting from the Current ATM ...

Page 38: ...he LAN IP Address The secondary IP address setting of the LAN Subnet Mask The secondary Subnet Mask setting of the LAN IGMP Snooping Enable disable the IGMP snooping function for the multiple bridged LAN ports Ethernet to Wireless Blocking When enabled the Ethernet to Wireless Blocking all of Ethernet users can t communicate with WLAN users Wireless This section enables users to configuration the ...

Page 39: ...hz G Selected if you are allowing the 802 11g wireless clients connect to the WLAN ADSL Router only SSID Type an SSID in the text box The SSID of any wireless device must match the SSID typed here in order for the wireless device to access the LAN and WAN via the WLAN ADSL Router Channel Select a transmission channel for wireless communications The channel of any wireless device must match the cha...

Page 40: ...ryption method and incorporates Message Integrity Code MIC to provide protection against hackers WPA2 AES WPA2 also known as 802 11i uses Advanced Encryption Standard AES for data encryption AES utilized a symmetric 128 bit block data encryption WAP2 Mixed The AP supports WPA TKIP and WPA2 AES for data encryption The actual selection of the encryption methods will depend on the clients 802 1x Auth...

Page 41: ...uses an external RADIUS server to perform user authentication To use WPA RADIUS enter the IP address of the RADIUS server the RADIUS port default is 1812 and the shared secret from the RADIUS server Please refer to Authentication RADIUS Server setting below for RADIUS setting Personal Pre Shared Key Pre Shared Key authentication is based on a shared secret that is known only by the parties involve...

Page 42: ...bled devices and legacy devices is that users do not need the knowledge about SSID channel and security settings but they could still surf in a security enabled Wi Fi network This device supports Push Button method and PIN method for WPS The following sub paragraphs will describe the function of each item The webpage is as below Although home Wi Fi networks have become more and more popular users ...

Page 43: ...generate PIN and then click Apply Changes Moreover if users want to make their own PIN they could enter four digit PIN without checksum and then click Apply Changes However this would not be recommended since the registrar side needs to be supported with four digit PIN PIN Configuration Click the Start PIN button to start the PIN method of WPS Push Button Configuration Click the Start PBC button t...

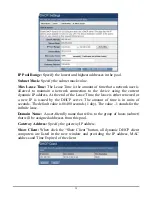
Page 44: ...the DHCP service DHCP Relay Some ISPs perform the DHCP server function for their customers home small office network In this case you can configure this device to act as a DHCP relay agent When a host on your network requests Internet access the device contacts your ISP to obtain the IP configuration and then forward that information to the host You should set the DHCP mode after you configure the...

Page 45: ... renewed or a new IP is issued by the DHCP server The amount of time is in units of seconds The default value is 86400 seconds 1 day The value 1 stands for the infinite lease Domain Name A user friendly name that refers to the group of hosts subnet that will be assigned addresses from this pool Gateway Address Specify the gateway IP address Show Client When click the Show Client button all dynamic...

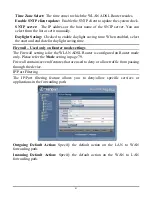
Page 46: ...ting to the MAC Base Assignment Table Time Zone Simple Network Timing Protocol SNTP is a protocol used to synchronize the system time to the public SNTP servers The WLAN ADSL Router supports SNTP client functionality in compliance with IETF RFC2030 SNTP client functioning in daemon mode which issues sending client requests to the configured SNTP server addresses periodically can configure the syst...

Page 47: ...me Firewall Used only on Router mode settings The Firewall setting is for the WLAN ADSL Router is configured on Router mode only Please refer the Mode setting in page 79 Firewall contains several features that are used to deny or allow traffic from passing through the device IP Port Filtering The IP Port filtering feature allows you to deny allow specific services or applications in the forwarding...

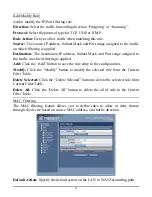
Page 48: ...e traffic on which filtering is applied Add Click the Add button to save the rule entry to the configuration Modify Click the Modify button to modify the selected rule form the Current Filter Table Delete Selected Click the Delete Selected button to delete the selected rule from Current Filter Table Delete All Click the Delete All button to delete the all of rule in the Current Filter Table MAC Fi...

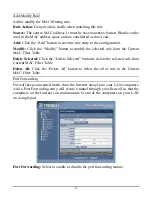
Page 49: ...m the Current MAC Filter Table Delete Selected Click the Delete Selected button to delete the selected rule from Current MAC Filter Table Delete All Click the Delete All button to delete the all of rule in the Current MAC Filter Table Port Forwarding Firewall keeps unwanted traffic from the Internet away from your LAN computers Add a Port Forwarding entry will create a tunnel through your firewall...

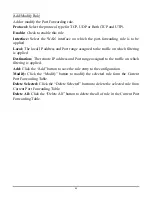
Page 50: ...hich filtering is applied Destination The remote IP address and Port range assigned to the traffic on which filtering is applied Add Click the Add button to save the rule entry to the configuration Modify Click the Modify button to modify the selected rule form the Current Port Forwarding Table Delete Selected Click the Delete Selected button to delete the selected rule from Current Port Forwardin...

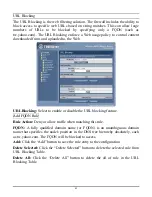
Page 51: ... enable or disable the URL blocking feature Add FQDN Rule Rule Action Deny or allow traffic when matching this rule FQDN A fully qualified domain name or FQDN is an unambiguous domain name that specifies the node s position in the DNS tree hierarchy absolutely such as tw yahoo com The FQDN will be blocked to access Add Click the Add button to save the rule entry to the configuration Delete Selecte...

Page 52: ...ll of rule in the Keyword Filtering Table Domain Blocking The firewall includes the ability to block access to specific domain based on string matches For example if the URL of Taiwan Yahoo web site is tw yahoo com and you enter yahoo com the firewall will block all the DNS queries with yahoo com string So the Host will be blocked to access all the URLs belong to yahoo com domain That means you ca...

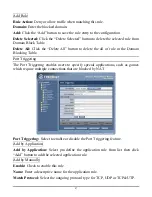
Page 53: ... Table Port Triggering The Port Triggering enables users to specify special applications such as games which require multiple connections that are blocked by NAT Port Triggering Select to enable or disable the Port Triggering feature Add by Application Add by Application Select pre define the application rule from list then click Add button to add the selected application rule Add by Manually Enab...

Page 54: ...e Selected Click the Delete Selected button to delete the selected rule from Trigger Table Delete All Click the Delete All button to delete the all of rule in the Trigger Table Disable Selected Click the Disable Selected button to disable the selected rule from Trigger Table Enable Selected Click the Enable Selected button to Enable the selected rule from Trigger Table DMZ A DMZ Demilitarized Zone...

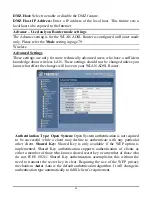
Page 55: ...fect the changes will have on your WLAN ADSL Router Authentication Type Open System Open System authentication is not required to be successful while a client may decline to authenticate with any particular other client Shared Key Shared Key is only available if the WEP option is implemented Shared Key authentication supports authentication of clients as either a member of those who know a shared ...

Page 56: ...efault is 100 Data Rate The rate of data transmission should be set depending on the speed of your wireless network You should select from a range of transmission speeds or you can select Auto to have the WLAN ADSL Router automatically use the fastest possible data rate and enable the Auto Fallback feature Auto Fallback will negotiate the best possible connection speed between the AP and a wireles...

Page 57: ...ose clients whose wireless MAC address are in the access control list will be able to connect to your WLAN ADSL Router Wireless Access Control Mode Disable Disable the wireless ACL feature Allow Listed When this option is selected no wireless clients except those whose MAC addresses are in the current access control list will be able to connect to this device Deny Listed When this option is select...

Page 58: ... Enable or disable the Vap Virtual AP setting SSID Type an SSID in the text box The SSID of any wireless device must match the SSID typed here in order for the wireless device to access the LAN and WAN via the WLAN ADSL Router Authentication Type Open System Open System authentication is not required to be successful while a client may decline to authenticate with any particular other client Share...

Page 59: ... clients will not be able to access to the Ethernet clients Dynamic DNS Each time your device connects to the Internet your ISP assigns a different IP address to your device In order for you or other users to access your device from the WAN side you need to manually track the IP that is currently used The Dynamic DNS feature allows you to register your device with a DNS server and access your devi...

Page 60: ...DynDns Settings Enter the username and password for your registered DynDNS account TZO Settings Enter the email address and key for your registered TZO account 54 ...

Page 61: ...idge and its attached ports Aging Time Set the Ethernet address ageing time in seconds After Ageing Time seconds of not having seen a frame coming from a certain address the bridge will time out delete that address from Forwarding DataBase fdb Show MACs Click the Show MACs button to list MAC address in forwarding DataBase fdb 55 ...

Page 62: ...red them to receive the information dynamically from a server whenever they access the Internet z On the WLAN ADSL Router itself a default gateway is defined to direct all outbound Internet traffic to a route at your ISP The default gateway is assigned either automatically by your ISP whenever the device negotiates an Internet access or manually by user to setup through the configuration You may n...

Page 63: ...towards the destination subnet Metric Defines the number of hops between network nodes that data packets travel The default value is 0 which means that the subnet is directly one hop away on the local LAN network Interface The WAN interface to which a static routing subnet is to be applied Add Router Click the Add Router button to add a user defined destination route Update Click the Update button...

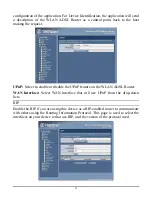
Page 64: ...rface The upstream WAN interface is selected here UPnP The WLAN ADSL Router supports a control point for Universal Plug and Play UPnP version 1 0 and supports two key features NAT Traversal and Device Identification This feature requires one active WAN interface In addition the host should support this feature In the presence of multiple WAN interfaces select an interface on which the incoming tra...

Page 65: ...to enable or disable the UPnP feature on the WLAN ADSL Router WAN Interface Select WAN interface that will use UPnP from the drop down lists RIP Enable the RIP if you are using this device as a RIP enabled router to communicate with others using the Routing Information Protocol This page is used to select the interfaces on your device is that use RIP and the version of the protocol used 59 ...

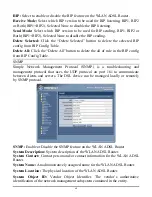
Page 66: ...Config Table SNMP Simple Network Management Protocol SNMP is a troubleshooting and management protocol that uses the UDP protocol on port 161 to communicate between clients and servers The DSL device can be managed locally or remotely by SNMP protocol SNMP Enable or Disable the SNMP feature on the WLAN ADSL Router System Description System description of the WLAN ADSL Router System Contact Contact...

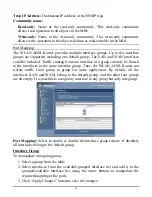
Page 67: ...nly be flowed to the interfaces in the same interface group Thus the WLAN ADSL Router can isolate traffic from group to group for some application By default all the interfaces LAN and WAN belong to the default group and the other four groups are all empty It is possible to assign any interface to any group but only one group Port Mapping Select to enable or disable the interface group feature If ...

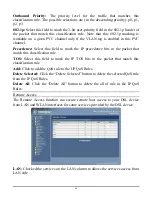
Page 68: ... fields in the packet that matches the Traffic Classification rule You can configure any or all field as needed in these two QoS blocks for a QoS rule IP QoS Select to enable or disable the IP QoS function Default QoS Select the QoS method IP Pred or 802 1p from list Source The IP address subnet mask and port number of the traffic source Destination The IP address subnet mask and port number of th...

Page 69: ... precedence bits in the packet that match this classification rule TOS Select this field to mark the IP TOS bits in the packet that match this classification rule Add Click to add the QoS rule to the UP QoS Rules Delete Selected Click the Delete Selected button to delete the selected QoS rule from the IP QoS Rules Delete All Click the Delete All button to delete the all of rule in the IP QoS Rules...

Page 70: ...th Identifier This is read only field and is selected on the Select column in the Current ATM VC Table VCI Virtual Channel Identifier This is read only field and is selected on the Select column in the Current ATM VC Table The VCI together with VPI is used to identify the next destination of a cell as it passes through to the ATM switch QoS Quality of Server a characteristic of data transmission t...

Page 71: ...p In CBR transmissions CDVT determines the level of jitter that is tolerable for the data samples taken by the PCR SCR Sustained Cell Rate measured in cells sec is the average cell rate over the duration of the connection MBS Maximum Burst Size a traffic parameter that specifies the maximum number of cells that can be transmitted at the peak cell rate Apply Changes Click to set new PVC QoS mode fo...

Page 72: ...on Checked to Enable the ADSL2 ADSL2 Annex L capability AnnexM Option Checked to Enable the ADSL2 ADSL2 Annex M capability ADSL Capability Checked to enable the bitswap capability or SRA capability ADSL Tone Click the ADSL Tone button to choose tones to be masked Masked tones will not carry any data Apply Changes Click to save the setting to the configuration and the modem will be retrained 66 ...

Page 73: ... local computer Load Setting from File Click the Browse button and selected a saved setting file from file browse window then click Upload button to loading the saved setting to the WLAN ADSL Router Reset Settings to Default Click the Reset button to reset the settings to factory default settings Password The first time you log into the WLAN ADSL Router you use the default password There are two l...

Page 74: ...Selection of user levels are admin and user Old Password Enter the old password for this selected login New Password Enter the new password here Confirmed Password Enter the new password here again to confirm 68 ...

Page 75: ...ring the upgrade process It may crash the system To upgrade the firmware for the DSL device z Click the Browse button to select the firmware file z Confirm your selection z Click the Upload button to start upgrading IMPORTANT Do not turn off your DSL device or click the Reset button while this procedure is in progress 69 ...

Page 76: ...outer Enable Checked to enable the selected route or route to be added Interface Select the interface domain LAN or WAN IP Address Enter the IP address that allow access to this device Subnet Mask Type the subnet mask in the text box Add Click to add the ACL rule to the ACL table Modify Click the Modify button to modify the selected rule form the ACL Table Delete Selected Click the Delete Selected...

Page 77: ...should use when connecting to the ACS Password The password the WLAN ADSL Router should use when connecting to the ACS Periodic Inform Enable When this field is enabled the WLAN ADSL Router will send an Inform RPC to the ACS server at the system startup and will continue to send it periodically at an interval defined in Periodic Inform Interval field When this field is disabled the WLAN ADSL Route...

Page 78: ...ting to this device Path The path of the device ConnectionRequestURL The device ConnectionRequestURL should be configured based on the Device_IP Path and Port as follows http Device_IP Port Path Port The port of the device ConnectionRequestURL Logout This page is used to logout from ADSL gateway Click the Logout button to logout from the WLAN ADSL Router 72 ...

Page 79: ...the host receives the message it sends messages in reply To use it you must know the IP address of the host you are trying to communicate with and enter the IP address in the Host Address field Click Go button to start the ping command the ping result will then be shown in this page Go Click Go button to start the ping command the ping result will then be shown in this page 73 ...

Page 80: ... the end of a VP VC connection where the ATM cell are terminated z Segment endpoint the end of a connection segment This page allows you to use ATM ping which generates F5 segment and end to end loop back cells to test the reach ability of a segment endpoint or a connection endpoint Select PVC Select the PVC channel you want to do the loop back diagnostic Flow Type The ATM OAM flow type The select...

Page 81: ...st page shows the test results for the connectivity of the physical layer and protocol layer for both LAN and WAN sides Select Internet Connection The available WAN side interfaces are listed You have to select one for the WAN side diagnostic Run Diagnostic Test Click the Run Diagnostic Test button to start the diagnostic test 75 ...

Page 82: ...ng DHCP Clients This table shows the assigned IP address MAC address and time expired for each DHCP leased client Routing Table This table shows a list of destination routes commonly accessed by your network 76 ...

Page 83: ...ARP Table This table shows a list of learned MAC addresses Bridge FDB Table This table shows a list of learned MAC addresses for this bridge 77 ...

Page 84: ...istics This page shows the packet statistics for transmission and reception regarding to network interface ADSL Statistics This page shows the packet statistics for transmission and reception regarding to the ADSL 78 ...

Page 85: ...ess to all your LAN users Also by default it acts a DHCP Server providing an IP address and related information to all Wireless and LAN users z Modem Only the ADSL Modem component is operational All Router features are disabled This device is transparent it does not perform any operations or make any changes to the network traffic passing through it You need to have a DHCP Server on your LAN to pr...

Page 86: ...Reboot Click Commit and Reboot button to apply setting changes and to reboot the WLAN ADSL Router 80 ...

Page 87: ...nsfer Rate 802 11g mode up to 54Mbps auto sense 802 11b mode up to 11Mbps auto sense Ethernet 10Mbps half duplex 20Mbps full duplex Fast Ethernet 100Mbps half duplex 200Mbps full duplex Receiver Sensitivity 802 11g 65dBm typical 54Mbps 802 11b 80dBm typical 11Mbps TX Power 802 11g 14dBm typical 802 11b 14 5dBm typical Network Cables 10BASE T 2 pair UTP Cat 3 4 5 100 m EIA TIA 568 100 ohm STP 100 m...

Page 88: ...Environmental DC inputs 12VDC 1A Power Consumption 6 5watts max Temperature Operating 0o C 40o C Storage 10o 70o C Humidity Operating 10 90 Storage 5 90 Dimensions 195 x 120 x 30mm EMI FCC part 15 FCC part 68 CE 82 ...

Page 89: ... that are sent to TRENDnet for RMA service must have the RMA number marked on the outside of return packages and sent to TRENDnet prepaid insured and packaged appropriately for safe shipment Customers shipping from outside of the USA and Canada are responsible for return shipping fees Customers shipping from outside of the USA are responsible for custom charges including but not limited to duty ta...

Page 90: ...are subject to the GNU General Public License GPL or GNU Lesser General Public License LGPL Go to http www trendnet com gpl or http www trendnet com Download section and look for the desired TRENDnet product to access to the GPL Code or LGPL Code These codes are distributed WITHOUT WARRANTY and are subject to the copyrights of the developers TRENDnet does not provide technical support for these co...

Page 91: ...85 ...

Reviews: