13.
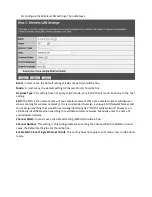
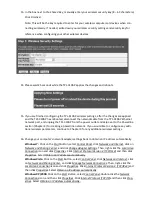
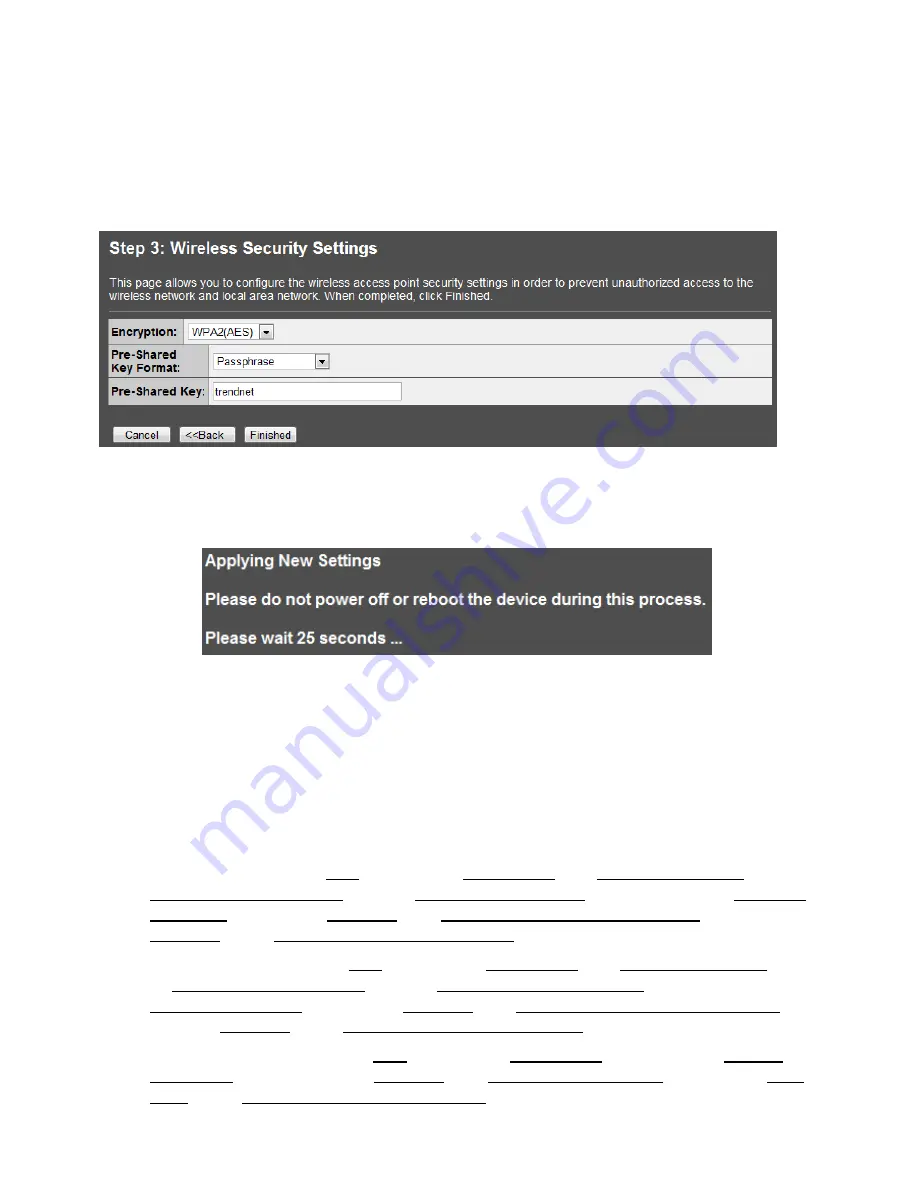
In the box next to
Pre-Shared Key
, manually enter your wireless security key (8 – 63 characters).
Click
Finished
.
Note: This will be the key required to enter for your wireless computers or devices when con-
necting wirelessly. If needed, write down your wireless security settings and security key for
reference when configuring your other wireless devices.
14.
Please wait 25 seconds while the TPL-310AP applies the changes and reboots.
15.
If you are finished configuring the TPL-310AP wireless settings, after the changes are applied
and the TPL-310AP has rebooted, disconnect the network cable from the TPL-310AP Ethernet
network port, and unplug the TPL-310AP from the power outlet and skip over to the Powerline
section (Chapter 4) for creating a powerline network. If you would like to configure any addi-
tional wireless parameters, continue to Chapter 3 for any additional wireless settings.
16.
Change your computer’s network adapter settings back to obtain an IP address automatically.
Windows 7:
Click on the
Start
Button, select
Control Panel,
click
Network and Internet,
click on
Network and Sharing Center
, and click
Change Adapter Settings.
Then, right-click the
Local Area
Connection
icon and click
Properties.
Click
Internet Protocol Version 4 (TCP/IPv4)
and then click
Properties.
Select
Obtain an IP address automatically
.
Windows Vista:
Click on the
Start
Button, select
Control Panel,
click
Network and Internet,
click
on
Network and Sharing Center
, and click
Manage Network Connections
. Then, right-click the
Local Area Connection
icon and click
Properties.
Click
Internet Protocol Version 4 (TCP/IPv4)
and
then click
Properties.
Select
Obtain an IP address automatically
.
Windows XP/2000:
Click on the
Start Button,
select
Control Panel,
double-click the
Network
Connections
icon, and then click
Properties
. Click
Internet Protocol (TCP/IP)
and then click
Prop-
erties.
Select
Obtain an IP address automatically.

