background image

5

17. 

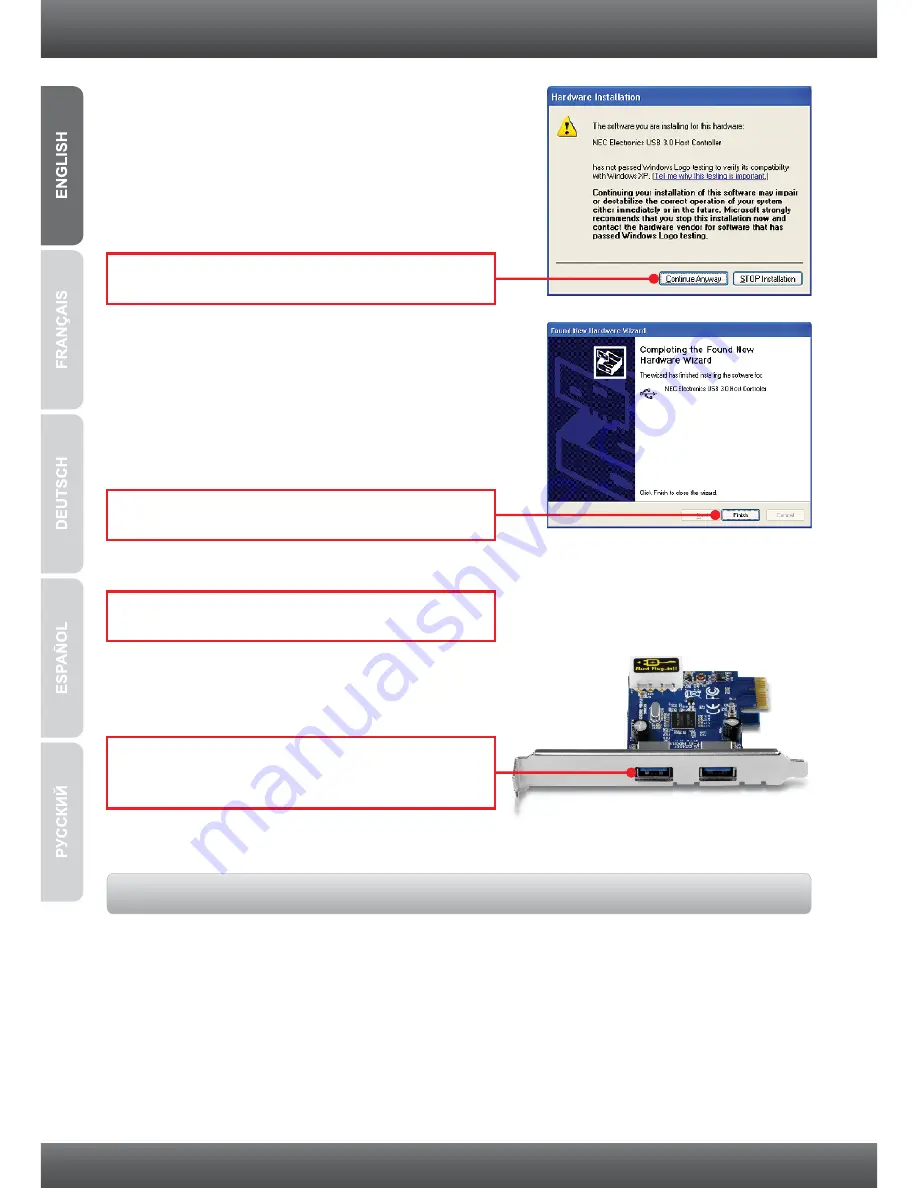
Repeat steps 13-16.

18. 

Connect your USB device to one of the USB 

ports on the TU3-H2PIE.

16. 

Click 

Finish

15. 

Click 

Continue Anyway

Your Installation is now complete

Summary of Contents for TU3-H2PIE

Page 1: ...TU3 H2PIE 1 02 Quick Installation Guide ...

Page 2: ...Table of Contents Version 01 01 2011 English 1 1 Before You Start 2 How to Install 2 1 Technical Specifications 6 Troubleshooting 7 ...

Page 3: ...Ÿ Ÿ CD ROM Driver Ÿ Multi Language Quick Installation Guide TU3 H2PIE System Requirements 1 Supported Operating Systems CPU Memory Windows 7 32 64 bit Windows Vista 32 64 bit Windows XP 32 64 bit 1GHz or above 800MHz or above 300MHz or above 1GB RAM or above 512MB RAM or above 256MB RAM or above ...

Page 4: ...o your CD ROM drive 2 Important Do not insert the TU3 H2PIE in the computer until instructed to do so 5 Click Install 2 Click Run Autorun exe Windows 7 Vista only 4 Click Next Then follow the InstallShield Wizard instructions 3 Click Install Driver ...

Page 5: ...Note Please refer to your computer s user manual regarding hardware installation 8 Shutdown your computer 9 Open your computer case 6 Click Continue Anyway Windows XP only 7 Click Finish 3 ...

Page 6: ...ears Select No not this time and then click Next 14 Select Install this software automatically recommended and then click Next 10 Insert the TU3 H2PIE card firmly into an available PCIe slot 11 Connect an available 4 pin Molex power cable from the computer s power supply to the TU3 H2PIE card 12 Turn ON the computer and wait until the Windows desktop appears ...

Page 7: ...5 17 Repeat steps 13 16 18 Connect your USB device to one of the USB ports on the TU3 H2PIE 16 Click Finish 15 Click Continue Anyway Your Installation is now complete ...

Page 8: ...1 x 4 pin internal power port cable not included Windows 7 32 64 bit Vista 32 64 bit XP 32 64 bit Ÿ Super speed 5Gbps USB 3 0 Ÿ High speed 480Mbps USB 2 0 Ÿ Full speed 12Mbps USB 1 1 Ÿ Low speed 1 5Mbps USB 1 0 900mA max per port 120 x 82 x 18 5 mm 4 7 x 3 2 x 0 8 in 45g 1 6oz 5 C 40 C 41 F 104 F 90 non condensing CE FCC Port Supported OS Data Rates Power Consumption Dimensions L x W x D Weight Te...

Page 9: ...while the computer is on Yes you can connect or disconnect the USB cable or any external USB device while the computer is on because the USB interface is Plug and Play and hot pluggable 3 I have a USB 1 1 2 0 cable Can it work with USB 3 0 devices Yes it works but it may cause problems for connecting super speed USB 3 0 external peripherals Therefore it is recommended that you use certified USB 3 ...

Page 10: ...nywarranty There are no user serviceable parts inside the product Do not remove or attempt to service the product by any unauthorized service center This warranty is voided if i the product has been modified or repaired by any unauthorized service center ii the product was subject to accident abuse or improper use iii the product was subject to conditions more severe than those specifiedinthemanua...

Page 11: ...Y WHETHER BASED IN CONTRACT OR TORT INCLUDING NEGLIGENCE FOR INCIDENTAL CONSEQUENTIAL INDIRECT SPECIAL OR PUNITIVE DAMAGES OFANYKIND OR FOR LOSS OF REVENUE OR PROFITS LOSS OF BUSINESS LOSS OF INFORMATION OR DATE OR OTHER FINANCIALLOSSARISING OUTOF OR IN CONNECTION WITHTHE SALE INSTALLATION MAINTENANCE USE PERFORMANCE FAILURE OR INTERRUPTION OF THE POSSIBILITY OF SUCH DAMAGES AND LIMITS ITS LIABILI...

Page 12: ......

Page 13: ......

Page 14: ...Copyright 2011 All Rights Reserved TRENDnet ...

Reviews: