TRENDnet User’s Guide
TV‐IP328PI
© Copyright TRENDnet. All Rights Reserved.
7
Hardware Installation
Cabling
It’s recommended that the wiring the cable in your home or office by a
professional. If you already have the cable deployed, make sure the cable and
the connectors meet the category 5 Ethernet cable standards. At least 2 pairs
of twisted lines are required for power and data. Poor cable quality may cause
unexpected problems. Testing your cable or running a new cable is suggested
for new camera installation.
Waterproof cap
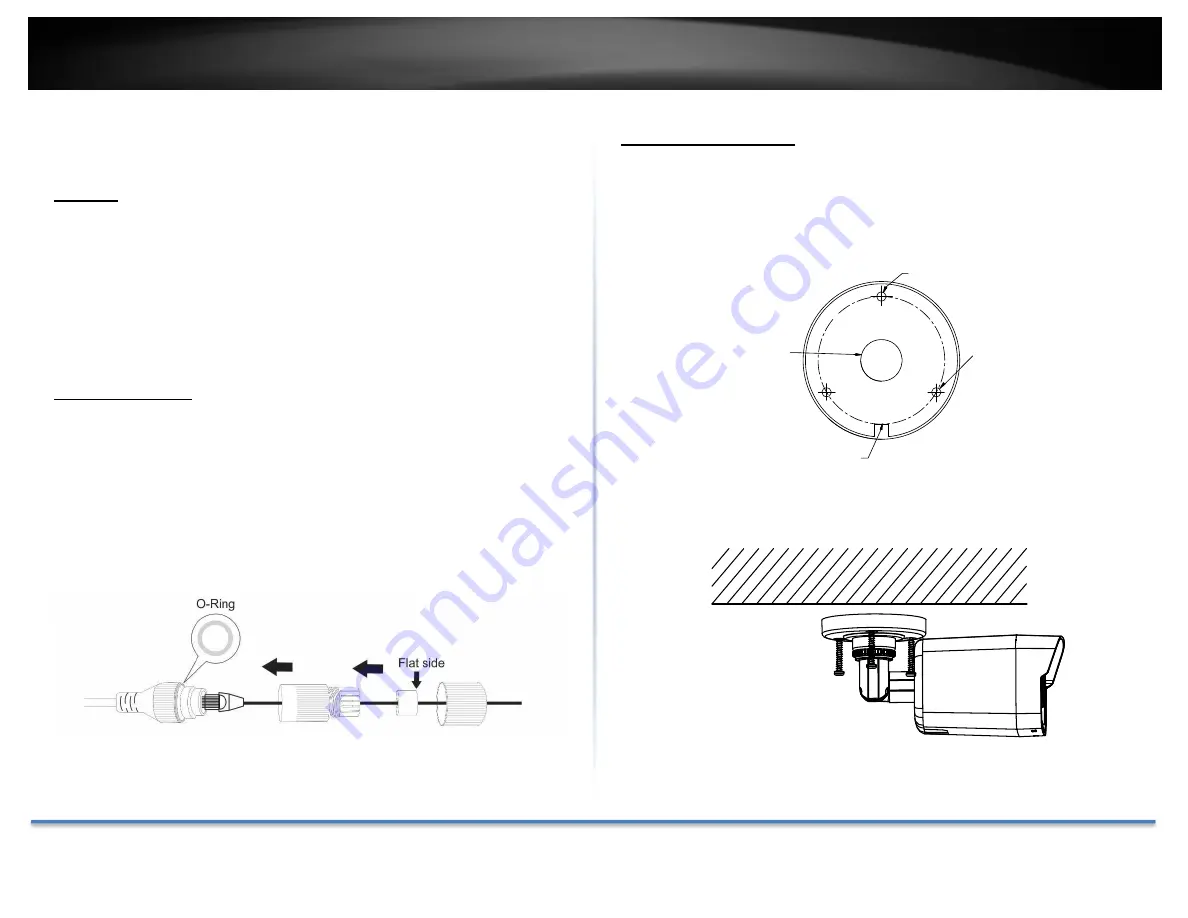
The TV‐IP328PI itself is IP66 grade water and dust proof. There is a set of
network cable water proof caps that comes with the package as well. Run
your cable going through the accessories, and then crimp the cable with an
RJ45 module. Plug in the network cable and then tighten the waterproof cap
to prevent water running into camera through the cable.
Mount your camera
Steps:
1.
Paste the drill template to the desired mounting position on the ceiling.
2.
Drill the screw holes in the ceiling according to the supplied drill template.
Note:
Drill the cable hole, if adopting ceiling outlet to route the cable.
3‐Ø4 mm
Drill Template
Cable
Hole
Side
Opening
Screw
Hole
3.
Route the cables through the cable hole (optional), or the side opening.
4.
Fix the camera on the ceiling with supplied screws.


