background image

Copyright ©2005.  All Rights Reserved. TRENDware International, Inc.  

TRENDnet

TRENDware, USA

What's Next in Networking

Version 07.25.05

4-port VoIP Gateway with 4-port Broadband Router

Quick Installation Guide

TVP-224HR 

Summary of Contents for TVP-224HR

Page 1: ...ght 2005 All Rights Reserved TRENDware International Inc TRENDnet TRENDware USA What s Next in Networking Version 07 25 05 4 port VoIP Gateway with 4 port Broadband Router Quick Installation Guide TVP...

Page 2: ...4 12 9 14 1 Prepare for Installation 2 Install Hardware 3 Configure the computer s TCP IP Settings 4 Configuration 5 Connection through Telnet 6 Connection through Console 7 Dynamic DNS Domain Name S...

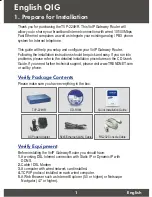
Page 3: ...ment Before installing the VoIP Gateway Router you should have 1 A working DSL Internet connection with Static IP or Dynamic IP with DDNS 2 Cable DSL Modem 3 A computer with wired network card install...

Page 4: ...ect Analog Phones Fax machine using RJ11 to FXS port s 4 Connect FXO port s using RJ 11 Cable to PBX system or PSTN line 5 Power on your TVP 224HR Verify Hardware Installation Make sure the following...

Page 5: ...you need to configure the TCP IP settings in your PC Operating System OS Set up the PC to Obtain an IP address automatically Detailed setup procedures for Windows OS computers can be found in the Use...

Page 6: ...low the steps below 1 Start your WEB browser In the address field Type in the following address http 192 168 0 1 2 The pop up screen should appear and prompt for user name and password The default val...

Page 7: ...equired information Below is a table that outlines the basic data you will require from your ISP Internet Access After setting up Internet Access you will be able to Remote Manage the Gateway using th...

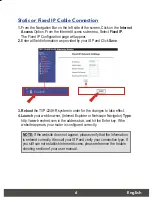
Page 8: ...he changes to take effect 4 Launch your web browser Internet Explorer or Netscape Navigator Type http www trendnet com in the address bar and hit the Enter key If the website appears your router is co...

Page 9: ...effect 5 Launch your web browser Internet Explorer or Netscape Navigator Type http www trendnet com in the address bar and hit the Enter key If the website appears your router is configured correctly...

Page 10: ...e 4 Reboot the TVP 221H system in order for the changes to take effect 5 Launch your web Browser Internet Explorer or Netscape Navigator Type http www trendnet com in the address bar and hit the Enter...

Page 11: ...to Login enter the user name admin When the TVP 224HR Gateway prompts you for Password enter the password Console will appear The default password is 123 but it is recommended that the password be cha...

Page 12: ...forget your administration password you can gain console access to the TVP 224HR using the super password The super password is the last six digits of your MAC address located on the bottom of your TV...

Page 13: ...rrect and accurately entered into the TVP 224HR Console Console ping 168 95 1 1 on off To reset to Factory Default settings please perform the following commands to Erase all port codec h323 configura...

Page 14: ...the Internet making it difficult for others to find connect to the TVP 224HR With Internet DDNS your IP may change but your Domain Name is Static The Service works as follows 1 You must register for t...

Page 15: ...lease also to enter User Name and Password 4 Click Save 5 The TVP 224HR will then automatically ensure that your current IP Address is recorded and updated at the DDNS server If the DDNS Service provi...

Page 16: ...er the TVP 224HR connected to switch by WAN port or the TVP 221H Connected by LAN port The switch that joins these two gateways serves the purpose of initial lab configuration Under this configuration...

Page 17: ...nnected to switch by WAN port or TVP 224HR Connected by LAN port Theoretically GW A is in Taiwan Local Area Code have 2 digits and GW B is in the US Local Area Codes have 3 digits Gateway A 4 ports is...

Page 18: ...ss Fixed IP Menu 2 Type in IP Address 192 168 1 20 Subnet Mask 255 255 255 0 and Default IP Gateway Address 0 0 0 0 in the related fields 3 Click on Save 4 Click on Reboot Gateway B IP Setup 5 Navigat...

Page 19: ...ocal ports or to remote gateways for further processing The following screen shots show an example for entering a dial plan for a single number This example should give you the necessary insight as to...

Page 20: ...ct Add HuntGroup 3 The following window will appear Please Enter Data as shown 4 Click on OK Local Destination ID Table 1 From the Navigation Menu on the left side Select Dial Plan Table Setup 2 From...

Page 21: ...gation Bar on the left side Click on Store Dial Plan 3 The following screen will appear on the right side Click on YES Gateway B Dial Plan Setup 1 Enter Gateway B Dial Plan into Gateway B as shown in...

Page 22: ...Please substitute your ext on PBX if applicable For PBX on FXO use only For PBX on FXO use only Remote Zone used to make calls to remote GW B FXS Internal Ext Remote Zone used to make calls to remote...

Page 23: ...1 1 Port 0 5 22 22 2 2 Remote 1 1 Dest 192 168 1 55 1720 TCP 2 3 4 4 4 4 22 NOTE The above destination table has both local destinations and remote destinations When the gateways are taken out of this...

Page 24: ...you a dial tone on FXO Port 0 for outside line Assumes that Telephone line is attached to Port 0 Line 1 Assumes that Telephone line is attached to Port 0 Line 1 Remote Zone used to make calls to remot...

Page 25: ...Port 0 5 11 11 2 2 H 323 1 1 Dest 192 168 1 20 1720 TCP 2 3 4 4 11 NOTE The above destination table has both local destinations and remote destinations When the gateways are taken out of this initial...

Page 26: ...for Gateway B phone 203 and 204 calls to Gateway A phone 201 800 and 801 Case 2 Gateway Phone to PSTN Phone Gateway B phone 203 calls to PSTN phone A number 77771234 Caller Operation at GW B Pick up...

Page 27: ...phone 203 Phone 203 is ringing Equipment Operation Receiver Operation at GW B phone 301 NOTE Case Tables 1 3 show the possible analog phone PBX PSTN integration applications of the Gateway Disconnect...

Page 28: ...device may not cause harmful interference 2 This device must accept any interference received Including interference that may cause undesired operation NOTE THE MANUFACTURER IS NOT RESPONSIBLE FOR AN...

Page 29: ...http www TRENDNET com TRENDnet Technical Support Contact Telephone Fax Email 1 310 626 6252 1 310 626 6267 support trendnet com Tech Support Hours 7 30am 6 00pm Pacific Standard Time Monday Friday Te...

Reviews: