ME 3P80 RC
7
English
OUTDOOR SENSOR FUNCTION
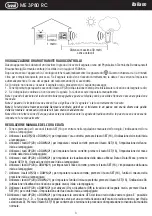
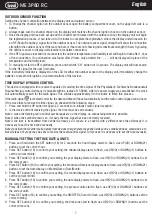
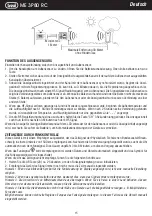
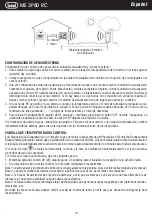
Setting the channel connection between the display unit and outdoor sensor:
1. To change the channel option on the outdoor sensor open the battery compartment cover, on the upper left side is a
button;
2. Always make sure the channel chosen on the display unit matches the channel option chosen on the outdoor sensor;
3. Once the display unit has been set up and the channel synchronized with the outdoor sensor, the display unit will begin
the registration process. It can take up to 3 minutes to complete the registration, where the display unit will search for
an RF (Radio Frequency) signal from the outdoor sensor. The outdoor sensor signal strength will show the connection
strength to the outdoor sensor. If there are no bars or if bars are not showing at its maximum strength (5 bars) try placing
the outdoor sensor or display unit elsewhere for better connection;
4. If the RF Signal was lost and not reconnected, the outdoor temperature and humidity level will begin to flash after 1 hour
of lost connection. If no connection was found after 2 hours only a dotted line ‘ - - - ’ will be displayed in place of the
temperature and humidity level;
5. To manually restart the RF registration, press and hold the “CH” button for 3 seconds. The display unit will now search
for the RF signal for the next 3 minutes.
If the low battery indicator is displayed on the LCD for either the outdoor sensor or the display unit, immediately change the
batteries to prevent disruptions in communications of the devices
TIME DISPLAY BY RADIO CONTROL
This device is equipped with a receiver capable of receiving the time signal of the Physikalisch Technische Bundesanstalt
Braunschweig (central Germany) receivable within a radius of 1500Km. After the power supply was established, the clock
will automatically search for the radio signal. This will take approximately 3 to 8 minutes to finish this process.
If the radio signal
is received correctly, the date and time will be set automatically and the radio control signal icon turns on
If the clock fails to receive the time signal, go ahead with the following steps:
1. Press and hold the UP button for approx. 2 seconds to re-initialize radio signal reception;
2. Is the device still not receiving the signal, the time must be set manually.
Note1: when the flashing radio control symbol appears on the display, no manual adjustment is possible.
Note2: when the symbol remains on, it means that the signal has been correctly received.
Note3: the time is transmitted from central Germany, so if we are in a country with a different time than Germany it is
necessary to set the time zone manually.
Note4: position the weather station away from devices that generate magnetic fields such as mobile phones, televisions, etc.
Not all areas of Europe may be able to receive the radio control signal. In this case it is necessary to set the time manually.
MANUALLY SETTING THE TIME, DATE & UNITS
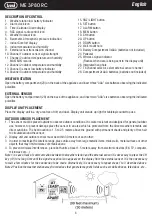
1. Press and hold down the SET button (16) for 2 seconds the hour display starts to flash, use UP(20) or DOWN(21)
buttons to set the correct hour;
2. Press SET button (16) to confirm your setting, the minute display starts to flash, use UP(20) or DOWN(21) buttons to
set the correct minute;
3. Press SET button (16) to confirm your setting, the year display starts to flash, use UP(20) or DOWN(21) buttons to set
the correct year;
4. Press SET button (16) to confirm your setting, the Month and Date icon display starts to flash, use UP(20) or DOWN(21)
buttons to set the date display on Month/Date or Date/Month;
5. Press SET button (16) to confirm your setting, the month display starts to flash, use UP(20) or DOWN(21) buttons to
set the correct month;
6. Press SET button (16) to confirm your setting, the date display starts to flash, use UP(20) or DOWN(21) buttons to set
the correct date;
7. Press SET button (16) to confirm your setting, the pressure units start to flash, use UP(20) or DOWN(21) buttons set
the correct units;
8. Press SET button (16) to confirm your setting, the ON/OFF RCC start to flash, use UP(20) or DOWN(21) buttons set the
correct setting;
9. Press SET button (16) to confirm your setting, the time zone start to flash, use UP(20) or DOWN(21) buttons set the
correct time zone;
Summary of Contents for 8011000026954
Page 1: ...ME 3P80 RC 1...

