background image

ME 3P80 RC

English

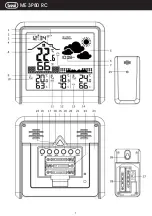
10. Press SET button (16) to confirm your setting and to end the setting procedures, enter the normal mode.

Note1: You will automatically exit settings mode if no buttons are pressed for 20 seconds. Enter settings mode again at 
any time by pressing and holding the SET button (16) for 3 seconds.
Note2: Under normal mode, press SET button (16) to check the calendar.

ALARM ADJUSTMENT

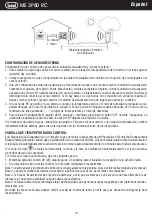
1.  Press and hold the ALARM button (17), located on the back of the display unit for about 3 seconds to set the alarm 

time. The alarm hour will begin blinking on the display where the clock time is usually shown;

2.  To adjust the alarm hour, press the UP(20) or DOWN(21) buttons (press and hold to fast adjust). When alarm hour is 

set to your satisfaction, press the ALARM button (17) to proceed to the alarm minute preference. Press the UP(20) or 
DOWN(21) buttons (press and hold to fast adjust), press the ALARM button (17) again to exit alarm settings;

3.  To turn the alarm ON or OFF, press the ALARM button (17) to enter alarm mode, press the ALARM button (17) again to 

ON or OFF the alarm. The 

 symbol should show on the top of the clock display when alarm is set to ON. Press the 

ALARM button (17) again to turn off the alarm, when the alarm is set to OFF, the 

 symbol should not display.

4.  When the alarm is in operation it will begin beeping with one short beep and continue with many short beeps if the alarm 

rings longer than 20 seconds. You can snooze the alarm for 5 minutes by pressing the SNZ/ LIGHT button (15).
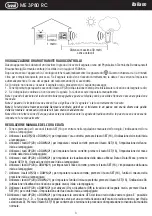
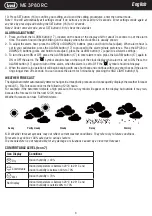
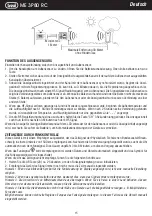
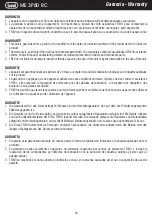
WEATHER FORECAST

The digital barometer automatically detects changes in atmospheric pressure and consequently displays the weather forecast 
symbol (5). This forecast concerns the following 12/24 hours.
For example: if the barometer detects a high pressure, the sun symbol will appear on the display, but outside it may rain, 
because the forecast is for the next 12/24 hours.
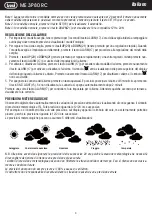
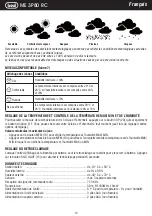
Weather forecasts can take 5 different views:

N.B. Weather forecast symbols may not reflect current weather conditions. They refer only to future conditions.
Forecasts may not be 100% safe due to various factors.
The manufacturer is not responsible for any damage or situations caused by an incorrect forecast.

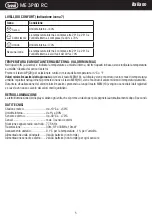
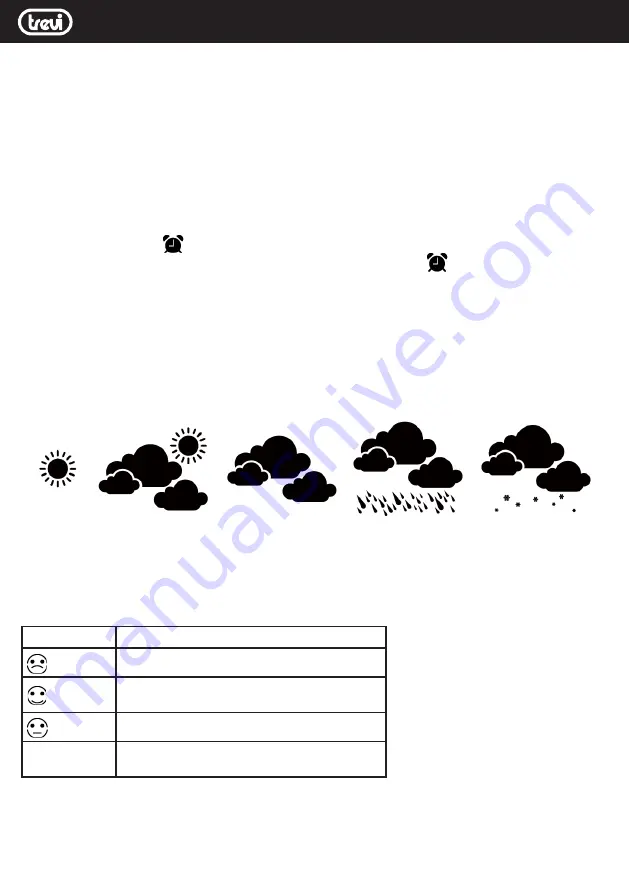
COMFORTABLE LEVEL (Icon 7)

Icon Display

Conditions

 Dry

Indoor humidity <40%

 Comfortable

Indoor temperature is between 20° C to 28° C and 
indoor humidity is between 40% to 70%

 Wet

Indoor humidity >70%

Not Display

Indoor temperature is between 20° C to 28° C and 
indoor humidity is outside 40% to 70%

Sunny

Stormy

Rainy

Cloudy

Partly claudy

Summary of Contents for 8011000026954

Page 1: ...ME 3P80 RC 1...

Page 2: ...tiva e necessario ripetere i passi dal 1 al 2 sopra descritti Nota2 Posizionare la stazione meteo lontana da apparecchi che generano campi magnetici quali cellulari televisori ecc POSIZIONAMENTO DEI S...

Page 3: ...tasto SET 16 per entrare nella regolazione manuale dell orologio l indicazione dell ora inizia a lampeggiare 2 Utilizzare i tasti UP 20 o DOWN 21 per impostare l ora corretta premere il tasto SET 16 l...

Page 4: ...allarme attivato Premere nuovamente il tasto ALARM 17 per disattivare l allarme il simbolo non sar visibile 5 Per spegnere la suoneria dell allarme premere un tasto qualsiasi possibile posticipare l...

Page 5: ...y viene mostrato il valore max di temperatura umidita registrati nella giornata premere di nuovo il tasto MEM 18 viene mostrato il valore minimo di temperatura umidita Durante la visualizzazione dei v...

Page 6: ...e1 in case of lack of communication between the weather station and the external sensor it is necessary to press the CH key 19 for a long time until the signal reception icon appears on the display fr...

Page 7: ...automatically and the radio control signal icon turns on If the clock fails to receive the time signal go ahead with the following steps 1 Press and hold the UP button for approx 2 seconds to re initi...

Page 8: ...ess the ALARM button 17 again to turn off the alarm when the alarm is set to OFF the symbol should not display 4 When the alarm is in operation it will begin beeping with one short beep and continue w...

Page 9: ...emperature and humidity when display shows MAX or MIN temperature and humidity ADJUSTMENT OF THE BACKLIGHT When the display unit is powered by battery only the back light will be off to preserve the b...

Page 10: ...ur micro ondes etc Remarque en cas de manque de communication entre la station m t o et le capteur externe il est n cessaire d appuyer longuement sur la bouton CH 19 jusqu ce que l ic ne de r ception...

Page 11: ...s 3 minutes suivantes Si l indicateur de batterie faible s affiche sur l cran LCD pour le capteur ext rieur ou l unit d affichage changez imm dia tement les piles pour viter toute interruption des com...

Page 12: ...n est enfonc pendant 20 secondes Acc dez nouveau au mode de r glage tout moment en appuyant sur le bouton SET 16 et en le maintenant enfonc pendant 3 secondes Remarque 2 En mode normal appuyez sur le...

Page 13: ...s et Fahrenheit appuyez sur le bouton UP 20 qui est galement le bouton d option C F Vous pouvez basculer entre Celsius et Fahrenheit tout moment sauf lors du r glage d autres options de r glage Valeur...

Page 14: ...e Ger te mindestens 1 5 Meter von elektronischen Ger ten entfernt EX Fernseher Computer Mikrowelle usw Hinweis 1 Bei mangelnder Kommunikation zwischen der Wetterstation und dem externen Sensor muss di...

Page 15: ...uten nach dem HF Signal Wenn die Anzeige f r niedrigen Batteriestand auf dem LCD entweder f r den Au ensensor oder die Anzeigeeinheit angezeigt wird wechseln Sie sofort die Batterien um Kommunikations...

Page 16: ...n den normalen Modus Hinweis 1 Sie verlassen den Einstellungsmodus automatisch wenn 20 Sekunden lang keine Tasten gedr ckt werden Rufen Sie den Einstellungsmodus jederzeit wieder auf indem Sie die SET...

Page 17: ...te 20 die auch die C F Optionstaste ist Sie k nnen jederzeit zwischen Celsius und Fahrenheit wechseln au er wenn Sie andere Einstel lungsoptionen festlegen Minimal Maximalwerte des Tages Dr cken Sie d...

Page 18: ...microondas etc Nota1 en caso de falta de comunicaci n entre la estaci n meteorol gica y el sensor externo es necesario presionar la tecla CH 19 durante un tiempo prolongado hasta que aparezca en el d...

Page 19: ...l de RF durante los pr ximos 3 minutos Si el indicador de bater a baja se muestra en la pantalla LCD para el sensor exterior o la unidad de visualizaci n cambie inmediatamente las bater as para evitar...

Page 20: ...ning n bot n durante 20 segundos Ingrese al modo de configuraci n nuevamente en cualquier momento presionando y manteniendo presionado el bot n SET 16 durante 3 segundos Nota2 En el modo normal presio...

Page 21: ...s el bot n de opci n C F Puede cambiar entre grados Celsius y Fahrenheit en cualquier momento excepto cuando configure otras opciones de configuraci n Valores m nimos m ximos del d a Presione el bot n...

Page 22: ...indique que le produit fait l objet d une collecte s par e C est pourquoi le produit ne doit pas tre limin avec les d chets urbains L utilisateur doit remettre le produit aupr s de d charges sp cialis...

Page 23: ...elle comprend la r paration des l ments pour des d fauts de fabrication l exception des tiquettes des boutons ou des parties amovibles 3 TREVI ne peut tre pas tenue responsable pour tout dommage dire...

Page 24: ...forme alla direttiva 2014 53 UE Il testo completo della dichiarazione di conformit EU disponibile al seguente indirizzo Internet https www trevi it dms zidi TREVI DOCME3P80RC pdf SIMPLIFIED EU DECLARA...

Reviews: