10
Trevi Spa User Guidea
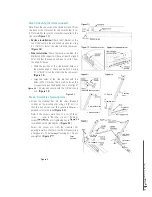
- By gravity, with a draining hose
- By gravity, using a vacuum hose
-With a submersible pump.
▪
Remove cartridge(s) and rinse with clean running water. Let them soak in
Cartridge cleaner
for
12 hours, as per the product’s instructions. Rinse, air dry and store for the winter. If the cartridges are no
longer any good, make sure to note all relevant information (such as model number) and photograph the
cartridges before discarding them.
▪
Remove all adjustable jets Leave headrests in place.
▪
Clean the shell with a mild soap, such as liquid dishwashing soap.
▪
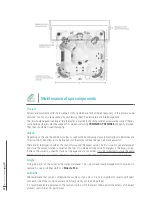
Make sure that the guillotine valves are open (located on either side of the heating element as well as
in front of the pump(s). If your system is equipped with In.Clear, refer to section
Cleaning your in.clear
below
Step 2 : Draining the pipes
You should use a Shop-Vac type vacuum with 4.5 HP blower or more to shut down your spa properly.
Scenario 1:
Spa with one bypass valve for each pump:
▪
Step 1 (Begin with pump 1)
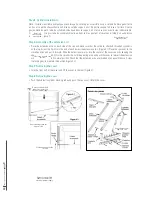
– Unscrew the bypass valve by 2" and remove all o-rings to avoid losing them.
Remove the black swivel inside the valve, and blow into the centre with the blower. Insert the swivel
backwards and direct it towards the left or right opening. Make sure you do this for both valves. Reinstall
the o-rings, taking care to lubricate with
Jack’s formula
and replace pivot correctly to close valve.
Vacuum the remaining water from the footwell.
▪
Repeat step 1 for pump # 2 (and pump # 3, if applicable)
▪
Step 2 (secondary pipes)
– Neck jet and waterfall valves. Unscrew the on/off valve, remove the o-rings
and the swivel. Blow into the valve using the blower cone until no water is left in waterfalls and neck
jets. Reinstall the o-rings, taking care to lubricate with
Jack’s formula
, and reinstall the swivel properly.
Close the valve. Vacuum the remaining water from the footwell.
▪
Step 3
–
Vacuum the spa’s drain for about 1 or 2 minutes with the vacuum cleaner. Vacuum each body jet
at
least twice
using vacuum. Vacuum the ozone generator nozzle using the vacuum cleaner, as well as
the holes in the skimmer and bottom drains.
▪
Dry any residual traces of water on the spa shell with a chamois.
Scenario 2:
Spa with 1 bypass valve for 2 pumps, or no bypass valve at all.
NOTE:
If the spa is not equipped with a bypass valve, begin at step 2 and repeat step 2
for pump 1 as well.
▪
Step 1 (Begin with pump 1)
– Unscrew the bypass valve by 2" and remove all o-rings to avoid losing them.
Remove the black swivel inside the valve, and blow into the centre with the blower. Insert the swivel
backwards and direct it towards the left or right opening. Make sure you do this for both valves. Reinstall
the o-rings, taking care to lubricate with
Jack’s formula
and replace pivot correctly to close valve.
Vacuum the remaining water from the footwell.
▪
Step 2:
Remove the skirt on the side where pump 2 is located. Unscrew the two rings from pump 2. It is
sometimes necessary to remove the pump entirely from its position. Be careful not to break anything on or
around the pump when removing it. Blow into the front tube to clear the drains properly. Blow into the top
pipe to thoroughly flush the jets. You should do this at least twice for each pipe. Vacuum the remaining
water from the footwell.
▪
Step 3 (secondary pipes)
– Neck jet and waterfall valves. Unscrew the on/off valve, remove the o-rings
and the swivel. Blow into the valve using the blower cone until no water is left in waterfalls and neck
jets. Reinstall the o-rings, taking care to lubricate with
Jack’s formula
, and reinstall the swivel properly.


