16
Trevi Spa User Guidea
Installation of a manual spa cover
Step 1: Preparation
▪
For installation, the following is required: drill with a star bit,
measuring tape and a pencil.
Note:
See content of the parts at the end.
▪
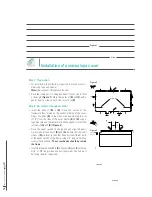
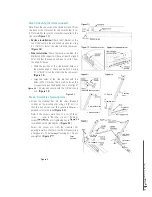
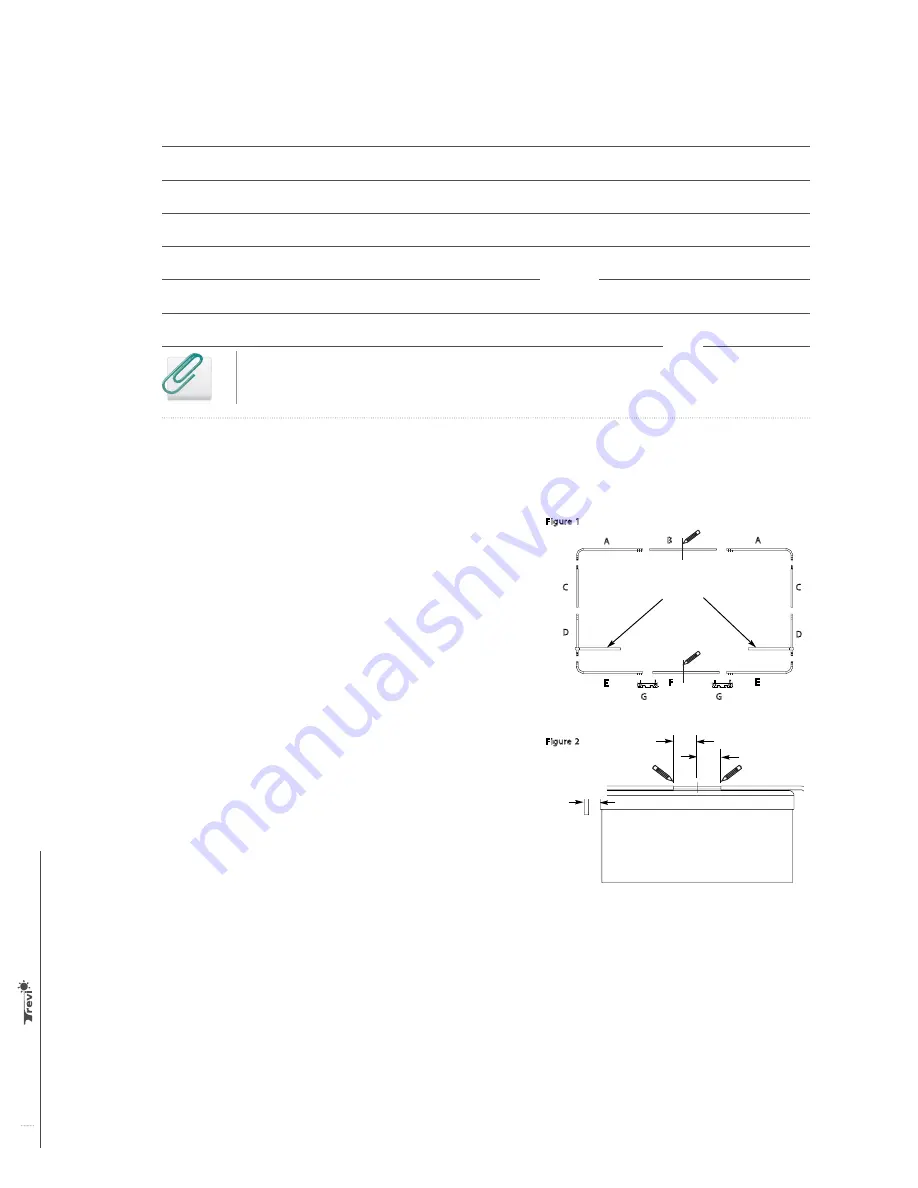
Place the frame parts to the ground next to your spa to form
a rectangle
(Figure 1)
. Mark the center of
(B)
and
(F)
with a
pencil. Insert a strap on each side in sections
(D)
.
Step 2: Assembly of the upper section
▪
Insert the ends of
(B)
in
(A)
. Place this section of the
framework thus formed on the central stitching of the cover.
Adjust the parts
(A)
so that they are approximately 6.5 cm
(2 1/2") from the sides of the cover. Center
(B)
in
(A)
using a
tape measure and the center mark. Make a pencil mark at the
junction of
(A)
and
(B)
(Figure 2)
.
▪
Place the upper section on the ground and align the pencil
marks made at the ends of
(B)
and
(A)
. Be sure that the short
sides of
(A)
are level to the other. Connect the different parts
of the upper section of the frame using 3/4'' long self-drilling
screws (3 at each end).
The screw heads should be inside
the frame.
▪
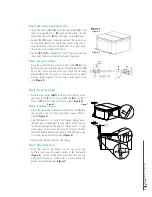
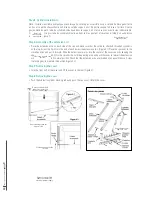
Insert the tapered end
(C)
in
(A)
. Connect
(A)
and
(C)
with the
5/16" x 1 5/8" long screws and nuts (2 per side). The nuts must
be facing towards the ground.
Figure 1
Figure 2
6.5 cm
2 1/2”
=
A
C
D
D
C
B
F
G
G
A
E
E
=
Figure 4
Jupe
du spa
G
50 cm
20”
4 vis
E
D
G
Courroies
Figure 1
Figure 2
6.5 cm
2 1/2”
=
A
C
D
D
C
B
F
G
G
A
E
E
=
Figure 4
Jupe
du spa
G
50 cm
20”
4 vis
E
D
G
Courroies
Figure 1
Figure 2
Figure 3
Strap
4 screws
skirt spa


