20
Trevi Spa User Guidea
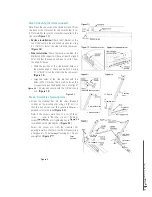
Step 3: Cylinder installation
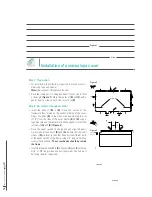
Note : Installez le cylindre hydraulique avec blocage du coté le plus accessible du spa. Le tube de blocage doit être
en bas et sa partie chevauchante doit être du coté du support en U. Sa partie coupée fait face à l'arrière. Fixez le
goujon fileté du petit tube du cylindre hydraulique dans le support en U et sécurisez avec l'écrou indésserrable.
Fixez l'autre bout, le gros tube du cylindre hydraulique, dans le bras pivotant et sécurisez à l'aide d'un autre écrou
indésserrable. (Figure 3)
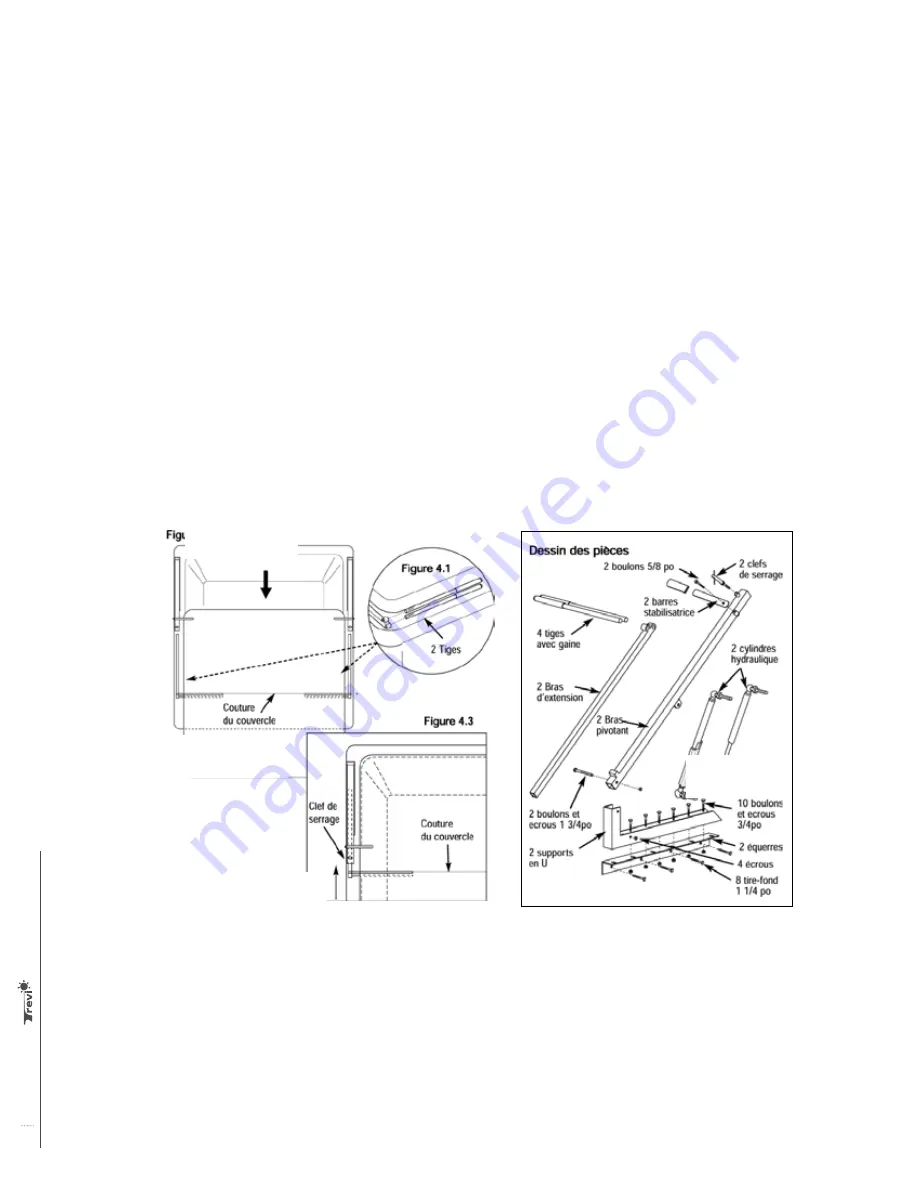
Step 4: Assembly of the extension arm
▪
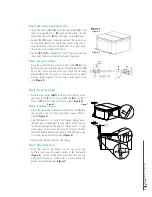
Place the extension arms on each side of the spa and make sure that the set-back, attached, threaded cylinder is
on the top. Screw the 2 pins into the end of each lower side extension arms. (Figure 4.1) Place the spa cover to the
closed position and pull it forward. Slide the extension arm pins into the center of the cover seam by keeping the
upper pin visible (Figure 4.2). Do the second side. Fold the pivoting arms and push the cover to reinsert the extension
arms until the cover is in its normal position. Check that the extension arms are inserted at an equal distance. Screw
the locking key to maintain the position (Figure 4.3).
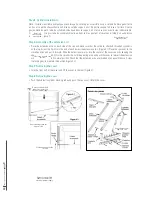
Step 5: Removing the cover
▪
Fold the front half of the cover and lift the cover to the rear (Figure 5).
Step 6: Removing the cover
▪
Push the hydraulic cylinder blocking tube and push the spa cover. Unfold the cover.
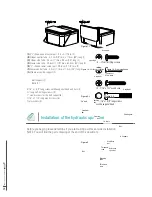
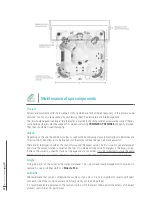
Rear sink
clearance for
manual sink
Rear clearance for
hydraulic sink
Clearance on each side
for sink
Distance to be drilled
under the spa for the
electrical power supply
Rear sink clearance for
manual sink
Rear clearance for
hydraulic sink
Clearance on each side
for sink
Distance to be drilled
under the spa for the
electrical power supply


