


Summary of Contents for BOREA BR02
Page 2: ......
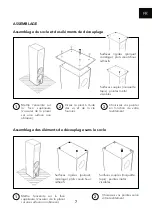
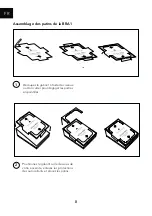
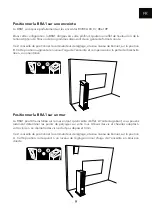
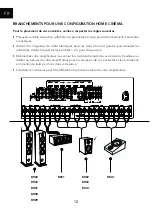
Page 4: ......
Page 5: ...5 FR MODE D EMPLOI FRANÇAIS ...
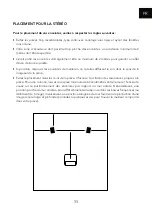
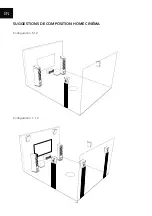
Page 14: ...14 EN SUGGESTIONS DE COMPOSITION HOME CINÉMA Configuration 5 1 2 Configuration 7 1 2 ...
Page 15: ...15 EN USER MANUAL ENGLISH ...
Page 24: ...24 SUGGESTIONS FOR A HOME THEATER 5 1 2 Configuration 7 1 2 Configuration ...
Page 25: ...25 ...
Page 32: ... DESIGN BY TRIANGLE IN FRANCE Version 3 8 20201106 ...


