


25
MIDLANDS
BIRMINGHAM
66 Birch Road East,
(M18)
Wyrley Road
Industrial Estate
Witton
Birmingham
B6 7DB
BOURNE
Manning Road Ind Estate
(M44)
Pinfold Road
Bourne
PE10 9HT
BRIDGNORTH
1 Underhill Street
(M72)
Bridgnorth
Salop
WV16 4BB
GLOUCESTER
101 Rycroft Street
(M23)
Gloucester
GL1 4NB
HEREFORD
Unit 3
(M31)
Bank Buildings
Cattle market
Hareford
HE4 9HX
HIGHAM FERRERS
30 High Street
(M51)
Higham Ferrers
Northants
NN10 8BB
ILKESTON
Unit 2
(M43)
Furnace Road
Ilkeston
DE7 5EP
LEICESTER
Unit 7
(M22)
Oaks Industrial Estate
Coventry Road
Narborough
Leicestershire
LEO 5GF
LINCOLN
Unit 8 Stonefield Park
(M40)
Clifton Street
Lincoln
LN5 8AA
NEWCASTLE
18-21 Croft Road
UNDER LYME
Brampton Industrial Estate
(M12)
Newcastle under Lyme
Staffordshire
ST5 0TW
NUNEATON
19 Ptarmigan Place
(M21)
Townsend Drive
Nuneaton
CV11 6RX
REDDITCH
13 Thornhill Road
(M20)
North Moons Moat
Redditch
Worcestershire
B98 9ND
TAMWORTH
Unit 3
(M19)
Sterling Park
Claymore
Tamworth
B77 5DO
WORCESTER
Unit 1
(M73)
Northbrook Close
Gregorys Mill Ind Estate
Worcester
WR3 8BP
SOUTH EAST
ASHFORD
Unit 2
(M58)
Bridge Road Buisness
Estate
Bridge Road
Ashford
Kent
TN2 1BB
FLEET
Unit 1
(M59)
Redsfield Industrial Estate
Church Crookham
Fleet
Hampshire
GU13 0RD
HAYWARDS HEATH
21-25 Bridge Road
(M55)
Haywards Heath
Sussex
RH16 1UA
SOUTH WEST
BARNSTAPLE
P.O. Box 12
(M30)
Barnstaple
North Devon
EX31 2YB
BOURNEMOUTH
63-65 Curzon Road
(M26)
Bournemouth
Dorset
BH1 4PW
BRIDGEWATER
6 Hamp Industrial Estate
(M35)
Bridgewater
Somerset
TA6 3NT
BRISTOL
11 Eldon Way
(M25)
Eldonwall Trading
Bristol
Avon
BS4 3QQ
EMSWORTH
266 Main Road
(M33)
Southbourne
Emsworth
PO10 8JL
ISLE OF WIGHT
Unit 8
(M34)
Enterprise Court
Ryde Buisness Park
Ryde
Isle of Wight
PO33 1DB
NEWTON ABBOT
Unit 2 Zealley Industrial
(M29)
Estate
Kingsteignton
Newton Abbot
S. Devon
TQ12 3TD
PLYMOUTH
16 Faraday Mill
(M32)
Cattledown
Plymouth
PL4 0ST
REDRUTH
Unit 7D
(M36)
Pool Industrial Estate
Wilson Way,
Redruth,
Cornwall
TR15 3QW
LONDON & EAST ANGLIA
BECKENHAM
11 a Gardener Indust Estate
(M79)
Kent House Lane
Beckenham
Kent BR3 1QZ
CHELMSFORD
Hanbury Road
(M47)
Widford Ind Estate
Chelmsford
Essex
CM12 3AE
COLINDALE
Unit 14
(M53)
Capitol Park
Capitol Way
Colindale
London NW9 0EQ
ELTHAM
194 Court Road
(M78)
Mottingham
Eltham
London SE9 4EW
ENFIELD
284 Alma Road
(M49)
Enfield
London
EN3 7BB
GRAVESEND
Unit B4,
(M57)
Imperial Buisness Estate
Gravesend
Kent
DA11 0DL
HARPENDEN
Unit 4
(M46)
Riverside Estate
Coldharbour Lane
Harpenden
AL5 4UN
LETCHWORTH
16-17 Woodside Ind Est.
(M50)
Works Road
Letchworth
Herts
SG6 1LA
LONDON
2/4 Royal Lane
(M76)
Yiewsley
West Drayton
Middlesex
UB7 8DL
MAIDENHEAD
Reform Road
(M60)
Maidenhead
Berkshire
SL6 8BY
MOLESEY
10 Island Farm Avenue
(M61)
West Molesey
Surrey
KT8 2UZ
NEWBURY
PO Box 5627
(M24)
Newbury
Berkshire
RG14 5GF
IPSWICH
Unit 2B
(M48)
Elton Park Buisness Centre
Hadleigh Road
Ipswich
IP2 0DD
NORWICH
2b Trafalgar Street
(M52)
Norwich
NR1 3HN
SUNBURY
Unit 1 a
(M63)
The Summit
Hanworth Road
Hanworth Ind Estate
Sunbury on Thames
TW16 5D
GAR08en
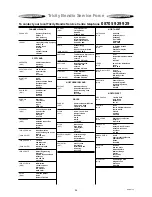
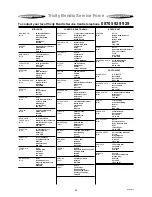
Tricity Bendix Service Force
To contact your local Tricity Bendix Service Centre telephone
08705 929 929
Summary of Contents for DH 105
Page 1: ...Dishwasher DH 105 OPERATING INSTALLATION INSTRUCTIONS ...
Page 26: ......
Page 27: ......


