background image

8

When the appliance is not in use

When the appliance is not in use for long periods,

disconnect from the electricity supply, empty all

foods and clean the appliance, leaving the doors ajar

to prevent unpleasant smells.

External cleaning

Wash the outer cabinet with warm soapy water. Do

NOT use abrasive products.
Once or twice a year dust the condenser (black grill)

and the compressor at the back of the appliance,

with a brush or vacuum cleaner, see figure, as an

accumulation of dust will affect the performance of

the appliance and cause excessive electricity

consumption.

D273/1

CONDENSER

COMPRESSOR

Defrosting

When the frost has reached a thickness of up to

4mm it can be removed using the ice scraper

provided with the appliance. During this operation it

is not necessary to disconnect the appliance from

the mains and remove the food. Never use metal

tools for this operation.
For complete defrosting (once or twice a year)

proceed as follows:
-  turn the thermostat control knob to the ÇOFFÈ

position (O) or disconnect the appliance from the

mains.

-  Remove any food from inside the freezer , wrap it

in several sheets of newspaper and store in a

cool/dry place.

-  Leave the door open and insert the ice scraper

under the channel in the centre of the lower part

of the appliance; place a low-sided container

beneath the scraper to collect the water (see fig.).

-  Clean and dry thoroughly.
-  Replace the scraper in one of the drawers .
-  Reconnect the appliance to the mains or reset

the thermostat control knob to the normal

operating position.

-  After letting the appliance run for at least two

hours in fast freeze mode, replace the previously

removed food into the compartment.

Important 

A temperature rise of the frozen food packs, during

defrosting, may shorten their safe storage life.

D068

MAINTENANCE AND CLEANING 

Before any maintenance or cleaning work is

carried out, DISCONNECT the appliance from the

ELECTRICITY supply.

Internal cleaning

Clean the inside and accessories with warm water

and bicarbonate of soda (5ml to 0.5 litre of water).

Rinse and dry thoroughly.

NEVER USE DETERGENTS, ABRASIVE

POWDERS, HIGHLY PERFUMED CLEANING

PRODUCTS OR WAX POLISHES, TO CLEAN THE

INTERIOR AS THESE WILL DAMAGE THE

SURFACE AND LEAVE A STRONG ODOUR.

13

Standard guarantee conditions

We, Tricity Bendix, undertake that if within 12 months of the date of the purchase this Tricity Bendix appliance

or any part thereof is proved to be defective by reason only of faulty workmanship or materials, we will, at our

option repair or replace the same FREE OF CHARGE for labour, materials or carriage on condition that:
The appliance has been correctly installed and used only on the electricity supply stated on the rating plate.
The appliance has been used for normal domestic purposes only, and in accordance with the manufacturerÕs

instructions.
The appliance has not been serviced, maintained, repaired, taken apart or tampered with by any person not

authorised by us.
All service work under this guarantee must be undertaken by a Tricity Bendix Service Force Centre. Any

appliance or defective part replaced shall become the CompanyÕs property.
This guarantee is in addition to your statutory and other legal rights.
Home visits are made between 

8.30am and 5.30pm 

Monday to Friday. Visits may be available outside these

hours in which case a 

premium 

will be charged.

Exclusions

This guarantee does not cover:

Damage or calls resulting from transportation, improper use or neglect, the replacement of any light bulbs or

removable parts of glass or plastic.
Costs incurred for calls to put right an appliance which is improperly installed or calls to appliances outside the

European Community (EC) or European Free Trade Area.
Appliances found to be in use within a commercial environment, plus those which are subject to rental

agreements.
Products of Tricity Bendix manufacture which are not marketed by Tricity Bendix.

European Guarantee

If you should move to another country within Europe then your guarantee moves with you to your new home

subject to the following qualifications:
The guarantee starts from the date you first purchased your product.
The guarantee is for the same period and to the same extent for labour and parts as exists in the new country

of use for this brand or range of products.
This guarantee relates to you and cannot be transferred to another user.
Your new home is within the European Community (EC) or European Free Trade Area.
The product is installed and used in accordance with our instructions and is only used domestically, i.e. a

normal household.
The product is installed taking into account regulations in your new country.
Before you move please contact your nearest Customer Care centre, listed below, to give them details of your

new home. They will then ensure that the local Service Organisation is aware of your move and able to look

after you and your appliances.
France

Senlis

+33 (0)3 44 62 28 28

Germany

NŸrnberg

+49 (0)911 323 2600

Italy

Pordenone

+39 (0)1678 47053

Sweden

Stockholm

+46 (0)20 78 77 50

UK

Slough

+44 (0)1735 219898

GUARANTEE CONDITIONS

Summary of Contents for TB 85 F

Page 1: ...2222 132 71 TB 85 F FREEZER OPERATING AND INSTALLATION INSTRUCTIONS ...

Page 2: ...amages to the cooling unit with consequent possible fluid leakages The appliance must not be located close to cookers radiators or boilers Avoid prolonged exposure of the appliance to direct sunlight Do not use other electrical appliances such as ice cream makers inside of refrigerating appliances During Use This appliance is designed for domestic use only specifically for the storage of edible fo...

Page 3: ...wing 6 Making ice cubes 6 Normal operating sounds 7 Hints and tips 7 Maintenance and Cleaning 8 Internal cleaning 8 External cleaning 8 When the appliance is not in use 8 Defrosting 8 Something Not Working 9 Service and Spare Parts 10 Customer Care Department 10 Guarantee Conditions 13 Instructions for the Installer Technical Specification 14 Installation 15 Positioning 15 Rear Spacers 15 Electric...

Page 4: ...DESCRIPTION OF THE APPLIANCE 4 B C A N S 0 6 5 4 3 2 1 A Freezer controls B Compartments for freezing fresh foods C Compartments for frozen food storage ...

Page 5: ... frozen food Temperature control The temperature within the freezer is controlled by the thermostat situated at the top of the cabinet To operate the freezer proceed as follows Turn the thermostat control beyond the ÇOÈ position When you first start the freezer we suggest that you turn the thermostat control to a medium setting between 3 and 4 For easier turning of this control use a small coin Th...

Page 6: ...ly result in a low temperature skin burn Do not remove items from the freezer if your hands are damp wet as this could cause skin abrasions or Òfrost freezer burnsÓ Important In the event of a power cut do not open the door The food in the freezer will not be affected if the power cut is short and if the freezer is full Should the food begin to thaw it must be consumed quickly and must not be re f...

Page 7: ...s show different types of frozen goods The numbers indicate storage times in months for the appropriate types of frozen goods Whether the upper or lower value of the indicated storage time is valid depends on the quality of the foods and pre treating before freezing Energy Saving Advice Do not install the appliance close to sources of heat such as a boiler or radiator Locate the appliance in a coo...

Page 8: ...sconnect the appliance from the mains Remove any food from inside the freezer wrap it in several sheets of newspaper and store in a cool dry place Leave the door open and insert the ice scraper under the channel in the centre of the lower part of the appliance place a low sided container beneath the scraper to collect the water see fig Clean and dry thoroughly Replace the scraper in one of the dra...

Page 9: ... Check that the door is closed Large quantities of food have recently been placed in the cabinet and or door is frequently opened Check that air ventilation is not obstructed Ensure the door is not left open Check that nothing is preventing the door from closing Is the door gasket intact and clean Has advised periodic defrosting been carried out Refer to normal operating sounds If after the above ...

Page 10: ...ng Not Working When you contact the Service Force Centre you will need to give the following details 1 Your name address and post code 2 Your telephone number 3 Clear and concise details of the fault 4 The model and serial number of the appliance found on the rating plate 5 The purchase date For general enquiries concerning your Tricity Bendix appliance or for further information on Tricity Bendix...

Page 11: ...11 ...

Page 12: ...12 ...

Page 13: ...r calls to put right an appliance which is improperly installed or calls to appliances outside the European Community EC or European Free Trade Area Appliances found to be in use within a commercial environment plus those which are subject to rental agreements Products of Tricity Bendix manufacture which are not marketed by Tricity Bendix European Guarantee If you should move to another country wi...

Page 14: ...40 V 50 Hz TOTAL POWER ABSORBED 90 W AVERAGE DAILY UNITS ELECTRICITY 0 75 kWh GROSS CAPACITY Freezer 180 l NET CAPACITY Freezer 160 l STAR RATING This figure is based on standard test results in accordance with European Standard EN 153 Actual consumption will depend on how the appliance is used and where it is located ...

Page 15: ...he plastic bag containing all relevant documentation also contains two spacers to be fitted into special holes in the back of the appliance Fit the spacers into the holes taking care to ensure that the arrow A is positioned as shown in the diagram Then turn them through 45 arrow A vertical until they lock into place DO NOT install in places with restricted ventilation Adjust the level of the appli...

Page 16: ...ich is marked with the letter ÇEÈ or the earth symbol or coloured green and yellow Connect the blue neutral wire to the terminal in the plug which is marked with the letter ÇNÈ or coloured black Connect the brown live wire to the terminal in the plug which is marked with the letter ÇLÈ or coloured red D207 GREEN YELLOW 13 AMP FUSE BROWN CORD CLAMP BLUE 13 AMP The plug moulded onto the lead incorpo...

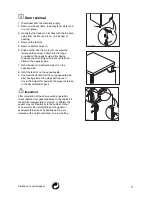
Page 17: ...tted on the opposite side 7 Refit the door and bottom hinge 1 on the opposite side 8 Refit the feet 3 on the opposite side 9 Unscrew the handle Refit it on the opposite side after having pierced the plugs with a punch Cover the holes left open with the plugs contained in the documentation pack Important After completion of the door reversing operation check that the door gasket adheres to the cabi...

Page 18: ......

Page 19: ......

Page 20: ...Tricity Bendix 55 77 High Street Slough Berkshire SL1 1DZ Consumer care telephone number 08705 950950 Electrolux Household Appliances Limited 2001 ...

Reviews: