13
Blade Replacement
For Electric Ream Cutters:
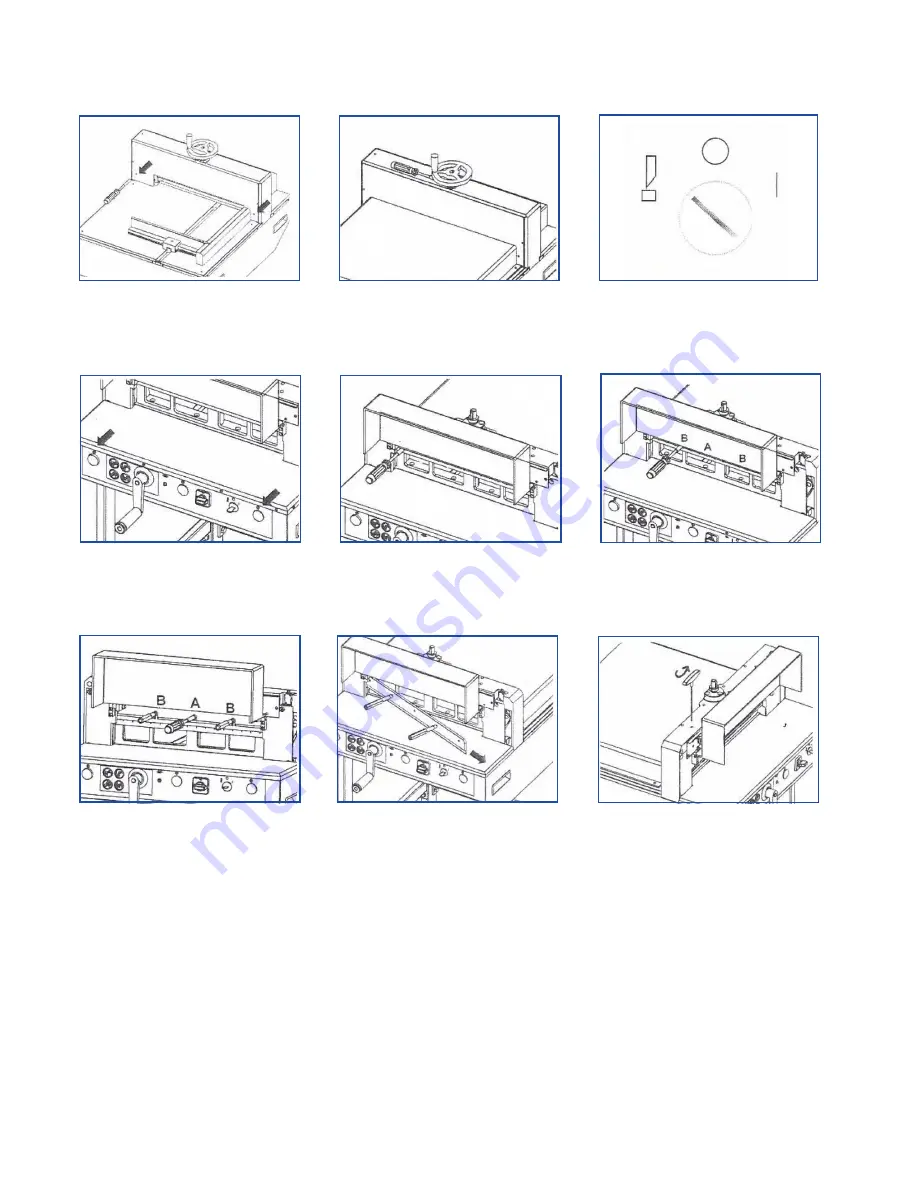
5. Close the safety guard, turn the select
switch to the right. Press the 2 enable switches
together, then the cutter will move upwards.
Turn the select switch to the middle and turn
off the power switch. Open the safety guard
and remove the left screw.
6. Remove the 2 other screws (B) but keep the
central one (A) as it is.
1. Remove the screws at both ends of the
cover.
2. Remove the clamp hand wheel and put it
aside then remove the cover.
4. Press 2 enable switches simultaneously,
then the cutter will move down to the end.
Turn the select switch to the middle, open the
safety guard and remove the right screw on
the cutter.
3. Press the power switch on, and turn the
select switch to the left.
7. Screw the 2 cutter holders (in tool box) into
B position tightly to avoid the blade falling
down then remove the central screw A.
8. Grip and loosen the cutter holders by just
a turn, move the cutter downwards and take
away the cutter carefully.
9. Turn the 3 (socket headless) adjustable
screws by T-wrench anti-clockwise, from cutter
support as high as possible (1mm up at least)
and turn the blade fine adjustment device on
the right hand side clockwise.


