ASSEMBLY INSTRUCTIONS
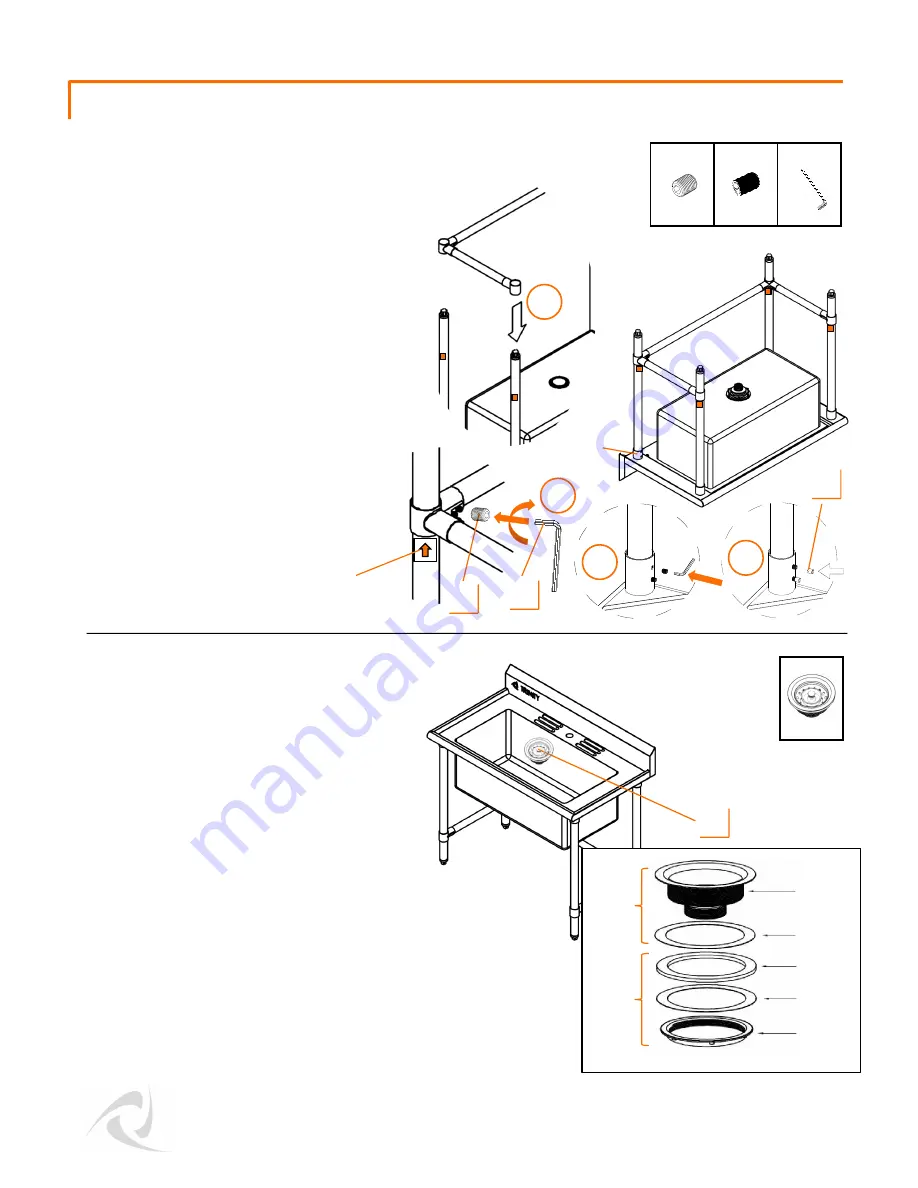
With two people, carefully turn sink right-
side up, standing it upright.
Unscrew large 3-3/8” Nut from bottom of
DRAIN ASSEMBLY (D). From inside SINK (A),
insert Drain through White Seal and opening
at bottom.
From under SINK (A), first slide on Black
Gasket and Paper Gasket then screw large
3-3/8” Nut back on tightly. If necessary,
use a pipe wrench to tighten.
Note:
P-trap NOT included.
With two people, take Cross Beams
assembly in STEP 2 and slide Connectors
(G+H) over all LEGS (B).
Use Alignment Stickers to help level out
Cross Beams, by lowering Cross Beam
assembly adjacent to stickers.
Tighten HEX SCREW (I) on each Connector
to LEGS (B) with HEX KEY (K).
Tighten both HEX SCREWS (I) on each Leg
Collar with HEX KEY (K). Place a SCREW
CAP (J) over each HEX SCREW (I).
STEP 3
STEP 4
D
I
D (1)
© 2019 TRINITY - 800.985.5506
3
Drain Assembly (D)
Inside
the sink
Under
the sink
Drain
Black
Gasket
Paper
Washer
3-3/8”
Nut
White
Seal
Alignment
Sticker
K
J
3
4
I (4)
K (1)
J (8)
Leg
Collar
1
2


