Comfort
BREEZE™
Model CB777
I n s t a l l a t i o n , O p e r a t i o n , & M a i n t e n a n c e M a n u a l
5
www.trioniaq.com
2. Check the template with a level to ensure proper installation
of the Humidifier.
3.
Drill (4) 1/8” diameter holes (as shown on the template) for
mounting the wire bracket with sheet metal screws and flat
washers provided.
4. Cut out the circle marked on the template. Do not cut this
opening over-sized.
5.
With a hammer and heavy piece of metal, straighten the
metal edges to prevent injury to yourself and damage to the
Humidifier.
6.
Fit the rubber channel around the cut-out to cover the rough
edges of the hole and trim to fit.
7.
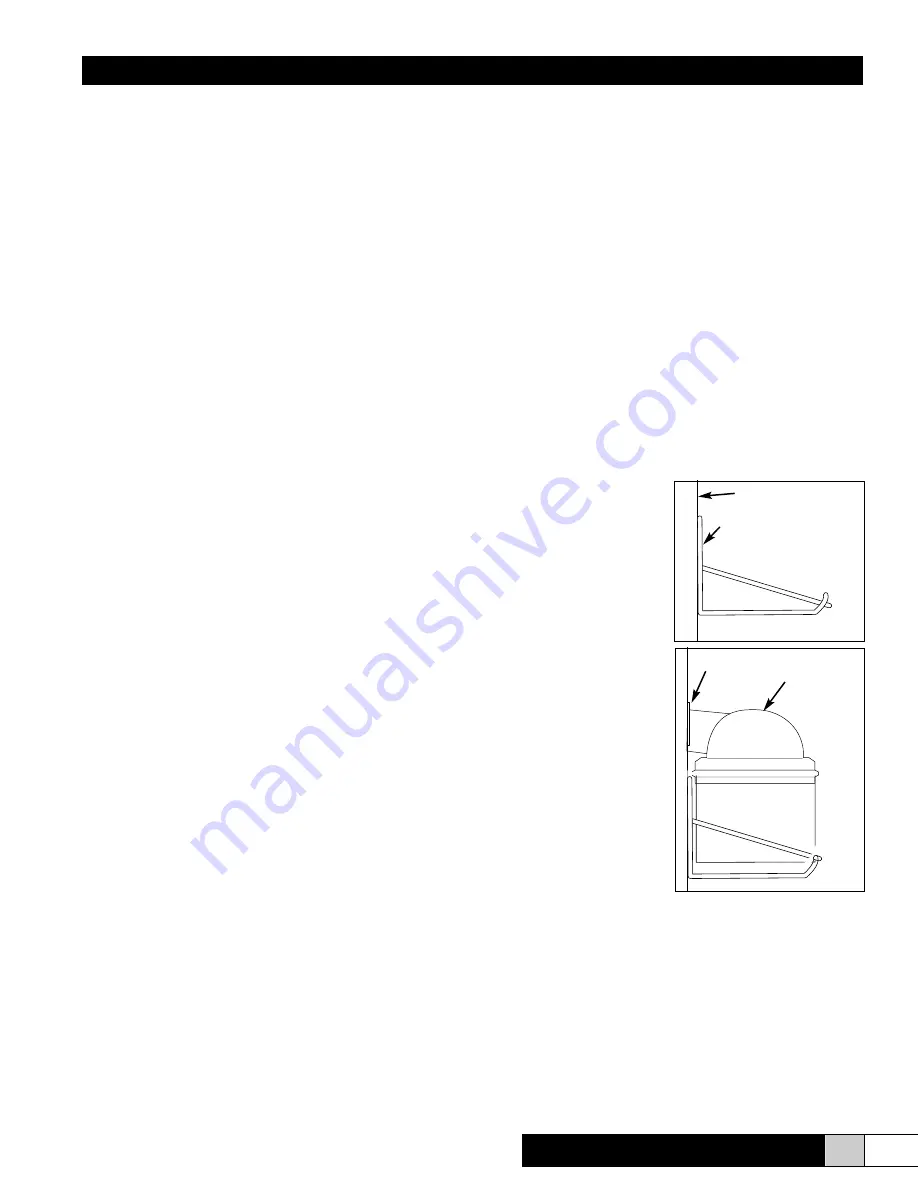
Attach the wire mounting bracket to the duct with (4) #10
sheet metal screws and flat washers (provided).
8. Move the side adjusting arms vertically until the shelf of the
wire mounting bracket is level.
9.
Mark the duct for securing adjusting arms and drill (2) 1/8”
holes. Fasten the arms in this position with (2) #10 sheet
metal screws and flat washers (provided).
10. The float and valve assembly have been factory adjusted
to maintain 1-1 1/2” of water in the water reservoir pan at
normal water pressure. If necessary, bend the float arm to
the required position to maintain the water level at other
water pressures.
11. Before mounting the
humidifier in its final
position, carefully rotate the
impeller assembly by hand
to ensure it rotates freely.
Position the humidifier on
the wire mounting bracket
with the float and valve
assembly connection
facing the most convenient
location. Be sure that the
water reservoir pan feet
do not rest on the wire
bracket and that the water
reservoir pan is level.
12. The discharge dome
should approach the
opening in the duct,
however, it should not
extend into the duct. There
will be no heat loss, due
to the negative pressure
of the cold air return duct
(the air flow will create a
vacuum in the duct).
NOTE:
The following items are located in the carton:
•
Bottom Pan
•
Atomizing Assembly
•
Discharge Dome
•
Wire Mounting Bracket
The following items are located in the parts bag:
•
Template
•
(6) #10 x 3/4” screws
•
(6) #10 flat washers
•
Rubber Channel
4. Installation
Selecting the Unit Location
Mounting on face of vertical return duct or side of horizontal
return duct When mounting your humidifier on the face of
a horizontal return duct, or on the face of a vertical return
duct, certain conditions must be met for its proper operation:
•
Mount the humidifier on the vertical or horizontal cold air
return duct.
•
Locate the humidifier at least four (4) linear feet upstream of
either the furnace fan and/or filter and any turn in the duct.
This will ensure that condensation does not collect within
the duct and cause oxidation (rust).
•
Mount the humidifier at least six (6) linear feet (preferably
10 feet) upstream from any electronic air cleaner. Failure to
follow this recommendation can cause excessive nuisance
arcing and or power supply failure.
•
If the duct seams inside the duct are not flat, locate the
humidifier at least three (3) linear feet upstream from the
seam.
•
If the humidification needs of the home require more than
one humidifier, each unit should be installed a minimum of
three (3) linear feet apart.
•
DO NOT use this humidifier on the discharge or warm air
supply side of a forced air heating system. This will reduce
the efficiency of the humidifier and may cause operational
problems.
•
DO NOT mount the humidifier in a furnace jacket.
•
DO NOT install the humidifier where freezing conditions
could occur.
•
DO NOT install on gravity hot air systems.
Physical Installation
CAUTION
Only a trained HVAC servicer or contractor should install
this humidifier. Do not connect the unit to the power source
until installation is complete. A thorough checkout of the unit
installation should be completed before operation. Failure to
follow these directions may void the manufacturer’s original
warranty.
Remember to select a location that is readily accessible for
periodic inspection and cleaning of your humidifier. Allow a
minimum of 2” clearance in front of the humidifier and 2” below
the water pan to allow for maintenance and repair.
Prior to installing this product:
•
Read the instructions carefully to ensure safe operation.
Failure to follow them could damage the product or cause a
hazardous condition.
•
Check the ratings given on the product to make sure it is
suitable for your application.
Mounting on the face of a vertical return duct or side of a
horizontal return
1. Mount the installation template on the side of the cold air
return air duct with the center line of the template lined up
with the center line of the return air duct. The narrow side of
the duct may be used if space permits.
Cold air return duct
Wire mounting bracket
Bracket should be level
Rubber channel
Discharge
dome


