background image

www.trioniaq.com

the liquid level in the tank. The usage should be 

approximately 1 part of detergent to 20 parts of 

water. The pump is a constant displacement type 

and the amount of detergent forced into the water 

supply to wash the unit is dependent upon the 

setting of the control valve in the bypass return line 

to the reservoir. The side of the translucent reservoir 

is marked with volume markers. Adjust the control 

valve to obtain the correct usage for the given unit 

in accordance with the submittal outline data, and 

then secure the setting with the Allen head set 

screw located in the valve adjustment knob. When 

the correct adjustment has been made, remove the 

remaining water from the reservoir and fill the tank 

with initial supply of detergent furnished, unless 

Tridex concentrate mixture is being used.

11. Programming Time Clock for Automatic Wash

General Information

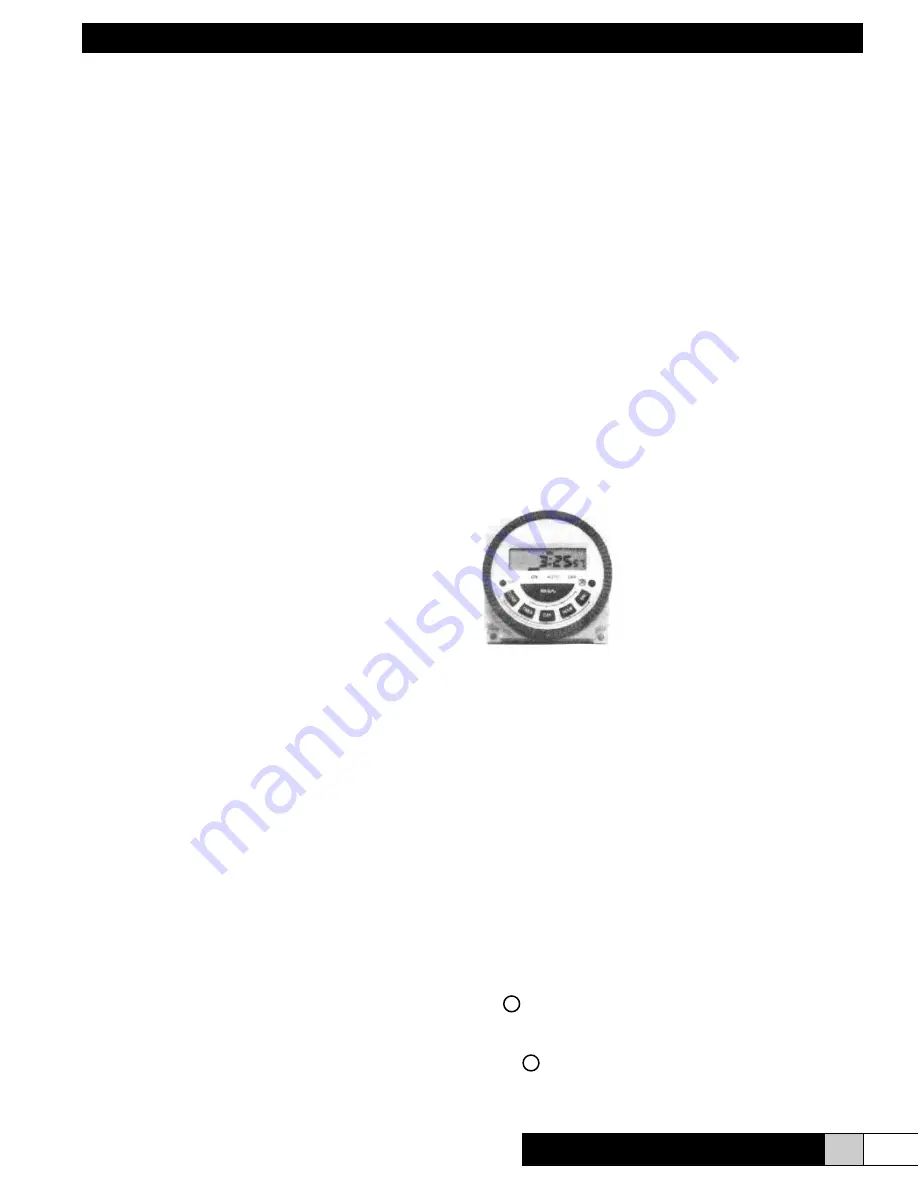
The panel-mounted digital timer 

series included with the Grease 

Viper can be operated in four 

separate power supplies, ranging 

from 240 VAC to 12 VDC.  Output 

format can be produced to be volt-

free or voltiac-output.  Batteries of 

lithium CR2032 or rechargeable 

V80H are optional for retaining the programming during 

timer’s disconnected operating power.

The digital timer is accurate to the minute, designed 

with either six or eight ON/OFF (events) per day.  It 

also provides 15 combinations of daily programs 

which can lead great convenience to users upon 

choosing the required days in a week for operating 

the timer.

Programming Functions

•  TIMER: Programs review and setting programs

•  MANUAL: To select “ON, AUTO, or OFF”

•  CLOCK: To adjust current DAY and TIME

•  DAY: To adjust day of week

•  HOUR: To adjust hour

•  MIN: To adjust minute

•   P : Reset timer’s setting

•  LED: To indicate ON/OFF status

Press  P  button to reset timer before programming.

Grease Viper

8

I n s t a l l a t i o n ,   O p e r a t i o n ,   &   S e r v i c e   M a n u a l

any debris or construction materials. Especially note 

the opening in the drain basin for any restrictions. 

The ducting, where secured to the cabinet collars, 

should be sealed water tight either with gasketing 

or caulking.

2.  Inspect the ionizing-collecting cells to see that all of 

the ionizing blades are intact, that no large pieces 

of foreign material are lodged between the plates, 

and that the cells are properly installed in the 

cabinet with the spiked ionizing blades located on 

the air entering side and the brass contact plungers 

facing the access side of the cabinet.

3. 

Confirm that the drain lines from the TRION

® 

cabinet 

drain basin are completely connected and properly 

terminated. A trap or seal of some type should be 

incorporated in each line to prevent air bypass.

4.  Check the water supply line to be sure water is 

available and that the strainer, solenoid valve(s), 

and detergent system are properly installed and 

connected.

5. 

Confirm that electrical power is available, that the 

wiring is completed, and that the system exhaust 

fan is ready to be energized.

6. 

Confirm that all access door interlocks are closed.

7.  Close the system electrical supply switches, making 

power available to the TRION

®

 control panel and 

the system fan.

8.  Turn the selector switch on the control panel to the 

“ON” position. Push filtration button on door. The 

exhaust fan should run (if installed) and the power 

supply(s) should be energized. Electrical arcing 

within the ionizing-collecting cells may occur - this 

is a normal occurrence caused by accumulation 

of dusts from construction or other sources in the 

cell(s) and should quickly subside.

9. 

Ensure the detergent tank is clean, and then fill the 

tank 1/8 full with clean water. Do not fill the tank 

with detergent until start-up adjustments have been 

completed.

10. (Review this paragraph in its entirety before 

initiating the wash start button.)

Manually initiate the wash cycle by pushing the 

“Wash Mode” button on the control. The wash control 

duration is 70 minutes and by means of a factory 

preset programmable logic controller (PLC) will 

sequence the washing events as previously outlined. 

When the detergent pump is energized, note the 

volume that is used by observing the reduction in 

X

X

Summary of Contents for Grease Viper Series

Page 1: ...T R I O N w w w t r i o n i a q c o m Grease Viper Series Electrostatic Precipitators Commercial Industrial Applications READ AND SAVE THESE INSTRUCTIONS ...

Page 2: ...or 1 Unpack and Inspect 4 2 Position Air Cleaner Cabinet 5 3 Connect Adjoining Ductwork 5 4 MountDetergentSystem 5 5 Connect Drain 5 6 Connect Water Wash Supply 5 7 MountControlPanel 6 8 Complete Wiring a Primary Wiring 6 b Grounding 6 9 Checkout for System Start up 6 Section 3 Operation Service For the Maintenance Engineer 1 Introduction and Principle of Operation 6 2 General Description 7 3 Init...

Page 3: ...reactivated carbon Gasketed access doors located on one side of the cabinet 90 degrees to the direction of the airflow provide entry for removal of the cells and filters The location of the access doors may be specified as right hand or left hand access determined by facing the inlet of the ESP dirty airflow at your back The solid state high voltage power supplies are factory installed and wired w...

Page 4: ...nit and detergent system Where applicable all water lines must be protected from freezing SAFETY NOTE Factory designed access to all electrically charged high voltage components contain electrical interlocks for the safety of operating personnel Any additional access that may be provided in the system where there is access to high voltage must be equipped with such interlocks Interlocks are readil...

Page 5: ... pan supply through the floor The recommended drain line trap to seal off the cabinet from the drain against the system pressure and the drain dump valve should be located in the heated interior If not installed in this manner heat trace or other means should be employed to prevent freezing Clean outs are recommended to be installed in all drain lines Wash Water Supply Line The length of the wash ...

Page 6: ...emperatures must be considered see detailed Warning on Page 6 cabinet then re install the ionizing collecting cells and all other filters When the ionizing collecting cells are reinstalled the directional arrows on the cell end plates must concur with airflow direction through the cabinet Impinger prefilters are to be installed within the inlet plenum section on the air entering side of the unit 4...

Page 7: ...n accordance with the plumbing schematic to prevent freezing 2 All piping exposed to cold climate outdoor conditions should be heat traced and insulated to prevent freezing 3 An air gap fitting should be installed on the drain line to facilitate gravity draining of wash water from the internal headers and manifolds 4 The water supply line should be pitched back toward the heated space 9 Check Out ...

Page 8: ...s On multi cell units all of the electrical connections between cells in a given tier are automatically made through spring plunger connectors Install cells into the cabinet in accordance with the directional arrows on the cell end plates The side of the cell containing the spiked ionizer blades must always be located on the air entering side The spring plunger connectors located on one end of eac...

Page 9: ...in the drain basin for any restrictions The ducting where secured to the cabinet collars should be sealed water tight either with gasketing or caulking 2 Inspect the ionizing collecting cells to see that all of the ionizing blades are intact that no large pieces of foreign material are lodged between the plates and that the cells are properly installed in the cabinet with the spiked ionizing blade...

Page 10: ...ion is only effective when timer is running in AUTO mode Temporary Override Condition 1 When timer s output status is ON press MANUAL key to move indicator from AUTO to OFF Timer output shall turn to OFF status programs overrided Press MANUAL again to switch timer status to AUTO Timer s output shall continue maintaining OFF Timer shall resume its automatic operation when next program event calls f...

Page 11: ...he inside of the tank should be kept clean free from dirt and foreign objects The detergent as supplied by TRION is formulated specifically for electronic air cleaners If substitutes are used they must be approved by TRION so as to not void the warranty They should be safe for use in ventilation systems and non caustic as 95 of the ionizing collecting cells are constructed of aluminum special high...

Page 12: ... or cleaning shall be maintained on the premises WARNING RISK OF ELECTRIC SHOCK These servicing instructions are for use by qualified personnel only To reduce the risk of electric shock do not perform any servicing other than that contained in the operating instructions unless you are qualified to do so NOTE All repairs to the fire suppression system if supplied must be completed by the authorized...

Page 13: ...h voltage power supply s is 12 000 VDC and up to 8 MA When the power supply s is de energized there is a 20 second delay for the voltage to decay Always short from ground to a point of high voltage with a well insulated jumper wire or an insulated handled screwdriver to bleed off any remaining residual charge NOTE It will be necessary to close the access door electrical interlock switch operated b...

Page 14: ... indicating light Replace light d Malfunctions other than short or open circuits refer to the Troubleshooting Reference Chart below Problem Symptom Probable Cause Location Reason Correction Indicating Light Not Glowing Short Circuit Ionizing Section of Cell 1 Dirty Insulator s Clean 2 Defective Insulator s Replace 3 Foreign Object between Spiked Ionizer and Ground Electrode Remove Collecting Secti...

Page 15: ...on and Buyer s sole and exclusive remedy for any breach of this warranty repair or replace reperform the Goods which gave rise to the breach or at Seller option refund the amounts paid by Buyer for the Goods which gave rise to the breach Any repair replacement or reperformance by Seller hereunder shall not extend the applicable Warranty Period The parties shall mutually agree on the specifications...

Page 16: ...TRION 101 McNeill Rd Sanford NC 27330 P 800 884 0002 F 800 458 2379 www trioniaq com customerservice trioniaq com TRION 2017 All Rights Reserved Form No 266206 001 Rev 09 17 ...

Reviews: