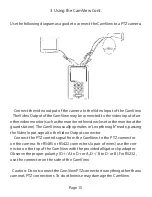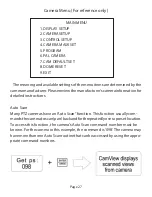
A. Connecting the CamView to an RS-485 PTZ Camera:
Connect the video signal from the PTZ camera to the VIDEO IN jack of the
CamView. This is usually accomplished with a coaxial cable with BNC connec-
tors. Sometimes, the camera uses a different connection (because BNC’s are
too large). Connect the PTZ wires from the camera to the RS-485 jack of the
CamView using the provided PTZ test cable.
B. Setting the Communication Port:
With the CamView in the ‘PTZ controller’ mode, press to access the PTZ
settings. Then press or to move the cursor to “Port”, and select
‘RS485’ by pressing or as required. Press to save the setting.
Press to exit.
C. Setting the Address
With the CamView in the ‘PTZ controller’ mode, press to access the PTZ
settings. Then press or to move the cursor to “Address”, and set
the address to match the camera address by pressing or as required.
Press to save the setting. Press to exit.
D. Setting the Protocol
With the CamView in the ‘PTZ controller’ mode, press to access the PTZ
settings. Then press or to move the cursor to “Protocol”, and select
the camera’s PTZ protocol by pressing or as required. Press to
save the setting. Press to exit.
E. Setting the Baud Rate
With the CamView in the ‘PTZ controller’ mode, press to access the PTZ
settings. Then press or to move the cursor to “Baud”, and set the
baud rate to match the camera by pressing or as required. Press
to save the setting. Press to exit.
Page 23
3.3.2 Setting PTZ Parameters (Details) Cont.
SET
RETURN
CLOSE
SET
RETURN
CLOSE
SET
RETURN
CLOSE
SET
RETURN
CLOSE
ENTER
OPEN
ENTER
OPEN
ENTER
OPEN
ENTER
OPEN
Summary of Contents for CamView PTZ 2
Page 1: ...REV A 10 13 CamView PTZ 2 TM Instruction Manual PN 8001 ...
Page 2: ......
Page 10: ...Page 8 2 3 Controls and Indicators 1 2 3 4 5 6 7 8 9 10 11 12 13 14 15 16 17 18 19 20 ...
Page 43: ...Notes ...
Page 44: ......


